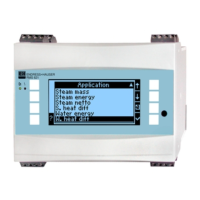
Batch Controller RA33 Wiring
Endress+Hauser 15
4 Wiring
4.1 Connection requirements
#
Warning!
Note that the entire electrical connection must be carried out only while the device is de-energized.
"
Caution!
• Before commissioning, ensure that the supply voltage corresponds to the specification on the
nameplate.
• Provide a suitable switch or power-circuit breaker in the building installation. This switch must
be installed close to the device (so that it is easily accessible) and marked as a circuit breaker.
• An overload protection unit (rated current = 10 A) is required for the power cable.
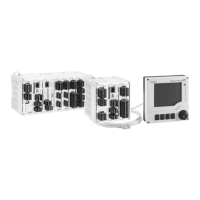
4.2 Quick wiring guide
a0014120
Fig. 15: Connection diagram of the batch controller
For the connection of the communication interfaces, see the "Communication" section, → ä 19.
Terminal assignment
Terminals Terminal assignment Inputs
1 + RTD power supply Temperature
(Optionally RTD or current
input)
2 - RTD power supply
5 + RTD sensor
6 - RTD sensor
52 + 0/4 to 20 mA input
53 Ground for 0/4 to 20 mA input
54 + 0/4 to 20 mA input Density
(Current input)
55 Ground for 0/4 to 20 mA input
10 + pulse input (voltage or contact) Flow
(Optionally pulse or current
input)
11 - pulse input (voltage or contact)
50 + 0/4 to 20mA or current pulse (PFM)
51 Ground for 0/4 to 20 mA input, flow
80 + digital input 1 (switch input) • Time synchronization
•Start batch
• Stop batch
• Reset batch
81 - digital input (terminal 1)