Soliswitch FTE20 Mounting
Endress+Hauser 9
Mechanical load of optional indicator light
The optional indicator light must be protected against mechanical load (impact energy > 1 J).
More information is provided in the "Technical data" section → 25.
4.3 Installation instructions
NOTICE
The device can be damaged if handled incorrectly during installation
‣
Do not turn the housing to tighten the process connection. Once the process connection
has been tightened, the housing can be aligned so that the cable entries point downwards.
A0017361
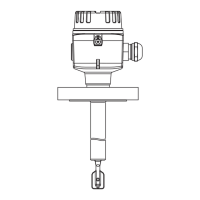
3 Installation of the standard version
1 Attach sealing ring (1) 60x48x3 mm (2.36x1.89x0.12 in).
2 Insert the rotary paddle into the connecting flange (3). Note: Pay attention to the maximum flange
depth of the connection. With the standard rotary paddle, installation in flange connections is
permitted up to a sleeve length ≤ 40 mm (1.57 in). For sleeve lengths > 40 mm (1.57 in)only the
version with hinged rotary paddle can be used. It must be possible to insert the rotary paddle without
force.
3 Tighten nut with open-ended wrench AF 60 (2).
NOTICE
The device with hinged rotating paddle does not function correctly when the transport
lock is secured.
‣
Remove the transport lock (plastic net around the rotating paddle) prior to installation.

 Loading...