WS-AP3705i Installation Procedures
Enterasys Wireless WS-AP3705i Install Guide 2-5
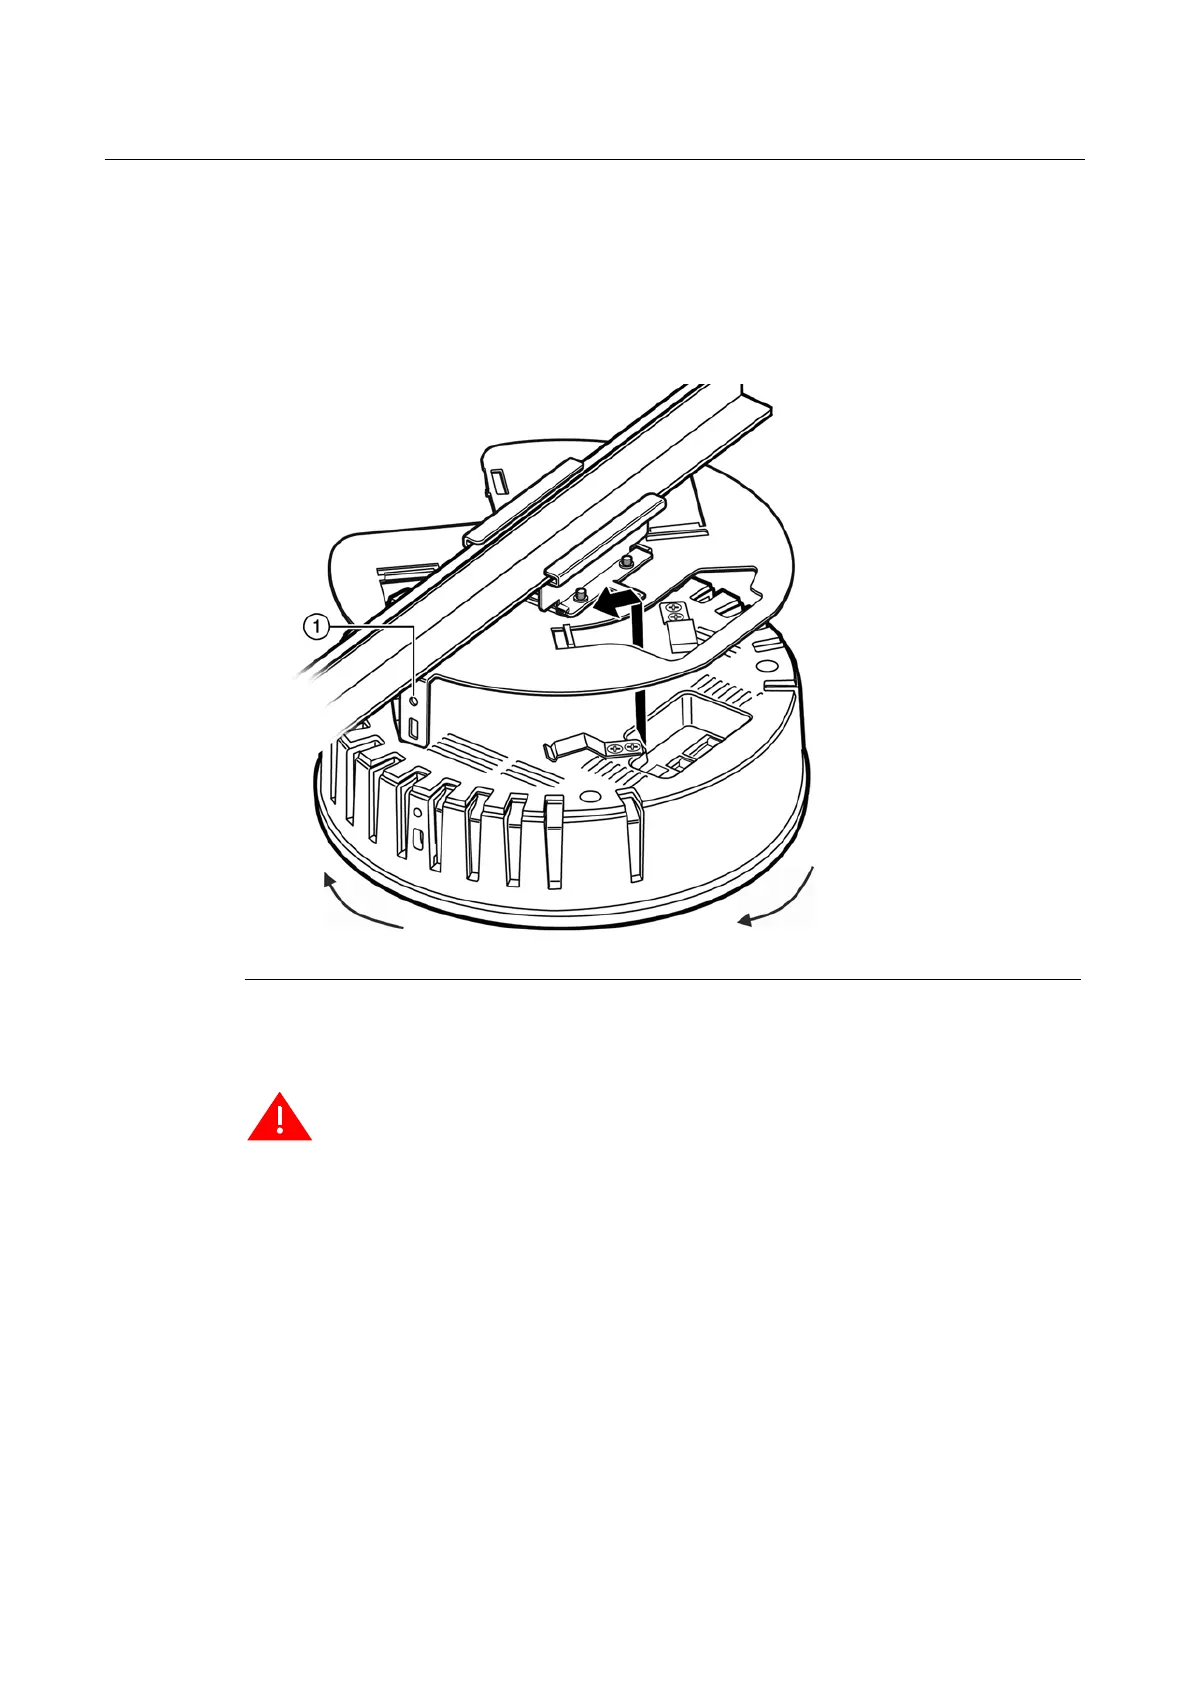
4. Align the WS-AP3705i with the ceiling mount assembly so that the rivet hole on the AP is
about 1” from the locking tab, then push the mounting clips on the AP bottom up through the
mount slots on the ceiling mount bracket and twist the AP until the clips snap over the flanges
on the end of the slots.
Figure 2-3 shows the AP mounting operation from a perspective above
the T-bar rail, in which case the twist is clockwise. From a perspective below the AP, you are
turning the AP in a counterclockwise motion.
Figure 2-3 Mounting the AP to the Ceiling Mount Assembly
5. Press the plastic rivet (included in protruded drop ceiling mount kit) through the ceiling
mount locking tab (Figure 2-3) into the rivet hole on the side of the AP (Figure 2-3). Once
the rivet is seated in the hole push the top towards the AP until it stops.
To remove the AP from the mount plate, reverse the rivet procedure using a small screwdriver
to unlock/open the rivet head.
6. Make a hole through the ceiling panel closest to the power slot on the AP. Then run the
Ethernet cable through the hole and into the LAN port (RJ45 Ethernet port) in the recessed
connector bay.
7. Replace the displaced ceiling panels.
1 Rivet hole in locking tab
Warning: If the rivet is not inserted as described in this step, there is a risk the Enterasys Wireless
WS-AP3705i will fall from the bracket.
Draft
 Loading...