ENVIRO-TEC
25
FORM ET115.24-NOM11 (118)
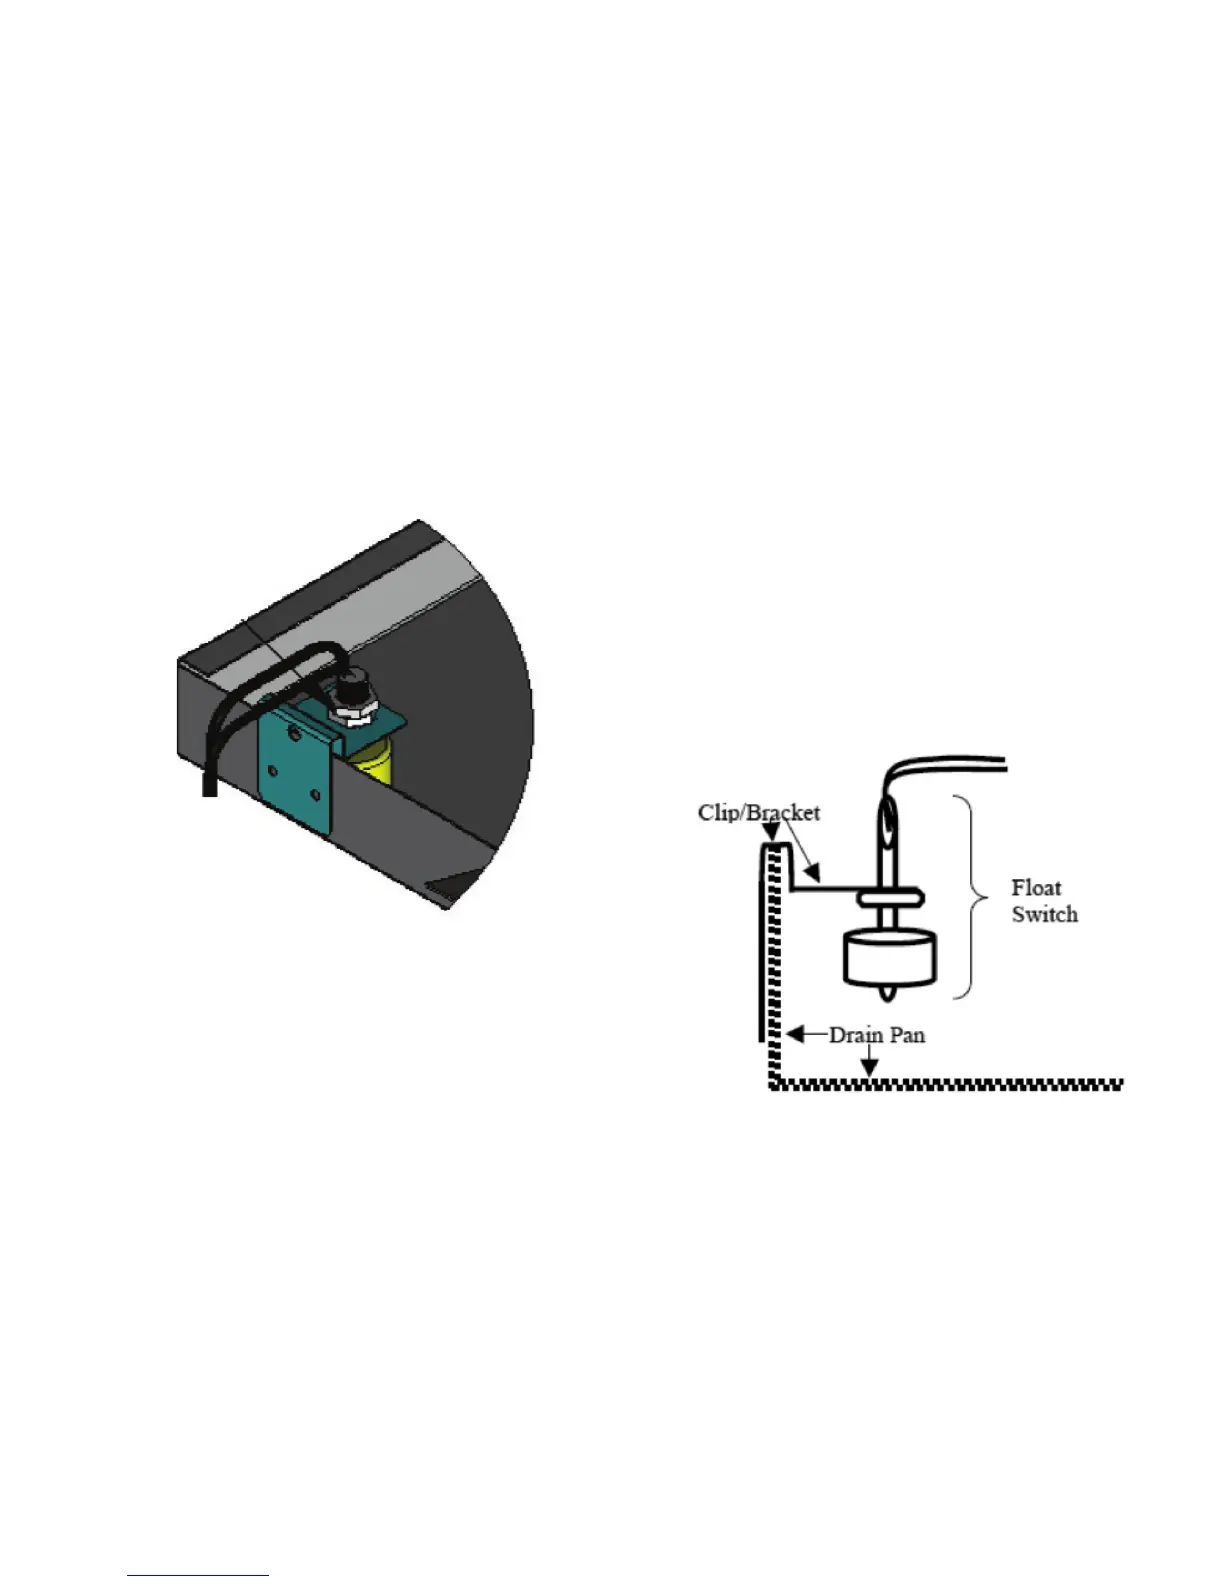
CONDENSATE FLOAT SWITCH INSTALLATION
Ensure oat switch assembly is rmly secured to the
bracket. Ensure top of oat is below rim of pan. Switch
will trip when the water level reaches a point even with
top of oat when oat is in down position. Sensitivity
may be adjusted by threading switch assembly
downward out of bracket if necessary.
Test switch by lifting oat with unit on. Unit should
stop running if switch is correctly wired. Test switch
sensitivity by lling pan and conrm switch stops unit
before pan overows.
Supplier’s install instructions
1. Disconnect power to unit at main panel.
2. Clip switch bracket onto side of pan at low end
and press rmly into place ensuring switch wires
are positioned up ensure oat moves freely.
3. Secure bracket into side of pan using self-tapping
sheet metal screw through upper hole in bracket.
4. Ensure oat switch assembly is rmly secured
to bracket. Ensure top of oat is below rim of
pan. Switch will trip when water level reaches
a point even with top of oat (when oat is in
down position). Sensitivity may be adjusted by
threading switch assembly downward out of
bracket if necessary.
5. Ensure wiring matches the wiring diagram
provided with the unit.
6. Test switch by lifting oat with unit on. Unit
should stop running if switch is correctly wired.
7. Test switch sensitivity. Fill pan and conrm that
switch stops unit before pan overows.
8. Place warning sticker on air handler or condenser
unit.
Figure 15b: Drain pan oat switch diagram
Figure 15a: Drain pan oat switch installed
 Loading...