Epson Artisan 810/835/837/710/725/730/Epson Stylus Photo PX810FW/TX810FW/PX820FWD/TX820FWD/PX830FWD/PX710W/TX710W/PX720WD/TX720WD/PX730WD/TX730WD
Revision G
Artisan 837/730/PX830FWD/PX730WD/TX730WD
Disassembly/assembly 314
Confidential
9.4.2.20 Rear Right Housing
Parts/Components need to be removed in advance:
Scanner Unit/Decoration Plate Left Upper Sub/Decoration Plate Left Upper/Paper
Guide Top Assy/Upper Housing/Hinge
Removal procedure
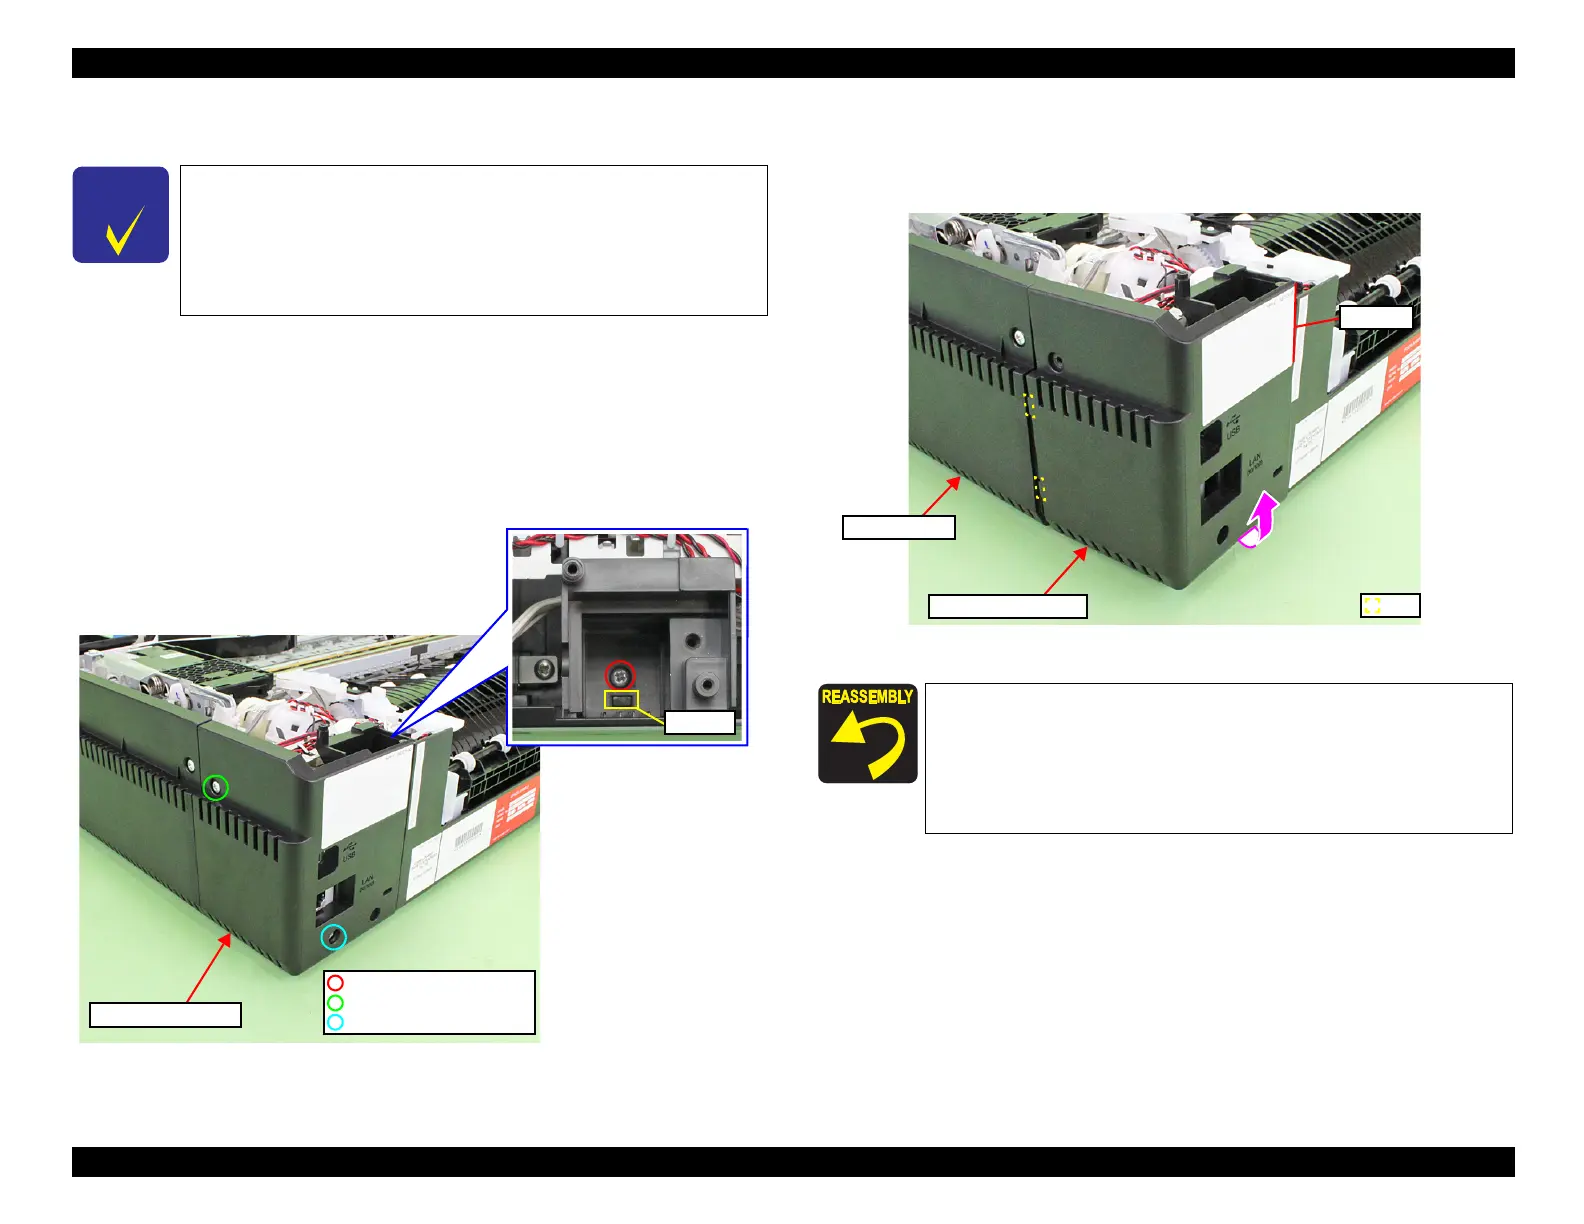
1. Remove the screws (x3) that secure the Rear Right Housing.
Figure 9-54. Removing the Rear Right Housing (1)
2. Release the hook A in Fig. 9-54, and also release the ribs (x2) on the right side
in Fig. 9-55, then remove the Rear Right Housing by lifting it in the direction
of the arrow.
Figure 9-55. Removing the Rear Right Housing (2)
This section describes the disassembly/reassembly procedures of the
Rear Right Housing for Artisan 730/PX730WD/TX730WD.
The disassembly/reassembly procedures for Artisan 837/
PX830FWD differ from those for Artisan 730/PX730WD/
TX730WD, therefore, see
"9.4.2.6 Rear Right FAX Housing"
(p.299) for the procedures.
C.B.A. 3x10 (6±1Kgfcm)
C.B.S. 3x6 (8±1Kgfcm)
C.B.P. 3x10 (6±1Kgfcm)
When installing the Rear Right Housing, insert the ribs (x2) of
the Rear Right Housing to the inside of the Right Housing.
(See Fig. 9-55.)
When installing the Rear Right Housing, align the point A of
the Rear Right Housing with the inside of the Base Frame.
(See Fig. 9-55.)
Rib
Rear Right Housing
Right Housing
Point A
 Loading...


