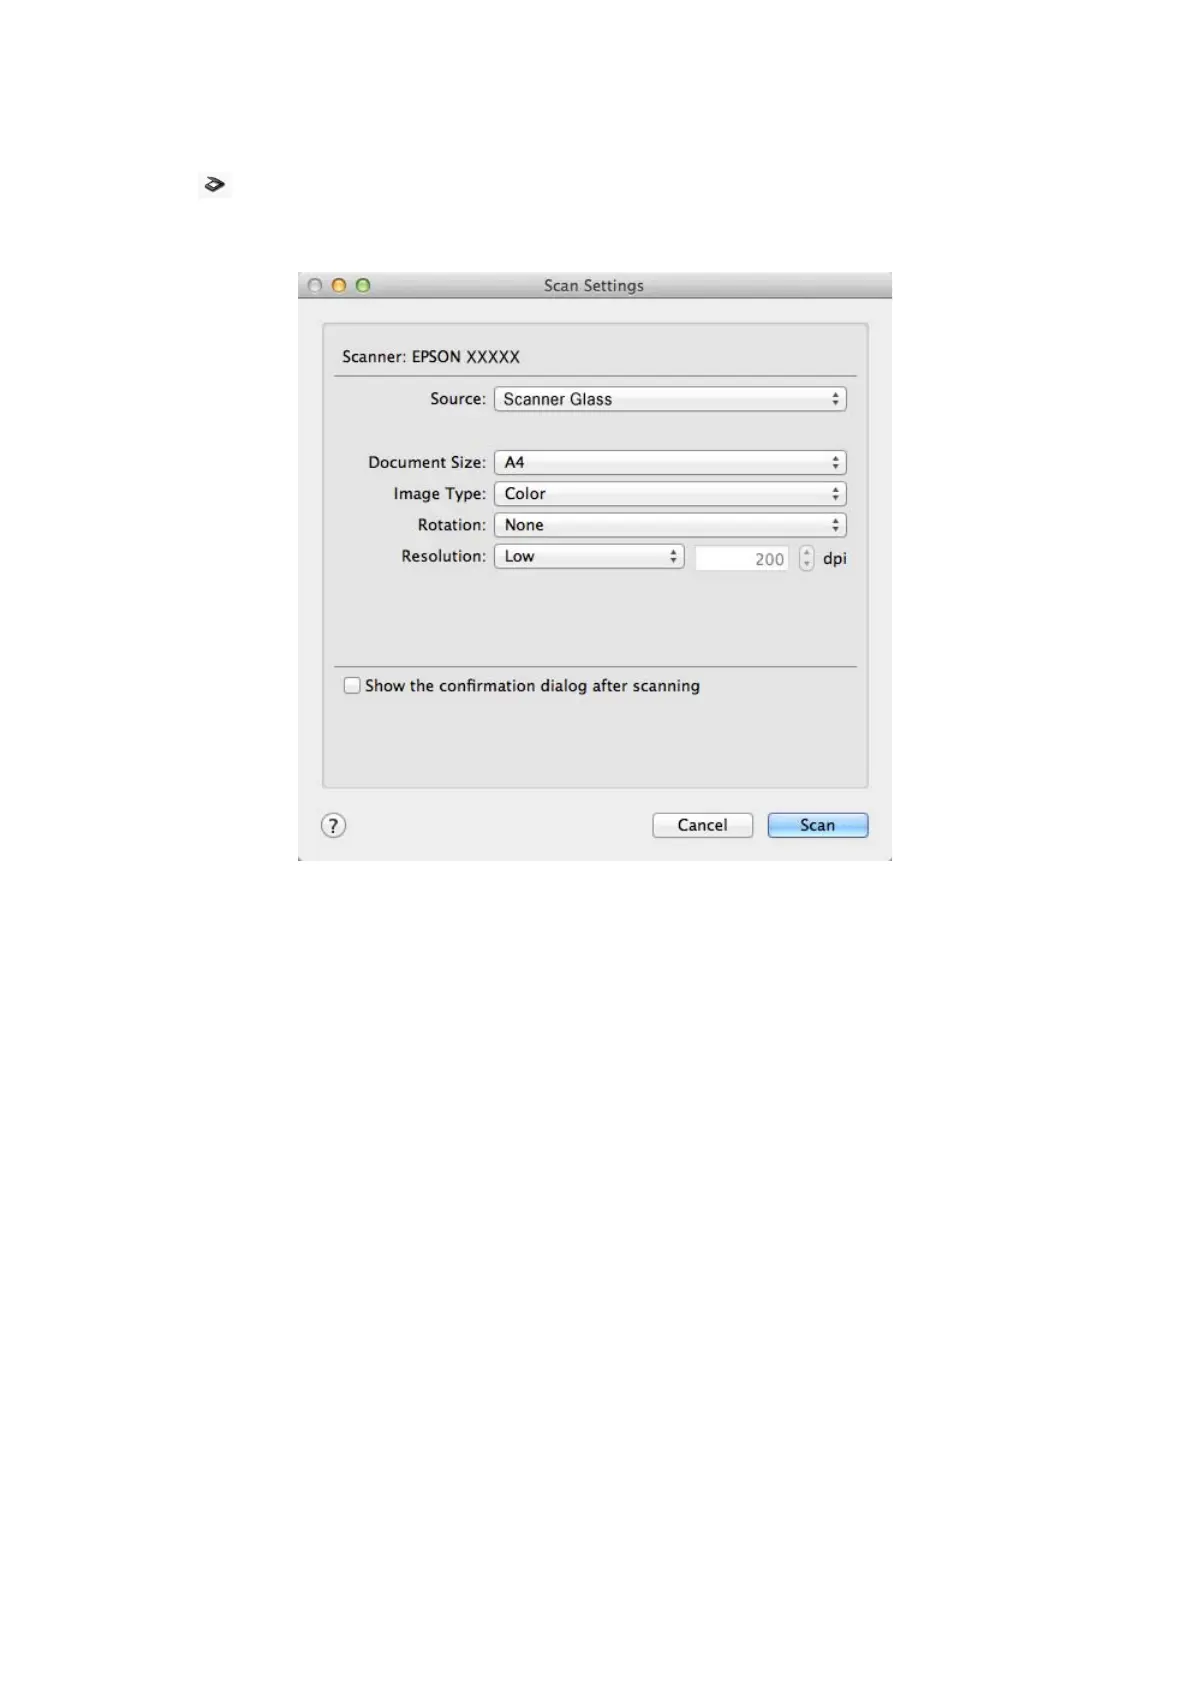
3. Click .
e Scan Settings window is displayed.
4. Make the necessary settings, and then click Scan.
e scanned document is displayed in Document Capture.
To display the EPSON Scan window, select Displays the EPSON Scan Setup Screen in Scan from the menu.
5. Check the scanned images, and then edit as necessary.
6. When you have nished checking the image, click one of the destination icons.
One of the transfer settings windows is displayed depending on the icon you selected.
Note:
❏ If you want to upload to a cloud service, you need to set up your account with the cloud service in advance.
❏ If you want to use Evernote as the destination, download the Evernote application from the Evernote Corporation
website and install it before using this feature.
7. Make the necessary settings in the window, and then click Send or OK.
8. Follow the on-screen instructions.
e
scanned image is saved to a folder, attached to an email, uploaded to a cloud service, and so on depending
on the function you selected.
Related Information
& “Placing Originals” on page 15
&
“Application Information” on page 59
User's Guide
Scanning
45