Installation Method
14
Installing on a Ceiling or a Wall
Securing the Ceiling Plate/Ceiling Mount Pipe to the Installation Surface
When installing on a concrete surface
When installing on a concrete surface, you need 4 commercially available M12 anchor bolts.
Warning
•
Make sure that the installation surface (ceiling or wall) is strong enough to support the weight and horizontal
roll of the product and the projector.
•
If the installation surface is not strong enough, reinforce it before installation.
c
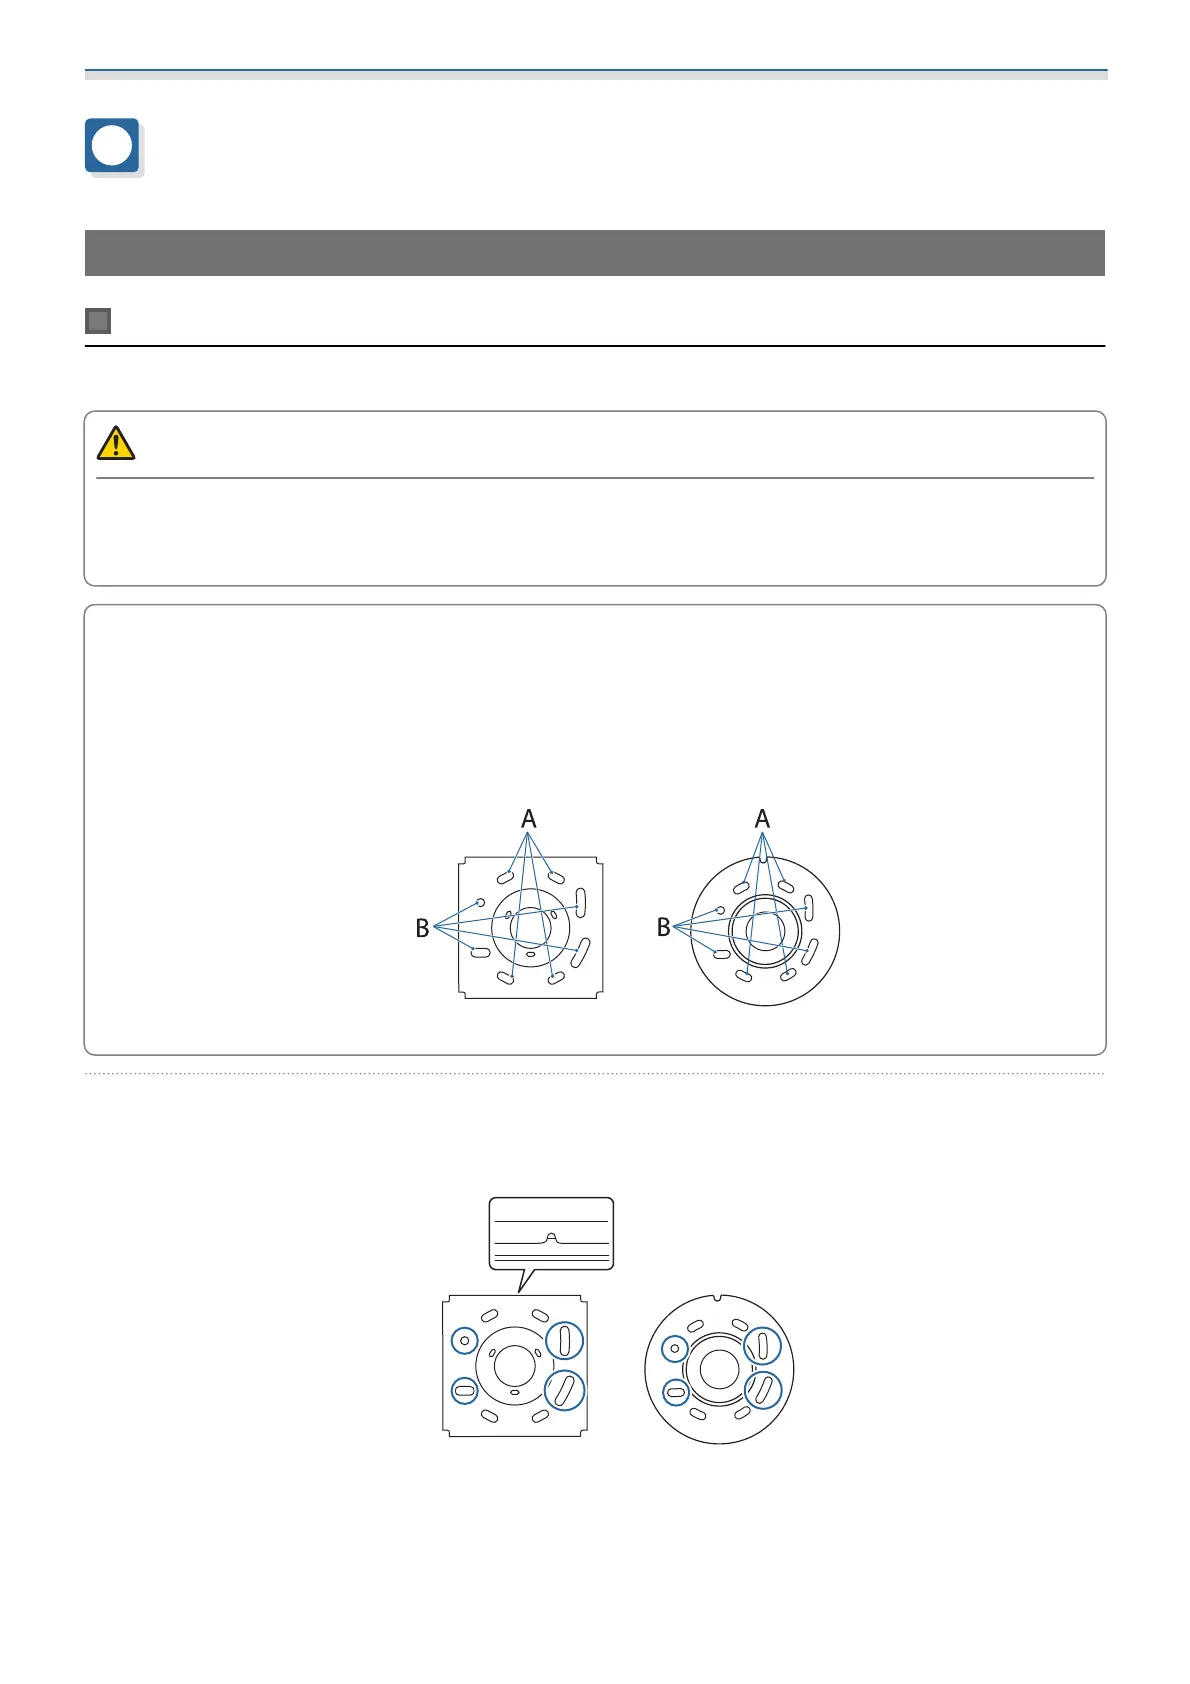
If you install this product after removing a mount that had already been installed, such as the
ELPMB47/ELPMB48/ELPMB22, you can use the mounting holes in the ceiling as they are.
The holes to be used depend on the mount being replaced. See the following illustration for more
details.
•
When replacing from the ELPMB22: Use the holes indicated by A.
•
When replacing from the ELPMB47/ELPMB48: Use the holes indicated by B.
ELPMB67 ELPMB67+ELPFP15
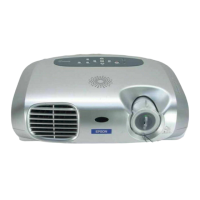
a
Drill holes in the ceiling or wall where the product will be installed
The holes for securing the mount are shown in the following illustration. The notch in the mount is on
the lens side of the projector.
ELPMB67 ELPMB67+ELPFP15