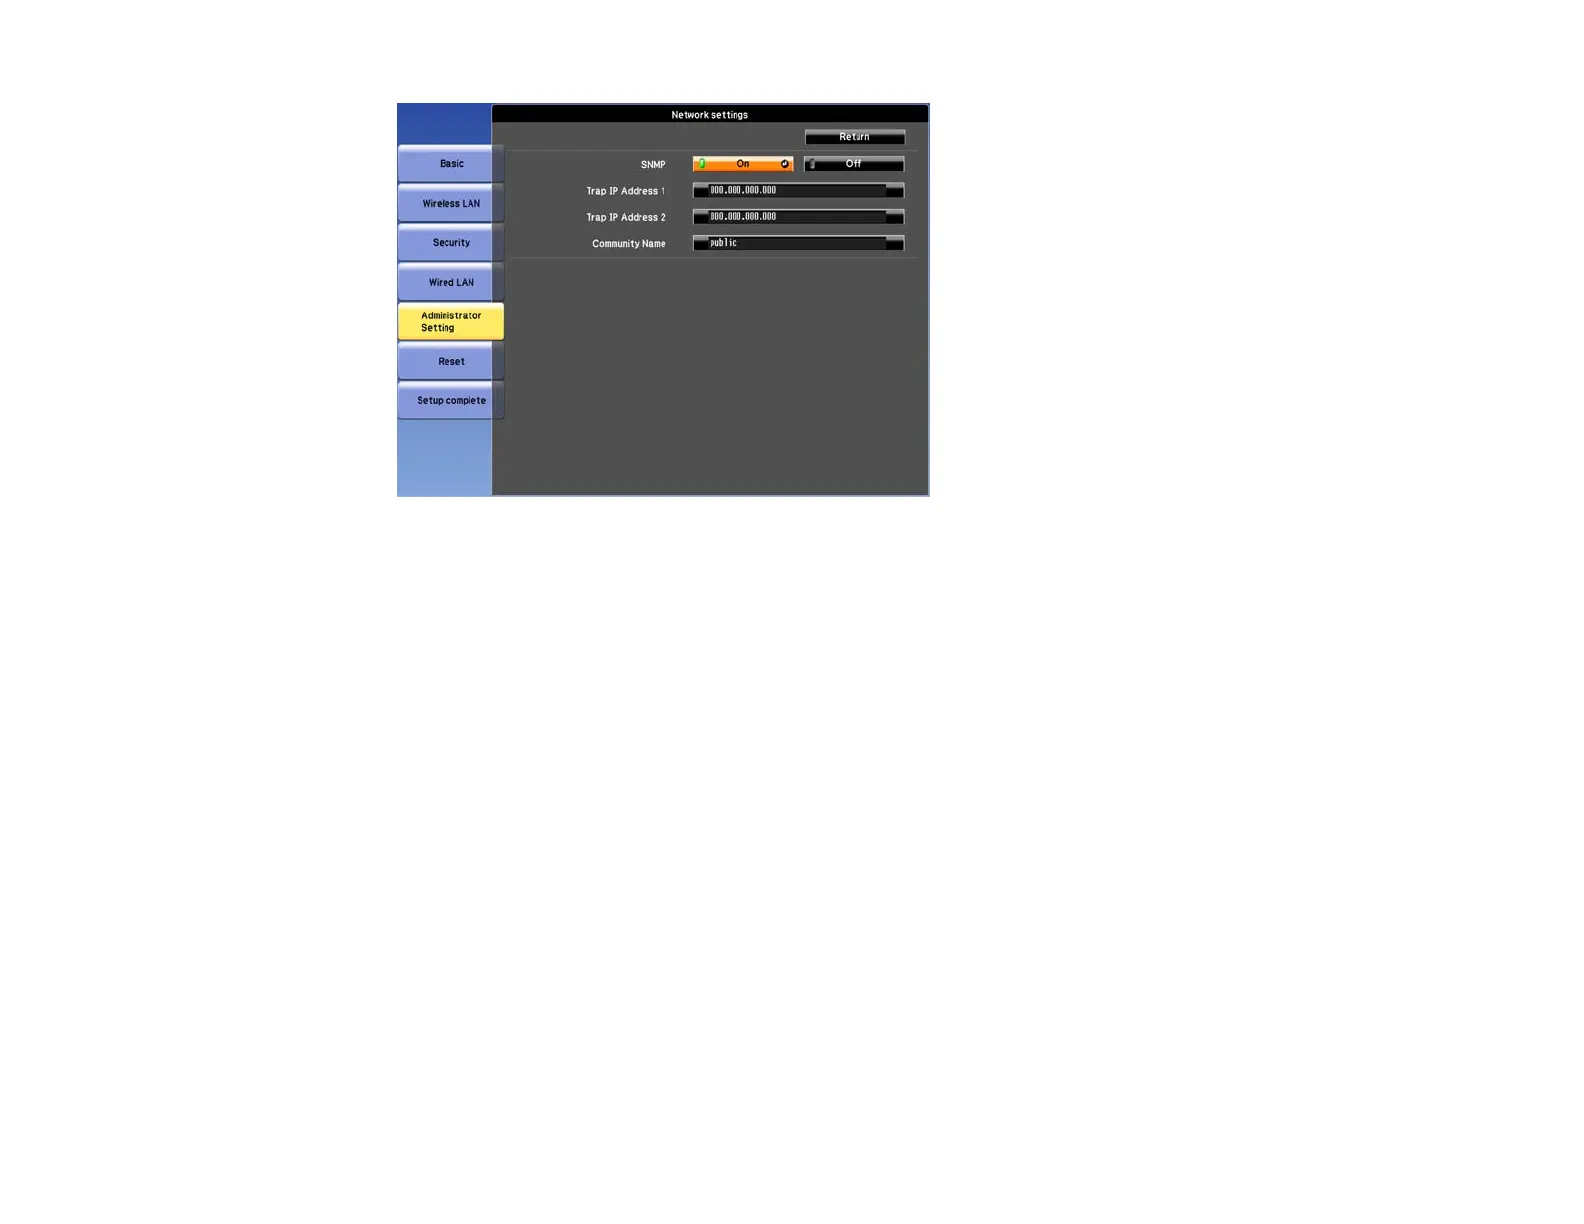
5. Select the SNMP menu and press Enter (PowerLite
G6050W/G6150/G6450WU/G6550WU/G6750WU).
6. Enter up to two IP addresses to receive SNMP notifications, using 0 to 255 for each address field.
Note: To enter the IP address using the numeric keys on the remote control, press and hold the
Num button. Do not use these addresses: 127.x.x.x or 224.0.0.0 through 255.255.255.255 (where x
is a number from 0 to 255).
7. If your network environment uses an AMX controller, turn on the AMX Device Discovery setting to
allow the projector to be detected (PowerLite Pro G6800/G6900WU).
8. If your network environment uses a Crestron RoomView controller, turn on the Crestron RoomView
setting to allow the projector to be detected (PowerLite Pro G6800/G6900WU).
9. If you are connecting to a network using Bonjour, turn on the Bonjour setting (PowerLite Pro
G6800/G6900WU).
10. If you want this projector to receive broadcasted messages over the network, turn on the Message
Broadcasting setting. Administrators can broadcast messages over the network using the Message
Broadcasting plug-in for EasyMP Monitor (PowerLite Pro G6800/G6900WU) (Windows only).
11. When you finish selecting settings, select Complete or Setup complete and follow the on-screen
instructions to save your settings and exit the menus.
76