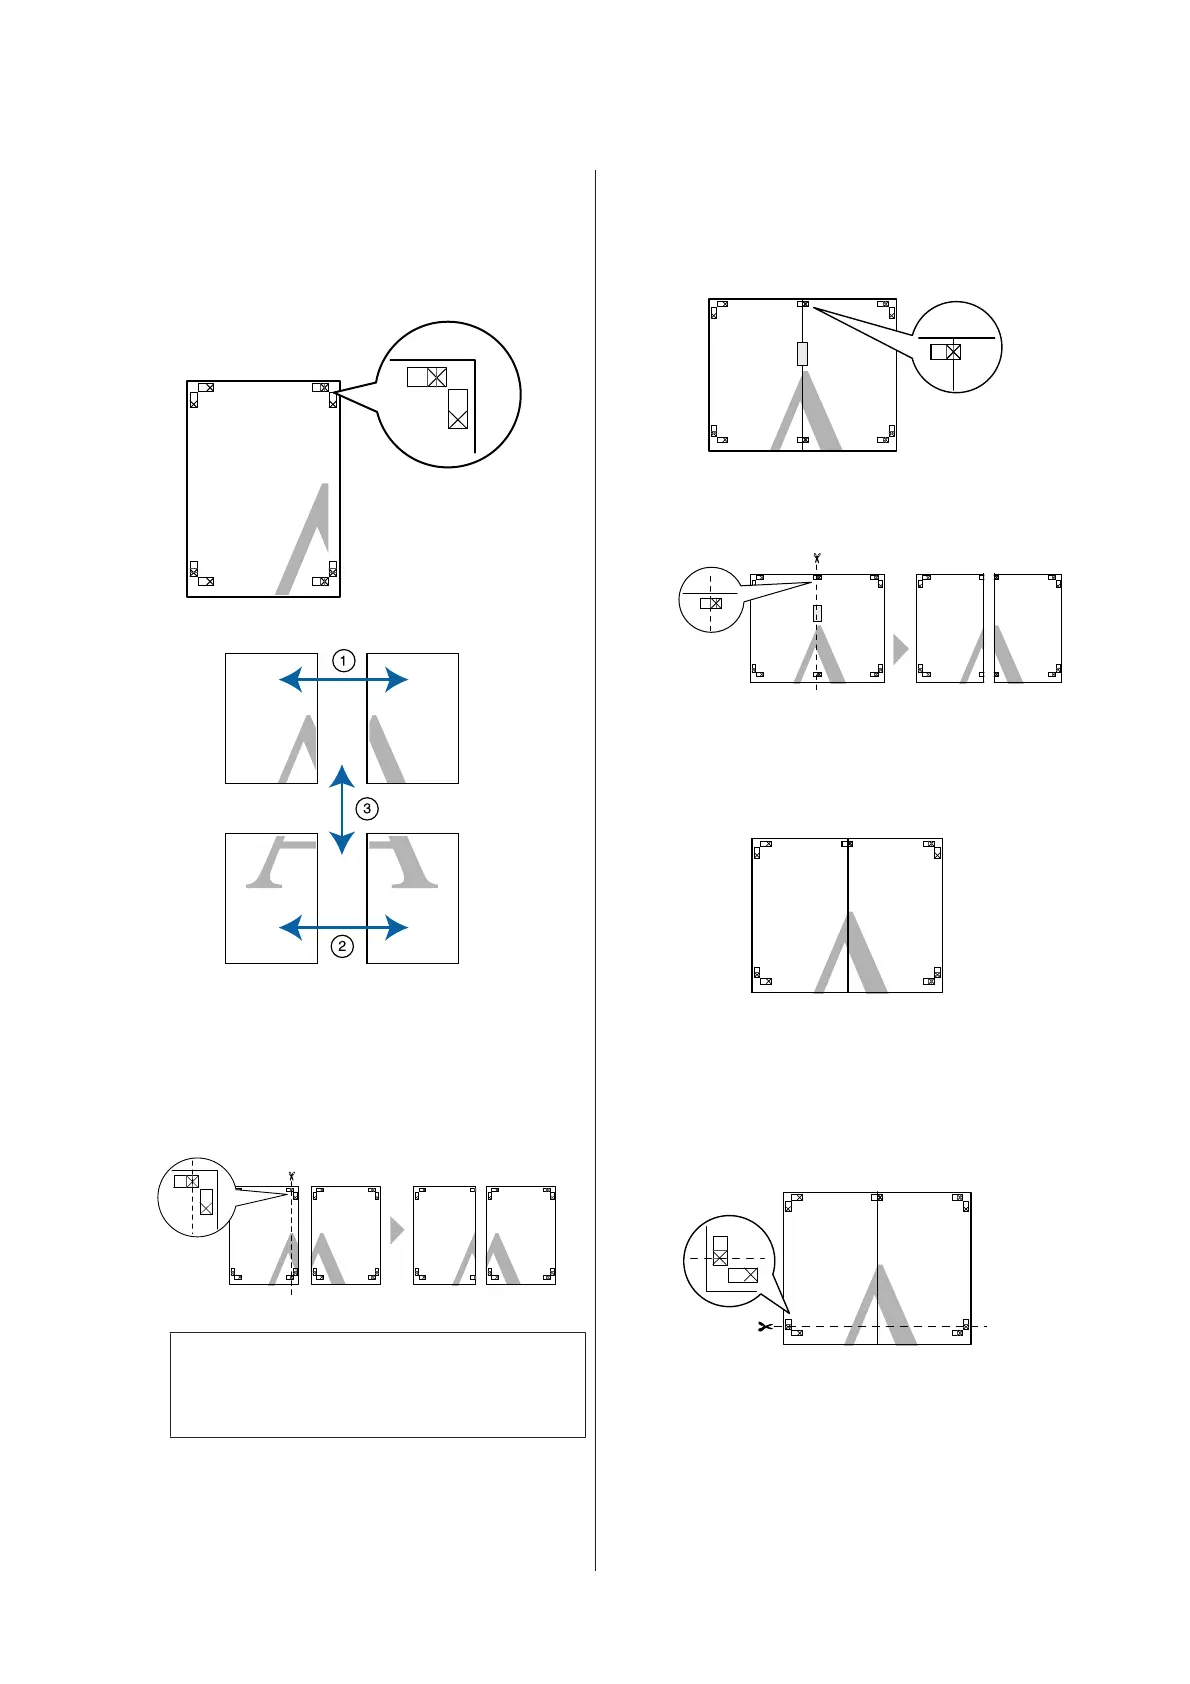
Poster printing with margins
When you select Overlapping Alignment Marks, the
following marks are printed on the paper. See the
procedures below to join the four printed pages together
using the alignment marks.
The following describes how to join four printed pages
together.
A
Cut the upper left sheet along the alignment
mark (vertical blue line).
Note:
The alignment marks are black for
black-and-white printing.
B
Lay the upper left sheet on top of upper right
sheet. Lineup the X marks as shown in the
illustration below, and temporarily fasten them
using an adhesive tape on the back.
C
While two pages are overlapping, cut them along
the alignment mark (vertical red line).
D
Join the left and right sheets together.
Use an adhesive tape to stick the backs of the
sheets together.
E
Repeat steps 1 to 4 for the lower sheets.
F
Cut the bottom of the upper sheets along the
alignment marks (horizontal blue line).
SC-P400 Series User's Guide
Printing Varieties
60
 Loading...