SE Group Confidential (Related Staff Only)
Adjustment Details of Adjustments 64
SC-P600 Revision D
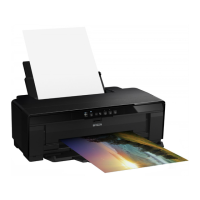
13. Confirm the calibrator is connected, click OK.
14. Place the calibrator on the white reference tile (white plate) and click OK.
Figure 2-34. Preparing the Calibrator
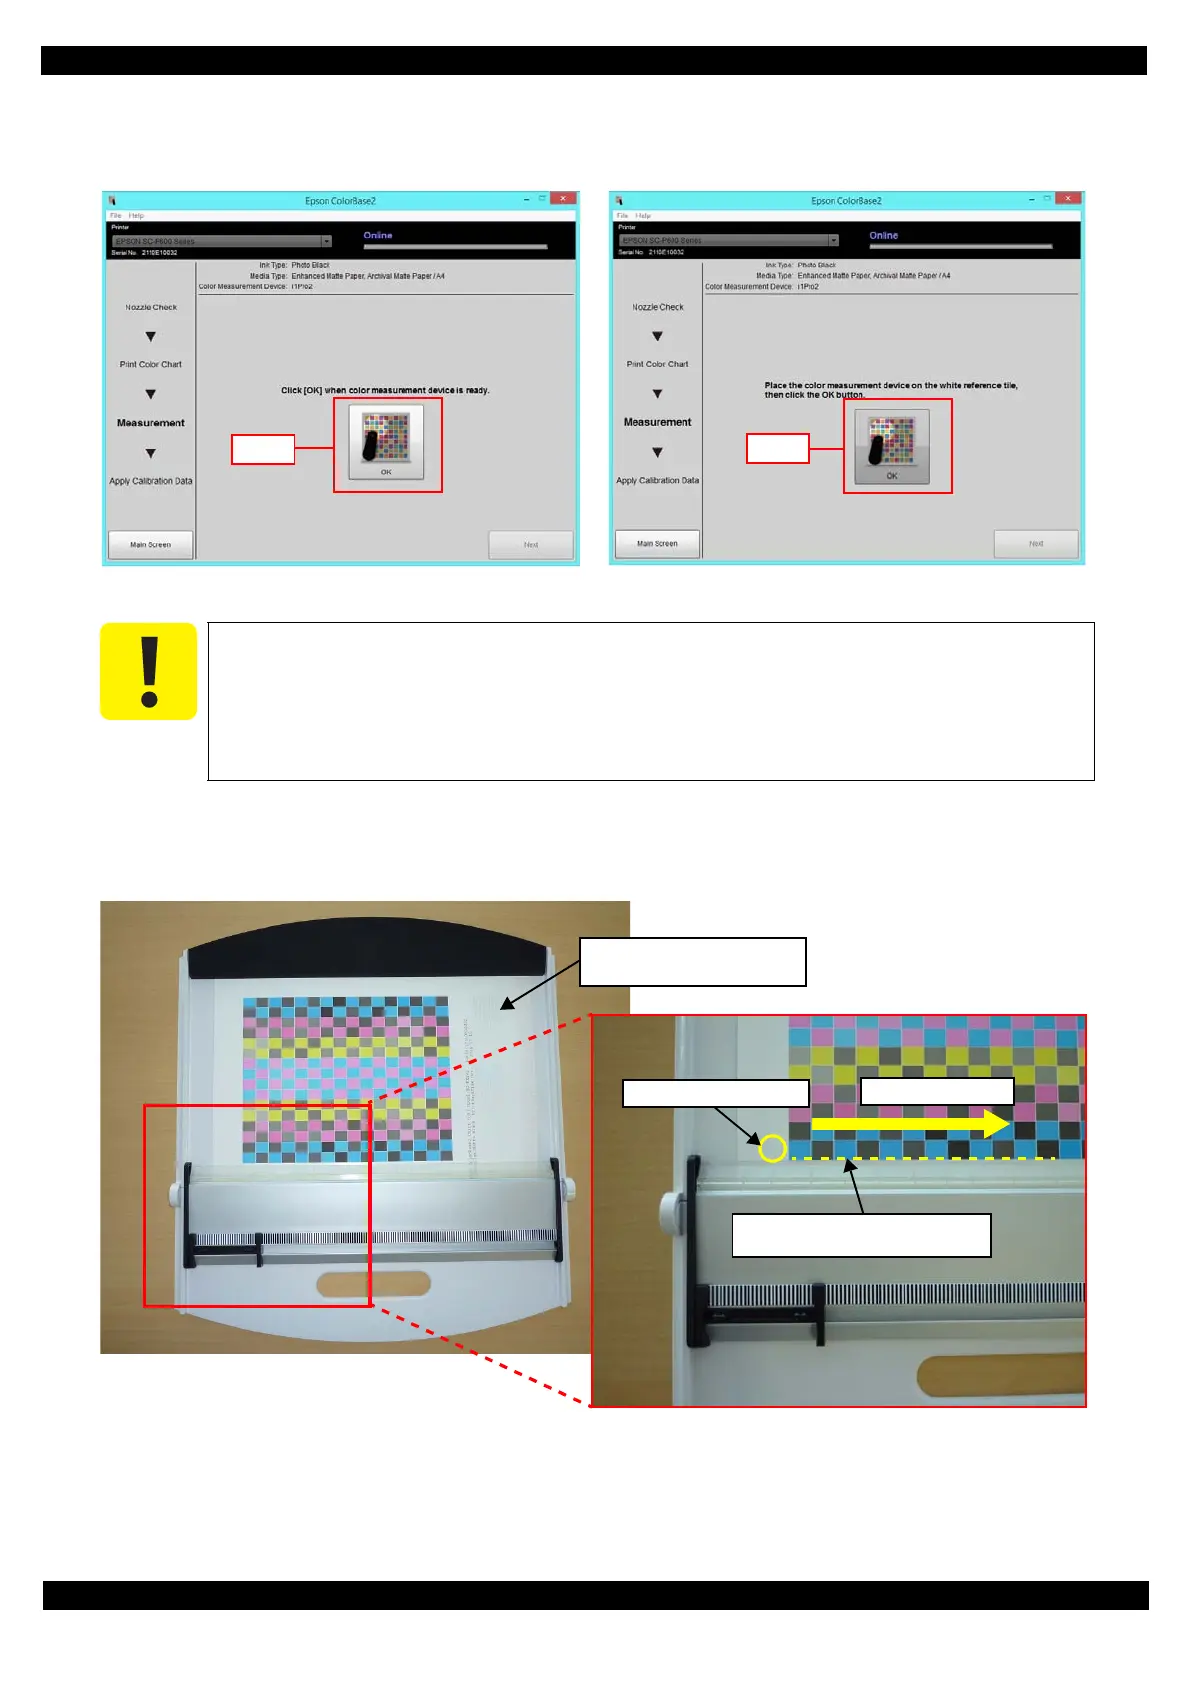
15. Place the color chart on the backing board as shown in Figure 2-35 and set the scanning ruler, and then click OK.
(Use Premium Glossy Photo Paper instead if no backing board is available.) i1Pro2 is used for explanation in the
following figures.
Figure 2-35. Color chart setting
The white reference tile (white plate) on the calibration plate should be clean. Clean off
any dirt with alcohol or other organic solvent. Use a soft cloth so as not to damage the
white reference tile (white plate).
The white reference tile (white plate) and the calibrator are used as a pair. Do not use any
other plate attached with other calibrators.
Align the edge of scale with the first
row of the calibration patches.
Place the chart with the nozzle
check pattern to the right.
Measurement start point
Measuring direction