Epson Stylus C58/C59/ME 2/C79/D78/C90/C91/C92/D92/T20/T20E/T23/T26/S20/T10/T11/ME 30/T21/T24/T27/S21 Revision E
DISASSEMBLY/ASSEMBLY Disassembling Printer Mechanism 60
Confidential
ASF Unit Removal
1. Remove the screw (x1) from the side of the Lower Housing.
2. Remove the screws (x2), and remove the ASF Unit taking care not to scratch
it with the positioning tab.
Figure 4-68. Removing ASF Unit
C.B.P 3X8 (Torque: 6±1Kgf.cm)
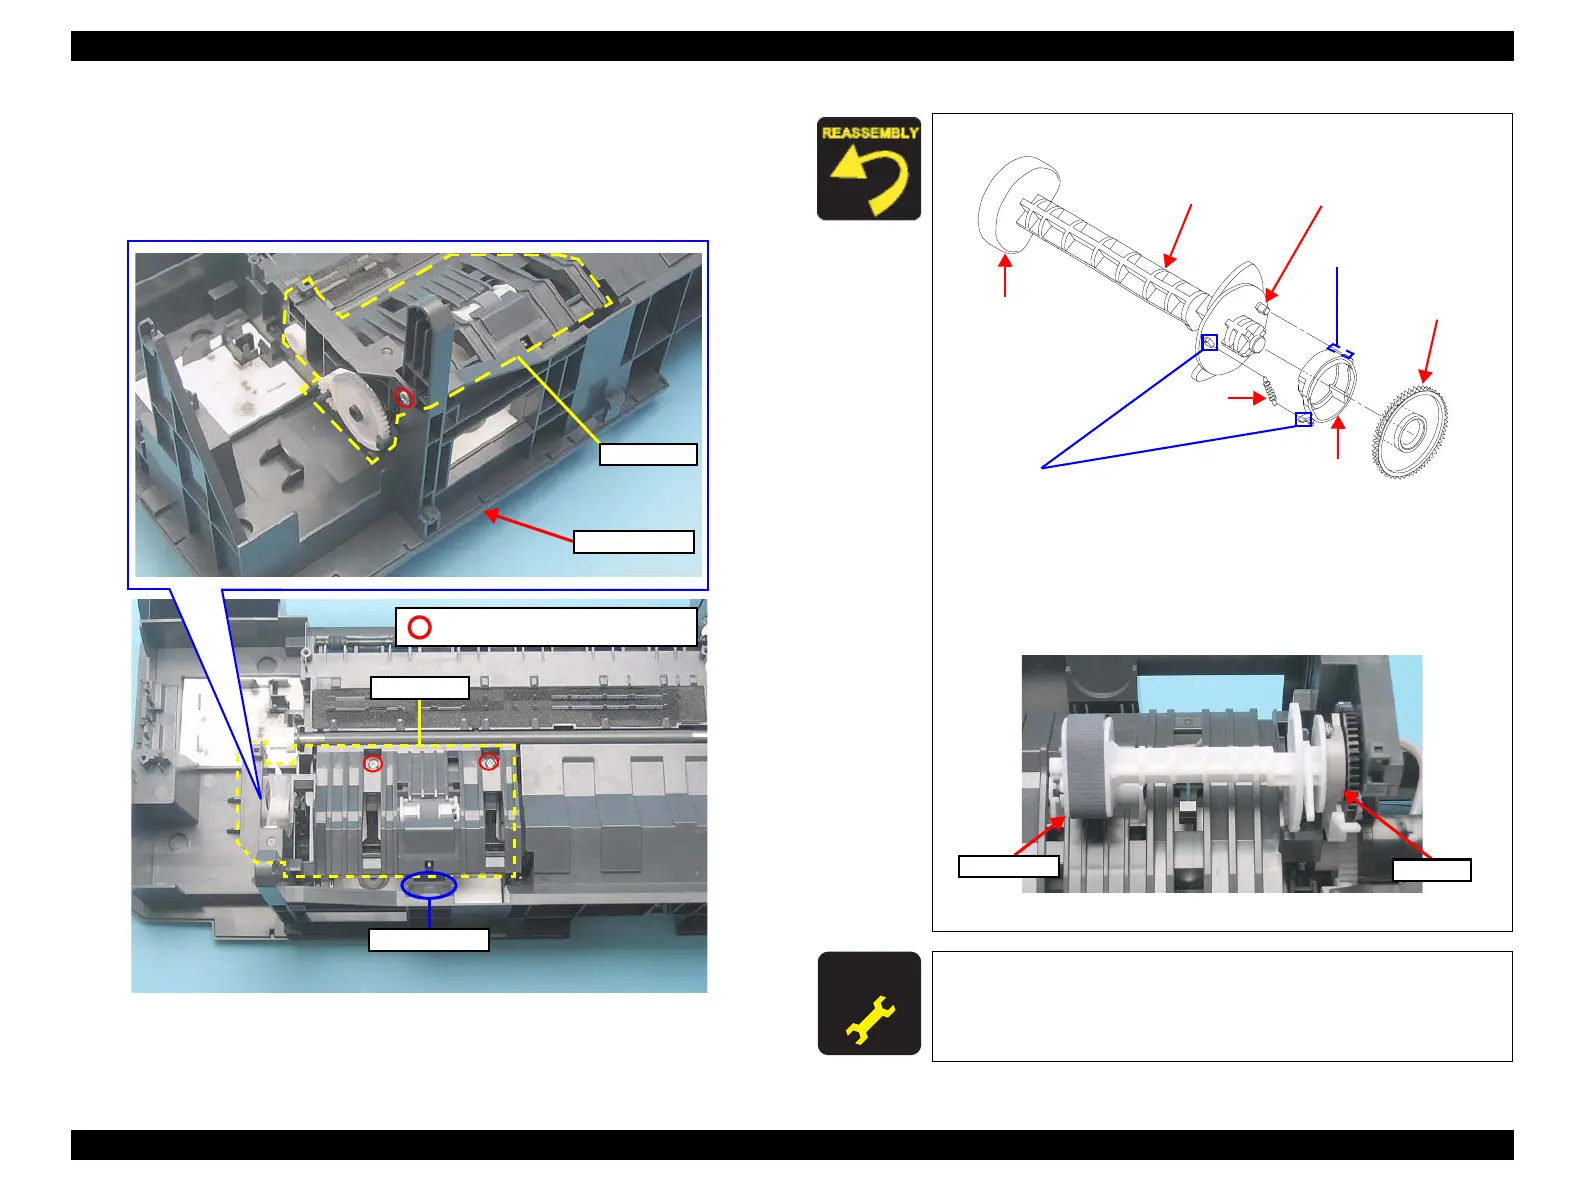
Assemble the LD Roller as shown below.
Figure 4-69. Assembling LD Roller (1)
1. Match the guide pin of the LD Roller Shaft with the positioning
hole of the Clutch.
2. Attach the tips of the Extension Spring 0.143 to the tab of the LD
Roller shaft and the tab of the Clutch.
3. Attach the cam side of the Spur Gear 36.8 to the hole of the Clutch.
Figure 4-70. Assembling LD Roller (2)
A D J U S T M E N T
R E Q U I R E D
Whenever the LD Roller is replaced, apply G71 grease
referring to
Figure 6-4 (p.81) and Figure 6-5 (p.81) in Chapter
6.
Clutch
Extension
Spring 0.143
Spur Gear 36.8
LD Roller Shaft
LD Roller
Guide pin
Tabs
Positioning hole

 Loading...


