Epson Stylus C58/C59/ME 2/C79/D78/C90/C91/C92/D92/T20/T20E/T23/T26/S20/T10/T11/ME 30/T21/T24/T27/S21 Revision E
DISASSEMBLY/ASSEMBLY Disassembling Printer Mechanism 62
Confidential
4.5.12 PF Roller
Part/Unit that should be removed before removing PF Roller
Upper Housing /Hopper /Main Board /Main Frame /EJ Frame Assy. /
Print Head /CR Scale/CR Motor/CR Unit/Timing Belt/Ink System
Removal procedure
1. Remove the FB Cover.
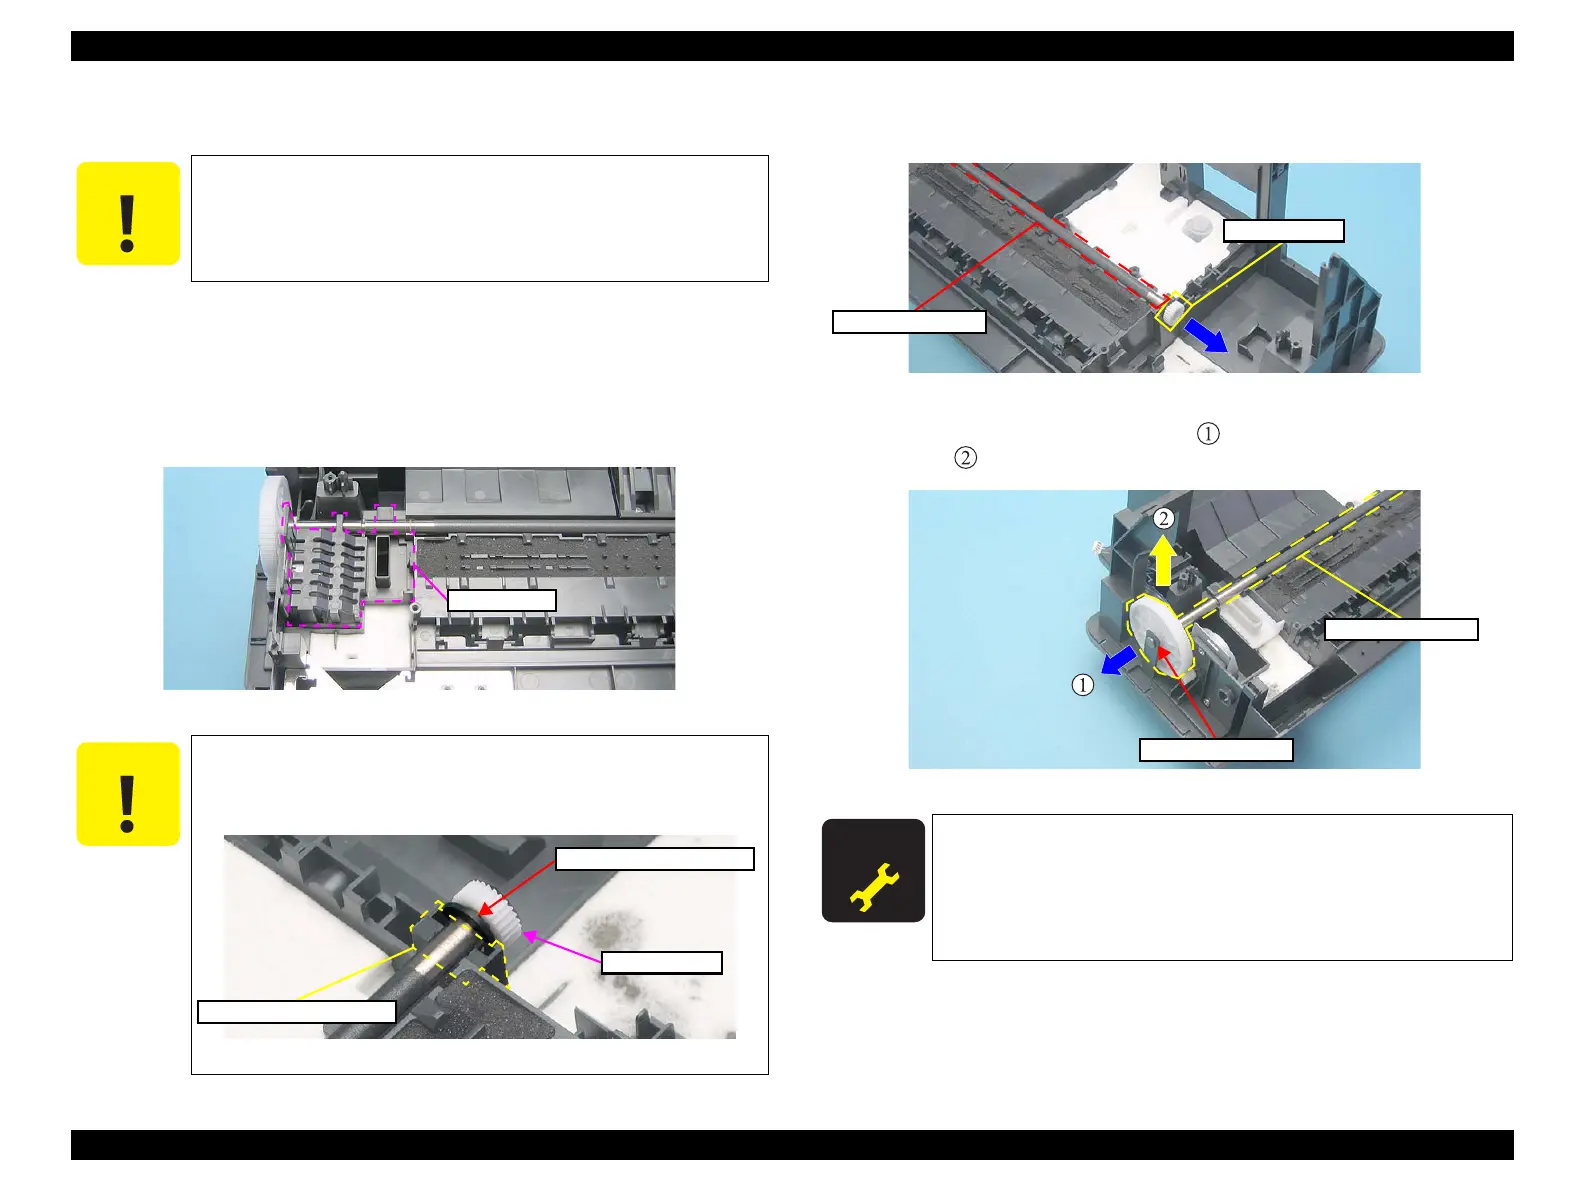
Figure 4-74. Removing PF Roller (1)
2. Remove the Spur Gear, 13.5 from the PF Roller with a flathead screw driver
or the like.
Figure 4-76. Removing PF Roller (2)
3. <Pull open the bearing slightly (Arrow ), and remove the PF Roller Assy
(Arrow ).
Figure 4-77. Removing PF Roller (3)
Do not touch or damage the coated area of the PF Roller
Assy., when performing the following work.
When installing the Spur Gear, 13.5, be sure to install a new
one. The Spur Gear 13.5 cannot be reused.
When removing (prying) the Spur Gear, 13.5 with a flathead
screw driver or the like, do not use the fragile upper half of the
bearing as a pivot point, but use the firmer lower half instead.
Figure 4-75. Removing Spur Gear, 13.5
Lower half of the Bearing
Upper half of the Bearing
A D J U S T M E N T
R E Q U I R E D
Whenever the PF Roller is replaced, apply G71 grease
referring to
Figure 6-6 (p.82), Figure 6-7 (p.82) and Figure 6-8
(p.82) in Chapter 6.

 Loading...


