K
Kristen SnyderSep 6, 2025
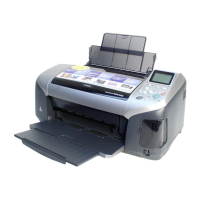
What to do if Epson Stylus Photo R320 Printer shows Power on Communication Error?
- Jjudith96Sep 6, 2025
Connect the printer and the PC with a 'USB Cable'.


What to do if Epson Stylus Photo R320 Printer shows Power on Communication Error?
Connect the printer and the PC with a 'USB Cable'.
How to solve Epson Printer Power on Communication Error?
Install the Stylus Photo R320 Printer Driver on the PC.
What to do for Power on initial Ink Charge Error on Epson Printer?
Check if the Ink Cartridge is normal by installing it in another printer. Also, write proper Market Setting to the EEPROM using the Adjustment Program.
| maximum resolution | 5760 x 1440 optimized dpi |
|---|---|
| minimum ink droplet size | 3 picoliters |
| maximum printable area | 8.5" x 44" |
| black text print speed | Up to 15 ppm |
|---|---|
| color text print speed | Up to 15 ppm |
| 4" x 6" photo print speed | 39 sec. |
| storage dimensions | 19.6" x 10.4" x 8.6" |
|---|---|
| printing dimensions | 19.6" x 18.7" x 11.4" |
| weight | 14 lb (with ink cartridges) |
Describes the structure of the manual and its sections.
Explains the meaning of various symbols used throughout the manual.
Introduces troubleshooting methodology and levels of repair.
Explains how to troubleshoot errors using printer indicators and software messages.
Details specific error conditions, their possible causes, and checks.
Introduces disassembly and reassembly procedures for printer components.
Outlines essential safety precautions before starting disassembly or assembly.
Lists the specified tools required for servicing the printer.
Provides a checklist for verifying service completion before returning the printer.
Advises on critical points for maintaining product quality during reassembly.
Details the step-by-step procedures for disassembling printer components.
Step-by-step guide for removing the Paper Support Assembly.
Step-by-step guide for removing the Preview Monitor Unit.
Step-by-step guide for removing the Upper Housing cover.
Step-by-step guide for removing the Middle Housing cover.
Guide for removing porous pads and paper guides from the front.
Step-by-step guide for removing the front Panel Board.
Step-by-step guide for removing the Stacker Assembly.
Detailed procedure for removing the Main Board.
Step-by-step guide for removing the ASF (Auto Sheet Feeder) Assembly.
Step-by-step guide for removing the Holder Shaft Assembly.
Detailed procedure for removing the Carriage (CR) Motor.
Step-by-step guide for removing the APG Assembly.
Detailed procedure for removing the Print Head assembly.
Detailed procedure for removing the Carriage Unit.
Step-by-step guide for removing the Upper Paper Guide.
Detailed procedure for removing the main printer mechanism and lower housing.
Detailed procedure for removing the Power Supply Unit.
Step-by-step guide for removing the CDR Guide Assembly.
Detailed procedure for removing the Ink System.
Step-by-step guide for removing Paper Guide and Roller EJ Assy.
Detailed procedure for removing the PF Motor.
Introduces the various adjustments required after component replacement.
Lists all available adjustment items for servicing the printer.
Guides on which adjustments are required or recommended based on replaced parts.
Details procedures for performing adjustments using the service software.
Adjusts market-specific information and common settings for the printer.
Assigns unique IDs for multiple printers connected via USB.
Corrects variations in print quality due to print head manufacturing.
Adjusts print head angle for uniform nozzle alignment.
Corrects print timing for bi-directional printing.
Corrects paper detection errors by adjusting PW sensor mounting.
Corrects the initial dot position in the CR scanning direction.
Prevents motor damage by setting heat generation limits.
Prints check patterns on normal paper to verify adjustments.
Prints check patterns on photo quality paper to verify adjustments.
Prints check patterns on glossy photo paper to verify adjustments.
Details adjustment procedures that do not require the service software.
Manual adjustment to secure space between print head and paper.
Explains the process for updating the printer's firmware.
Step-by-step instructions for updating the printer firmware.
Troubleshooting common errors encountered during firmware updates.
Provides information on maintaining the printer in optimal condition.
Describes procedures for cleaning printer components like the housing and rollers.
Details actions for resolving print irregularities and maintenance errors.
Specifies lubrication points, types, and amounts for printer components.
Refers to the parts list for exploded diagrams of printer components.
Lists the electrical circuit diagrams provided for various printer boards.