EX 1) A sample program written in BASIC (the output from this program is
transmitted to the printer by assigning the printer port to file number
“#1” using an OPEN statement).
100
PRINT #1, CHR$(&H1B);“L”;
110
PRINT #1, CHR$(&H1B);“W”;CHR$(0);CHR$(0);CHR$(0);CHR$(0;
120 PRINT #1, CHR$(100);CHR$(0);CHR$(100);CHR$(0);
130
PRINT #1, CHR$(&H1B);‘T”;CHR$(0);
140 PRINT #1, “Page mode Lesson TEST1”
150
PRINT #1, CHR$(&HC);
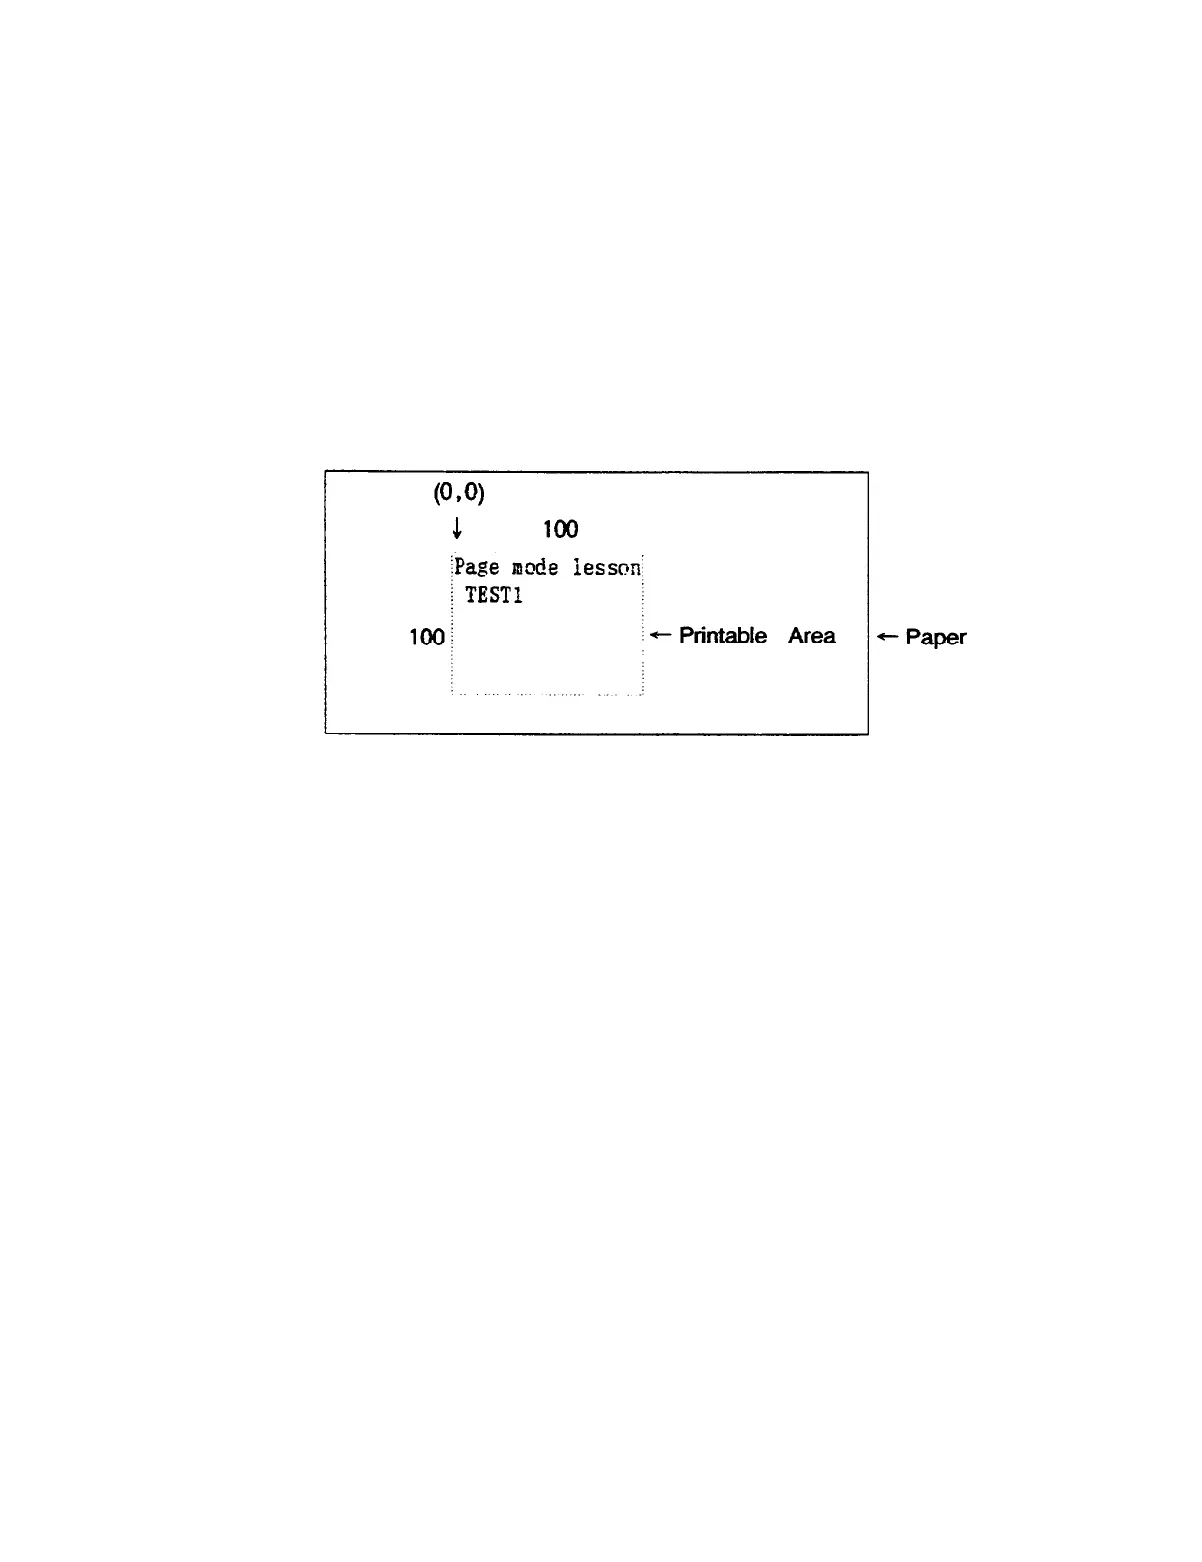
The above sample program specifies a printable area of 100X100 from the
start position (0,0), and the first line is written as shown in Figure 6-4-2.
Figure 6-4-2
In Figure 6-4-2, a line has been fed between “lesson” and “TEST1”. This
is because the 100x100 printable area is not wide enough to hold all of
the print data, so a line has been fed automatically. The line spacing used
here is set using ESC 3.
Any number of printable areas can be specified before FF is executed.
However, if any printable areas overlap the logical sum of the data in the
overlapping portion of the areas will be calculated.
When previously buffered data needs to be partially deleted, CAN is used.
This command clears all the currently specified area. A partial delete can
be executed by specifying a printable area which contains only the data to
be deleted using ESC W, and then executing CAN. It should be noted that
any data in the specified area, even if it is just part of a character, will be
deleted.
-43-
 Loading...