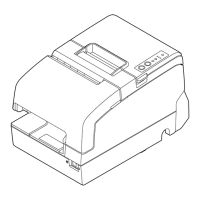
Setup
To set up the printer, follow the steps below.
1. Removing the protective materials and tape (
U
"Removing the Protective Materials and Tape" on page 8
)
2. Connecting the cables (
U
"Connecting the Cables" on page 9)
3. Attaching the connector cover (
U
"Attaching and Removing the Connector Cover" on page 11)
4. Installing the ribbon cartridge (
U
"Installing and Replacing the Ribbon Cartridge" on page 12)
5. Installing the roll paper (
U
"Installing the Roll Paper" on page 17)
6. Test printing (
U
"Test Printing" on page 19)
7. Attaching the power switch cover (
U
"Attaching the Power Switch Cover" on page 19)
8. Applying the LED information label (
U
"Applying the LED Information Label" on page 20)
QNotes:
❏
When using the printer, be sure to install roll paper.
❏
For models with the MICR reader, do not place the printer near any magnetic fields to avoid decreasing the
MICR recognition rate. In particular, when you install the printer near a CRT display device, check the
recognition rate of the MICR reader.