Confidential
Adjustment Details of Adjustments 72
Epson WF-5690/4640/4630/5620/5190/5110 series Revision D
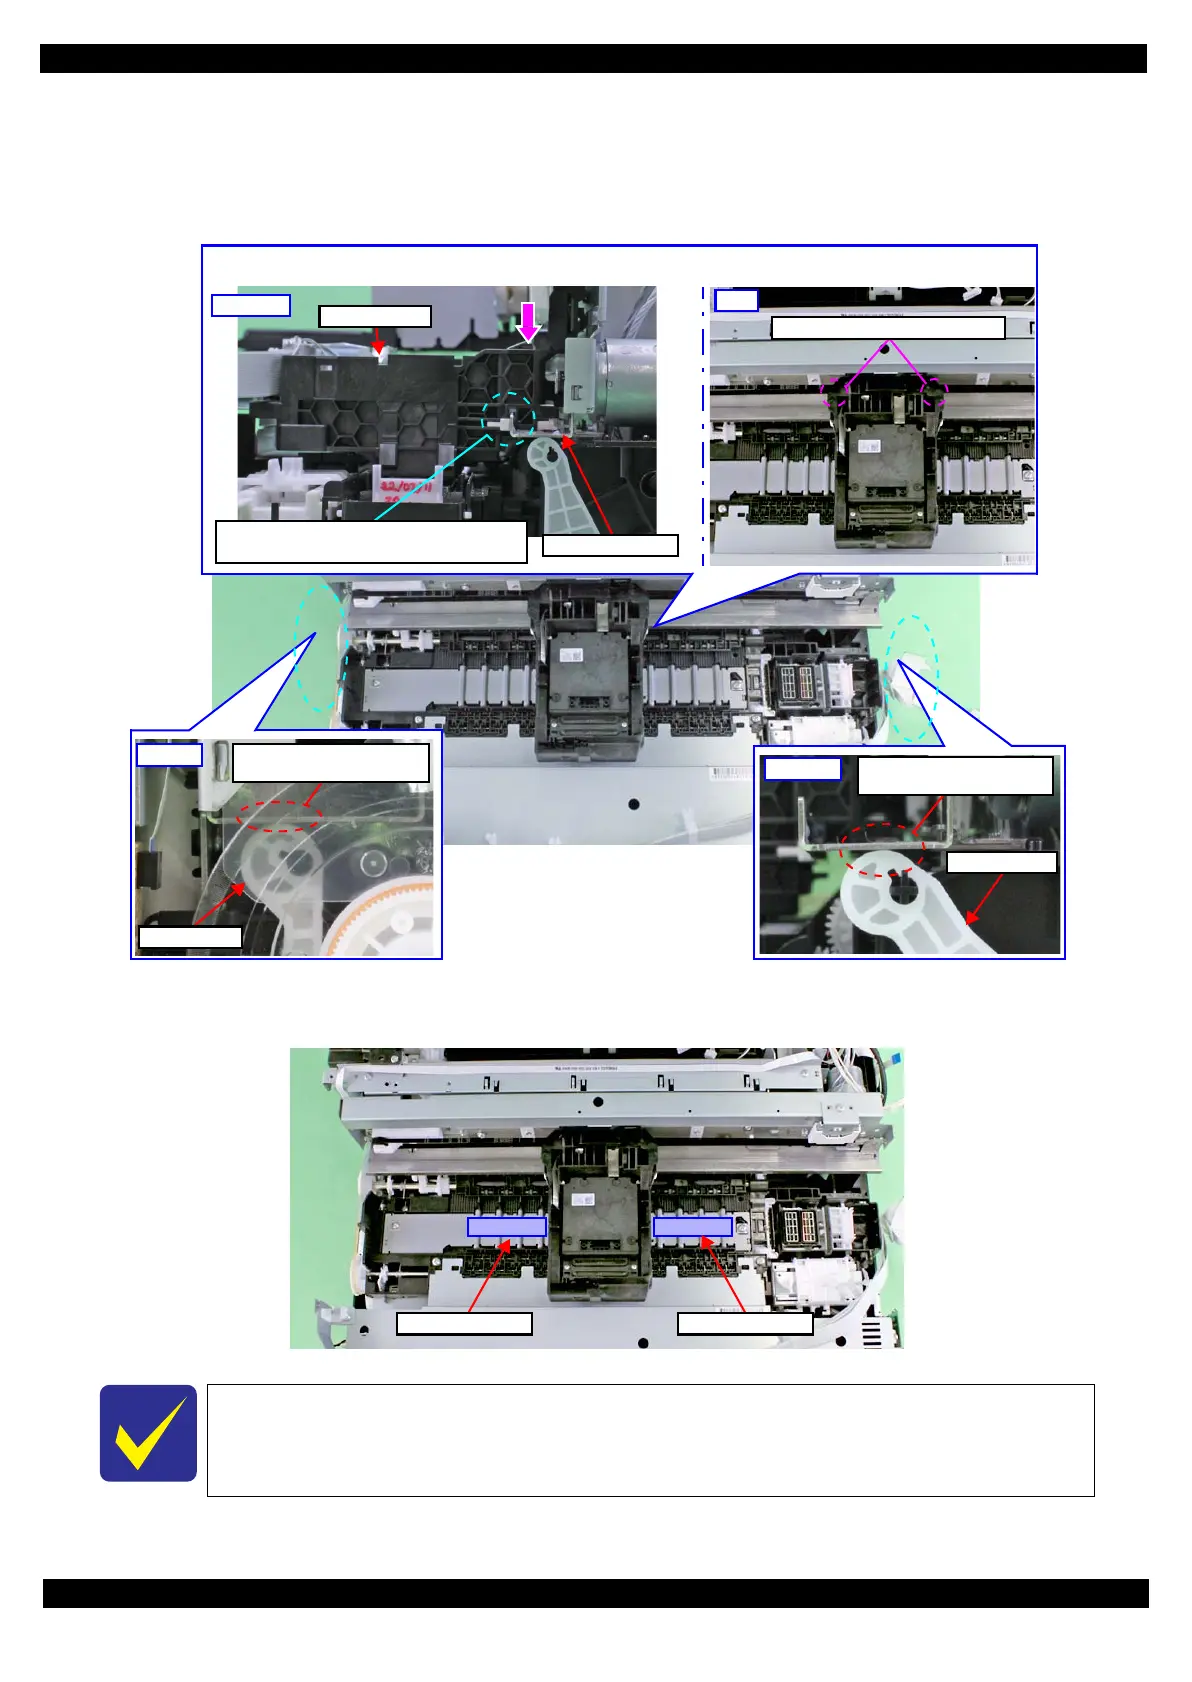
5. Press the two points down vertically on the Carriage Assy shown in Figure 3-19 simultaneously, and make
sure of the following.
The Carriage Assy is installed correctly without any gap between the Carriage Assy and CR Guide Frame.
The PG Cam Right/PG Cam Left touch the CR Guide Frame.
Figure 3-24. The PG Cam Right/PG Cam Left and CR Guide Frame
6. Place the thickness gauges (1.47 mm) on the positions shown in Figure 3-25.
Figure 3-25. Position of the Thickness Gauge
When adjusting the PG Cam Right/PG Cam Left in the following steps, make sure to adjust
the same amount for both right and left.
PG Cam Left
Left side
Confirm PG Cam Left
touches CR Guide Frame.
PG Cam Right
Right side
Confirm PG Cam Right
touches CR Guide Frame.
Press here (x2) down vertically.
Top
Carriage Assy
CR Guide Frame
Make sure from here that the Carriage Assy
is not loosened from the CR Guide Frame.
Right side
To avoid performing the PG adjustment with the Carriage Assy loosened from the CR Guide Frame, press down the two
points in the direction of the arrow.
Thickness gauge Thickness gauge
 Loading...


