4.
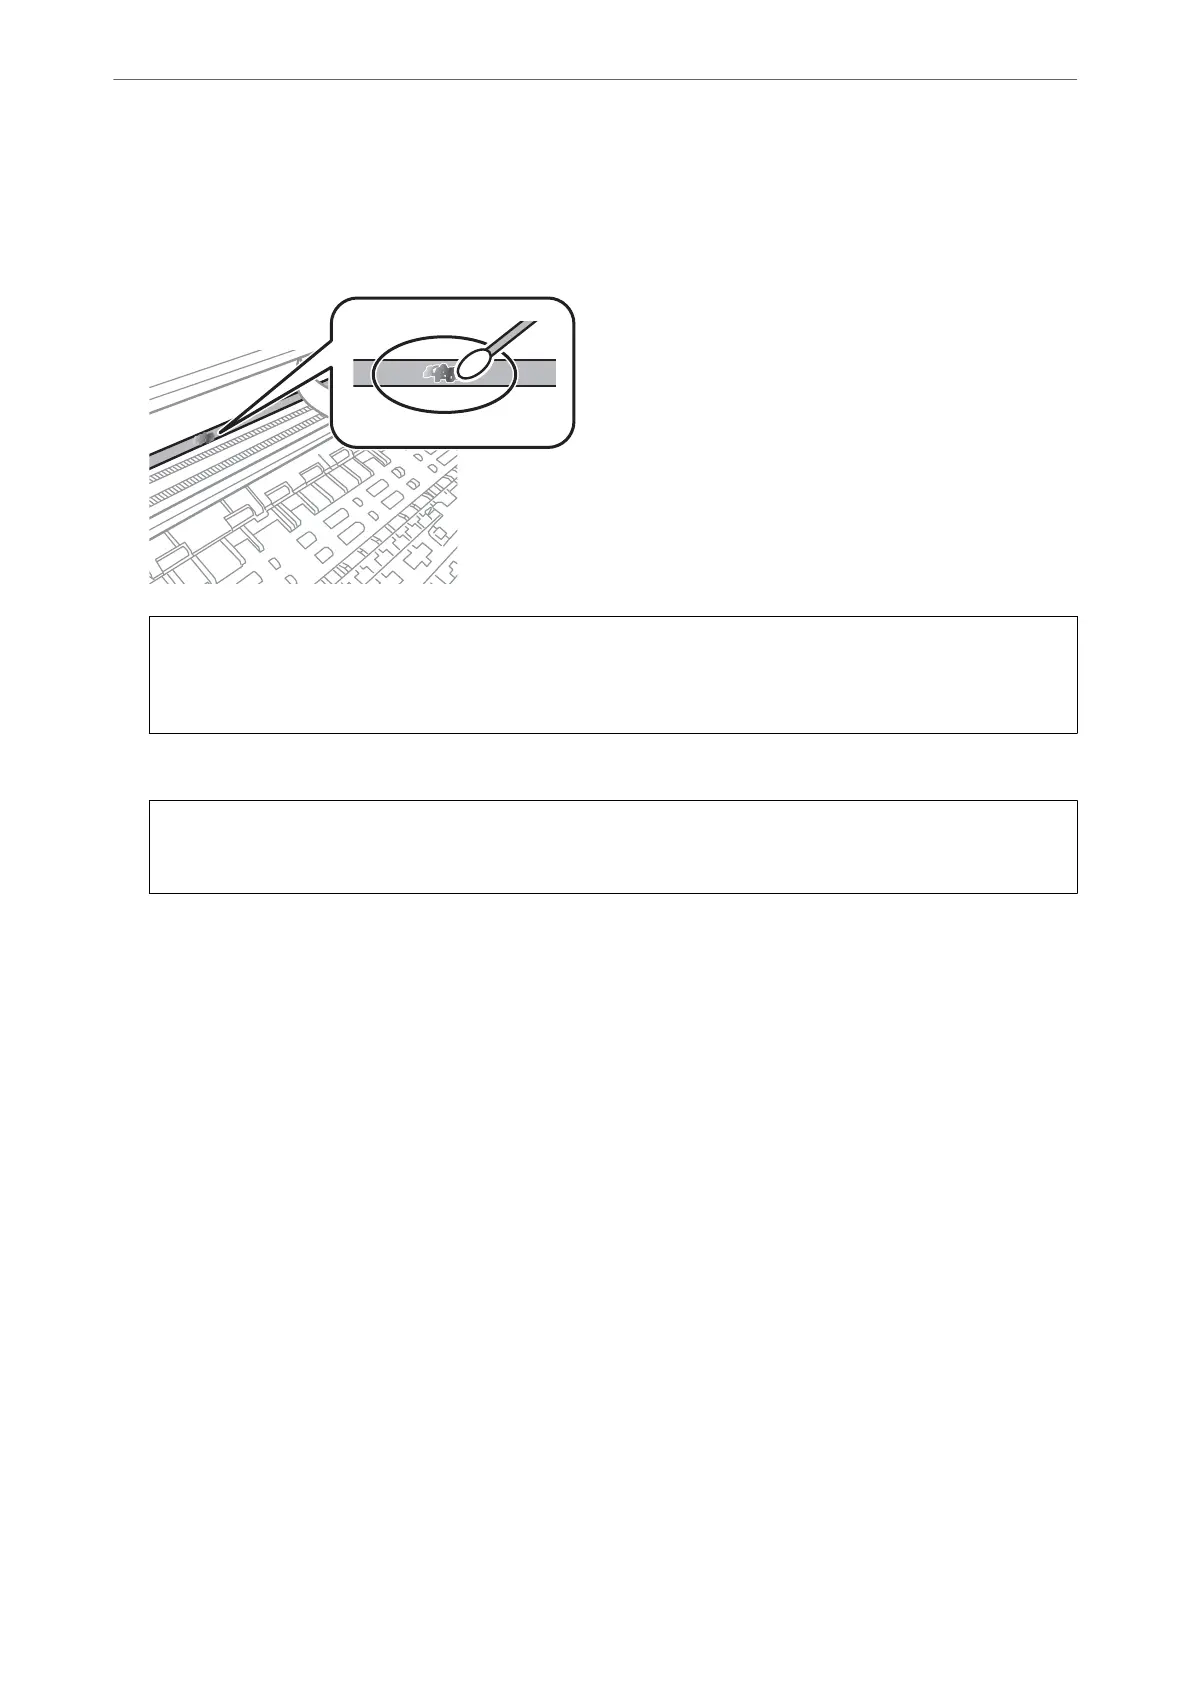
Moisten a cotton swab with the water with a few drops of detergent so that it is not dripping water, and then
wipe the smeared part.
Be careful not to touch the ink that has adhered inside the printer.
c
Important:
Wipe o the smear gently. If you press the cotton swab too hard to the lm, the springs of the lm may be
dislocated and the printer may be damaged.
5.
Use a new dry cotton swab to wipe the lm.
c
Important:
Do not leave any bers on the lm.
Note:
To prevent the smear from spreading, frequently replace the cotton swab with a new one.
6.
Repeat steps 4 and 5 until the lm is not smeared.
7.
Visually check that the lm is not smeared.
Menu Options for Maintenance
Select Maintenance on the printer's control panel.
Print Head Nozzle Check:
Select this feature to check if the print head nozzles are clogged. e printer prints a nozzle check
pattern.
Print Head Cleaning:
Select this feature to clean clogged nozzles in the print head.
Power Cleaning:
Select this feature to perform power cleaning if the print head is severely clogged or is still clogged
aer repeating standard cleaning. More ink is consumed than in usual cleaning.
Maintaining the Printer
>
Improving Print, Copy, and Scan Quality
>
Menu Options for Maintenance
76
 Loading...