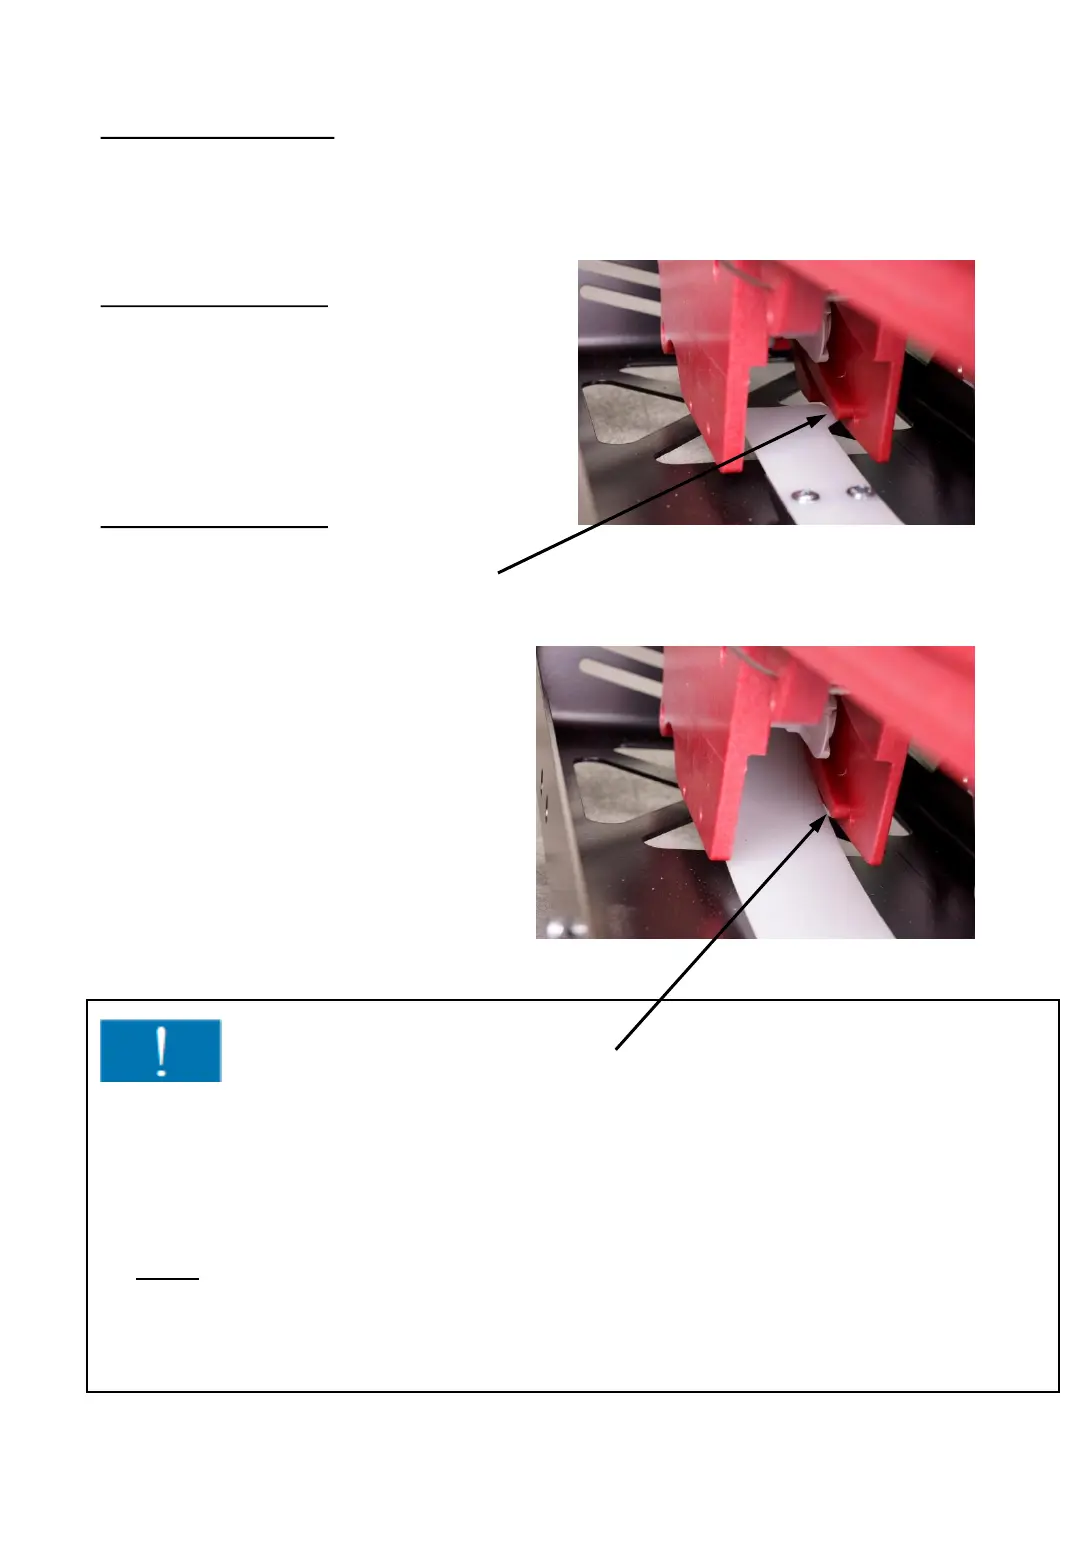
4. Step (installation)
Push the ChainLance all the way back
into the strapping system so that you can
see the groove of the length adjusting
belt.
5. Step (installation)
Push the new length adjusting belt
into the small groove below the
groove for the ChainLance.
3. Step (dismantling)
Remove the pin for setting the pallet width and pull out the length
adjusting belt.
- 61 -
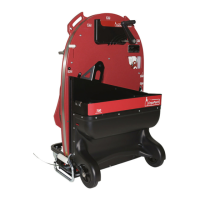
Fig. 85
Fig. 84
Important !
Make sure that also the cut out of the length adjusting belt is inserted into the
lower groove and that it does not slide into the upper groove of the ChainLance.
Further assembling is to be done in reversed dismantling order.
The screws may only be tightened until the stop nut engages. The screws have to
be loose and must not be tightened!
If the screws have been tightened too much, the storage plates will be pressed
together, the ChainLance and the length adjusting belt could become jammed!