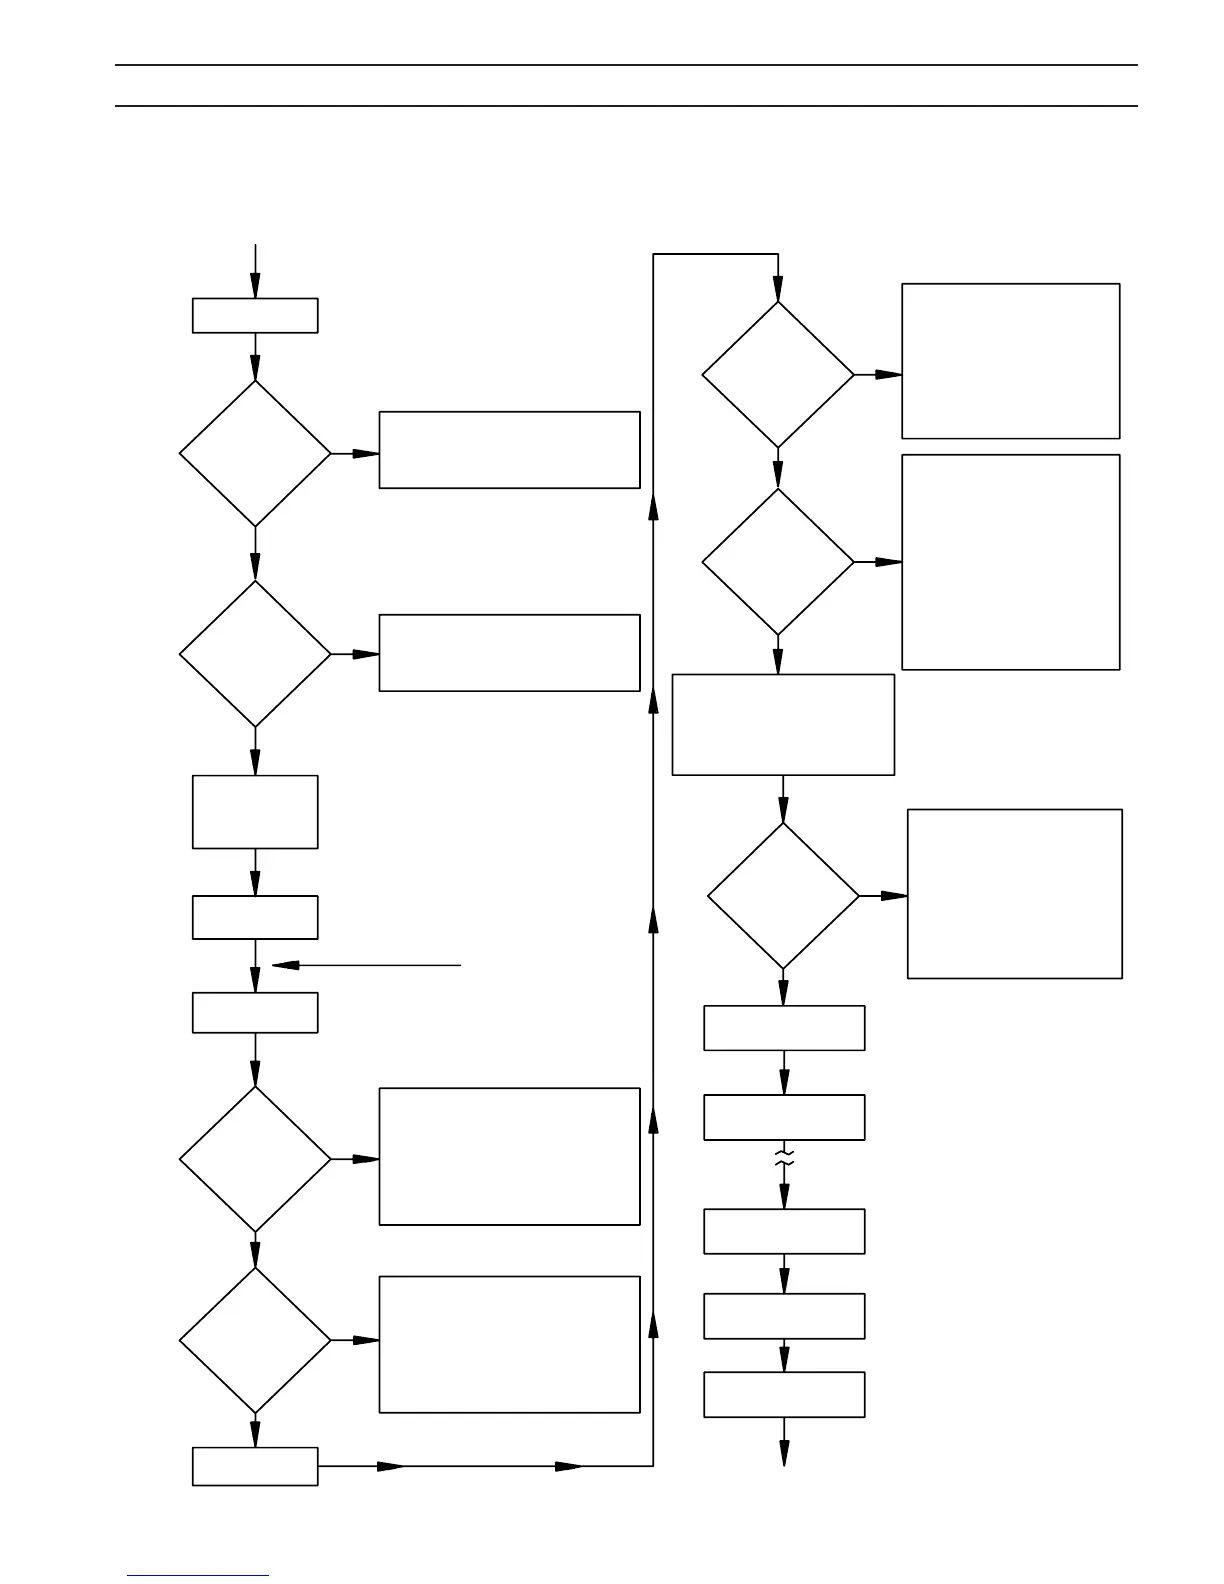
53
Proper Input
Power Applied
ROS ON
Is
OVER TEMP
Light
On?
1. Machine may be overheated.
2. Check connections to thermal switches
(TS).
Is
READY/LOW GAS
Light
On?
1. Close top lid.
2. Check ISW switch
3. Check CB1.
Set Gas(es) at proper
pressure with OSS
switch in CUT/START-
SHIELDmode.
Place OSS switch in
OPERATE
Depress Torch
Switch
Is
HIGH FREQ
Light
On?
Does
LOW GAS
Light GO
O?
1. Check input gas pressure.
2. Check gas ow of PT-26. Check to be
sure consumables are good and prop-
erly in place.
3. Check torch switch for intermittent con-
nection.
4. If using PT-26, check jumper between
pin 4 and 5.
1. Check OSS switch.
2. Check Torch Switch.
3. Check PAC contactor to insure 24 VAC is
applied to coil.
4. Check PC Board.
5. Check HFTR Transformer
2 second delay
Unit in Post Flow mode
and ready to cut again.
LOW GAS light
turns on
Release torch switch
Adjust cutting speed
HIGH FREQ light
goes out
Is
Main Arc
established
?
1. Check work lead connection.
2. Check consumables in torch.
3. Check for proper nozzle and
current. At low currents, the arc
length has to be closer to work.
4. Check all input voltages between
lines.
5. Check open circuit voltage.
6. Check diodes and SCR’s.
7. Check PC board.
Touch pilot arc to work piece within
6 sec. after pilot arc is established, or
pilot arc will turn o and begin cycling
on and o about every 3 sec.
1. Check consumables in torch.
2. Check torch connections using
ohmmeter.
3. Check open circuit voltage (325
VDC). (Disconnect HF to avoid
damaging meter.)
4. Check HF at spark gaps. (ISW
switch must be closed when
performing check.) May have to
reset spark gap.
5. Check PAC contactor.
6. Check R20 and R21 resistors.
1. Check open circuit voltage.
Should be about 370 VDC. (Dis-
connect HF to avoid damaging
meter.)
2. Check input power.
3. Check MC contactor.
4. Check diodes and SCR’s.
5. Check PC board.
Is
Pilot Arc
established
?
Does
TORCH ON
Light turn
on?
“A”
“A”
YES
NO
C. STATUS LIGHT TROUBLESHOOTING CHART
NO
YES
YES
NO
NO
YES
YES
NO
NO
YES
YES
NO
SECTION 5 MAINTENANCE