13
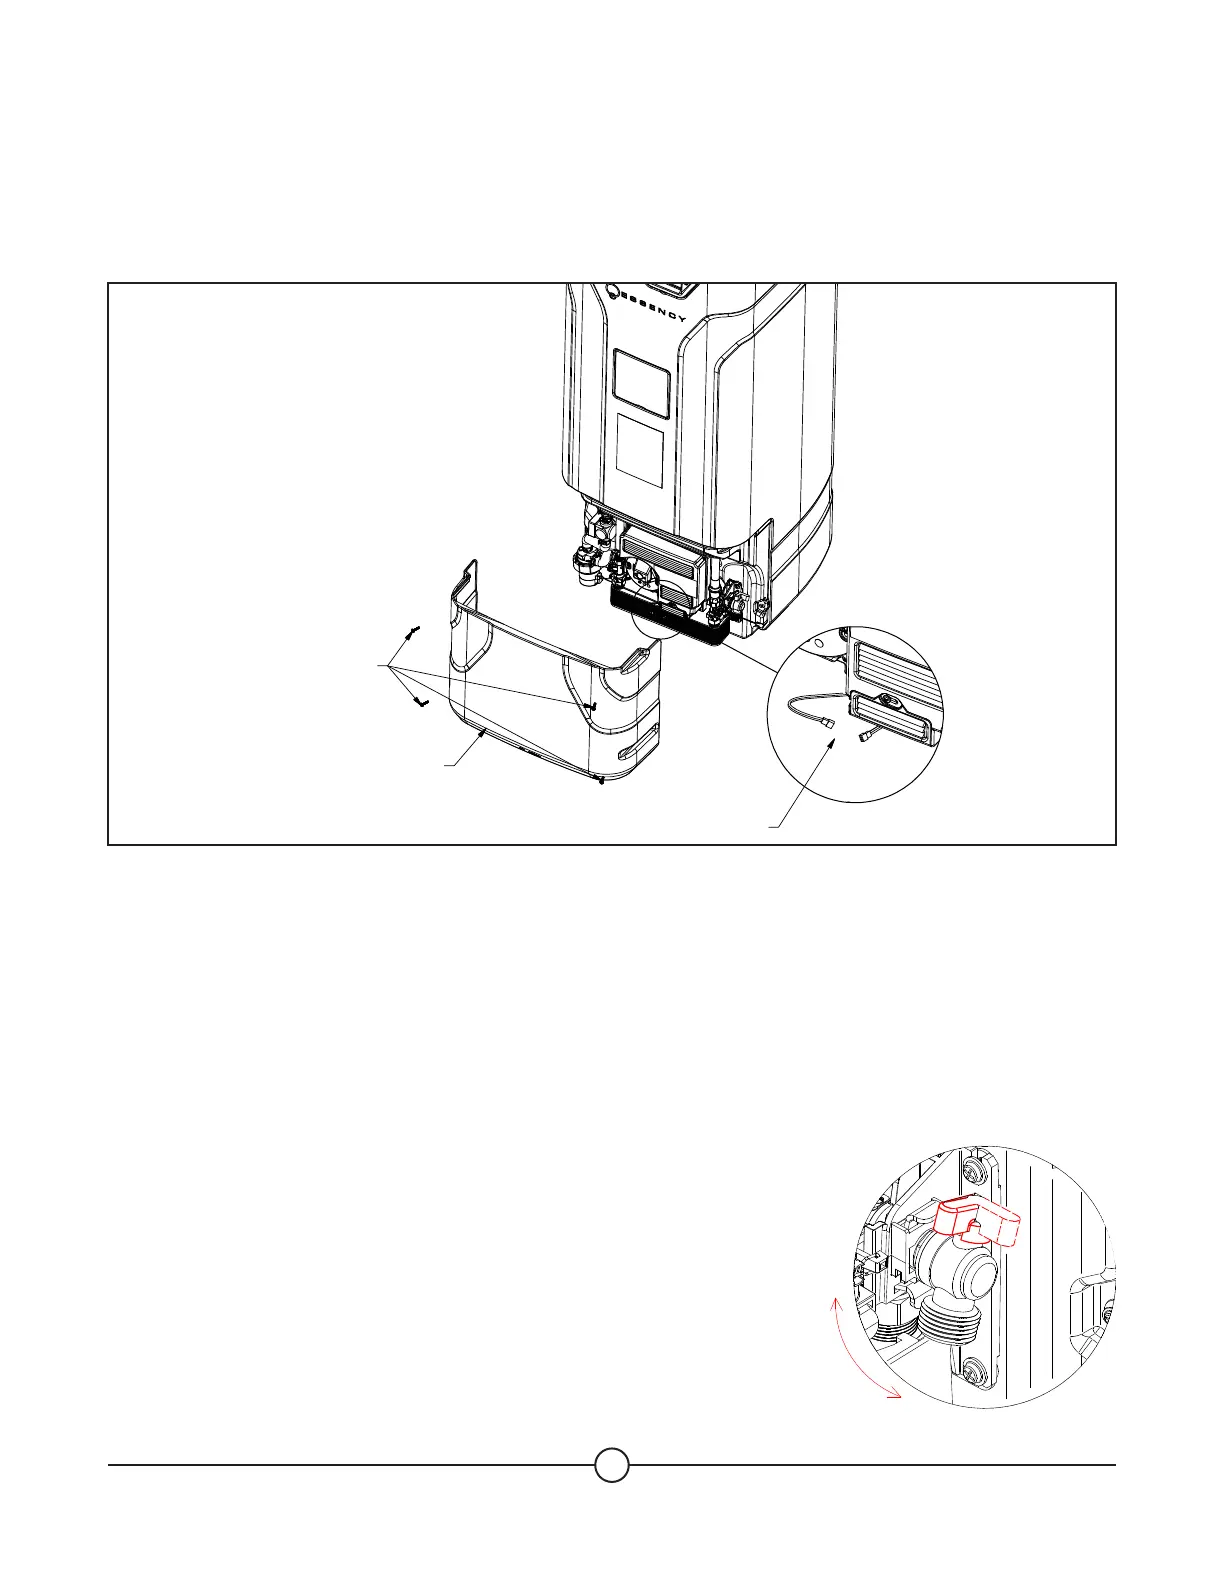
1. CONNECTING THE BATTERY
As a back-up in case of power failure, the water heater is equipped with a lithium-ion battery located behind
the lower cover of the unit. To connect this battery, before powering the unit, follow the steps as indicated
on the illustration below:
NOTICE: When reinstalling the cover, do not over-tighten the screws. The applied torque shall not exceed
1.1 lb.ft. After battery connection, the front cover is to be put back on, and left on, for the duration of the
installation.
NOTICE: The battery is intended to be used as an emergency back-up only, in case of power failure, and will
allow you to use the amount of hot water available in your tank at the time of power failure. It will not operate
the water heater heating elements, but only the variable speed pump at a moderate flow rate (corresponding
to a shower flow rate). Neither the touchscreen display nor the WiFi will be operational. It is not meant to be
used continually.
NOTICE: The water heater’s internal drain valve is closed by default from the
factory. Before proceeding with ‘Filling the Water Heater' step (see page 21),
ensure the valve is still closed. In the closed position, the red valve handle
will be facing out. In the open position, the red handle will be facing right.
1) Unscrew the 4 screws
2) Remove the cover
3) Connect the battery
Close
Open