12
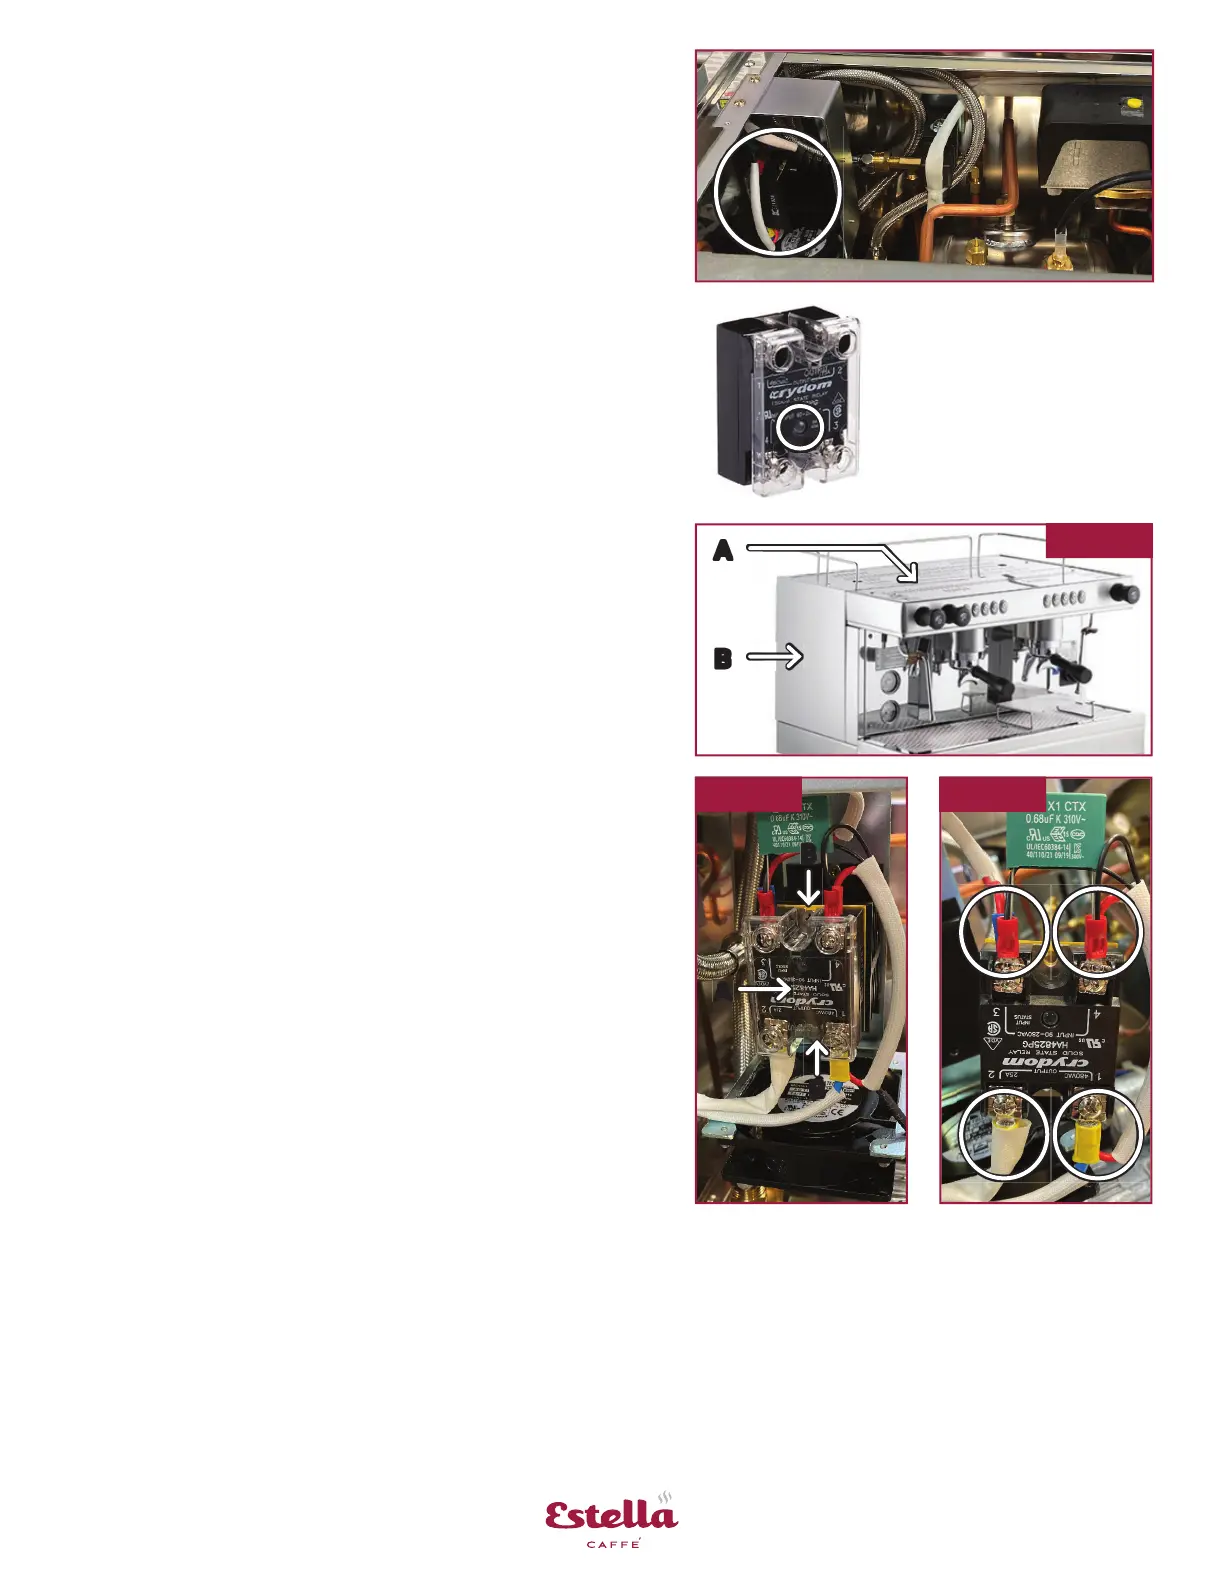
Fig. 25
Fig. 26 Fig. 27
A
B
A
B
B
Solid State Relay (SSR)
Time Estimate: Approximately 20 min.
Part: #236PECEM2 for 1 and 2 group units
#236PECEM3 for 3 group unit
1. Follow pre-maintenance steps from page 10
2. Remove 2 screws from top rear cover and
remove cover (Fig. 25 A)
3. Remove 2 screws from le side cover and
remove cover (Fig. 25 B)
4. Remove clear plas c cover, pull straight off
body of SSR (Fig. 26 A)
5. Remove the 2 moun ng screws from the top and
bo om (Fig. 26 B)
6. Pull away from heat sink, thermal pad between
heat sink and SSR comes with replacement SSR
7. Disconnect wire terminals from old SSR,
one terminal at a me (Fig. 27)
8. A ach wires to new SSR, one terminal at a me
9. Reassemble by reversing steps
10. Ensure connec ons are secure prior to
applying power to the unit
Te s ঞ ng
• Status Light, will illuminate when powered "on"
• On = pressure switch ac va on
• Check proper voltage from #1 to #2 and that boiler
element has voltage
• If status light is "on", but no power to boiler
element, Replace SSR
 Loading...
