15
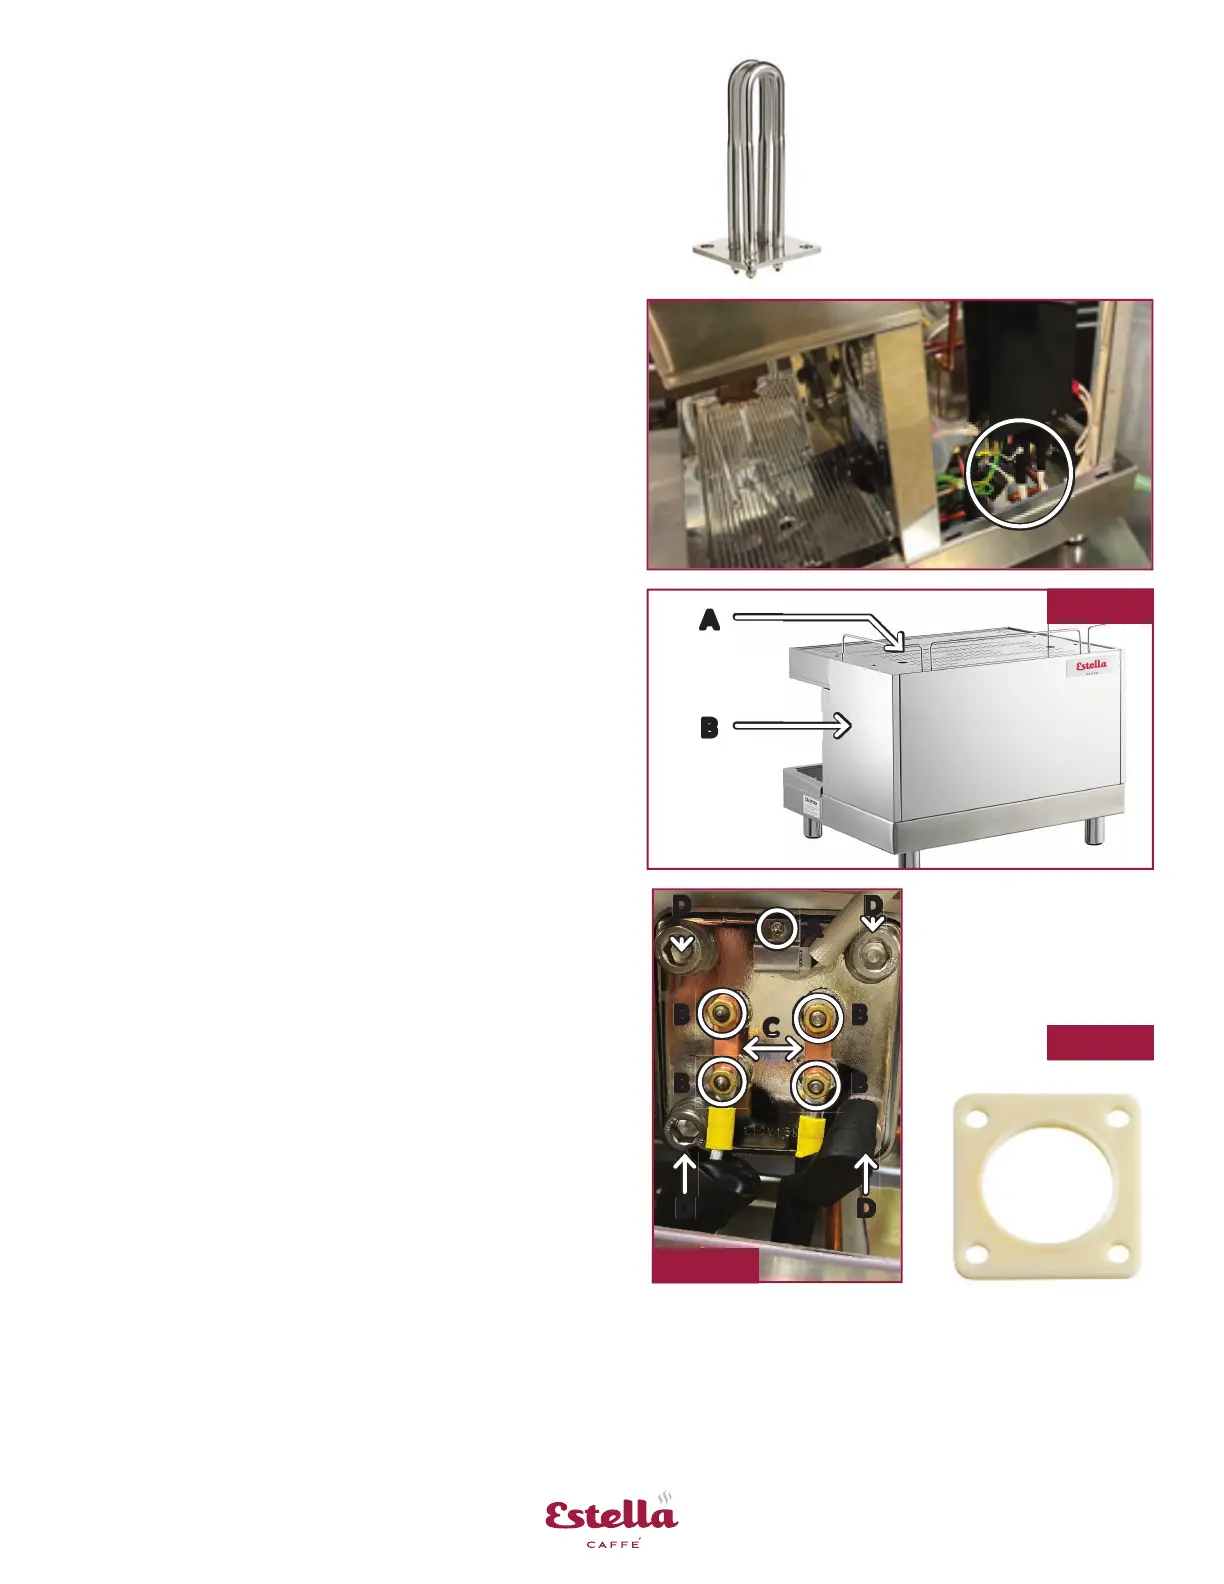
D
D D
D
A
C
B B
B B
1. Follow pre-maintenance steps from page 10
2. Remove 2 screws from top rear cover and
remove cover (Fig. 36 A)
3. Remove 2 screws from right side cover and
remove cover (Fig. 36 B)
4. Remove grounding wire clip (Fig. 37 A) with
2.5 mm hex key
5. Remove hex nuts from element wiring
(Fig. 37 B) with 8mm socket
6. Remove copper bus bars from element
(Fig. 37 C)
NOTE: Do not lose orienta on
7. Remove 4 socket head cap screws holding
element in place (Fig. 37 D) with 5mm hex key
8. Pull element from boiler tank
9. Note gasket orienta on, replace if necessary
(Fig. 38)
NOTE: Part #236PECEM10 for all units
10. Separate gasket from hea ng element
11. Reassemble by reversing steps
Fig. 36
Fig. 37
A
B
Boiler Element
Time Estimate: Approximately 60 min.
Part: #236PECEM7 for 1 group unit
#236PECEM8 for 2 group unit
#236PECEM9 for 3 group unit
Te s ঞ ng
• Disconnect wires and bus bars from element
before tes ng
• Part #236PECEM7 for 1 group unit should read
~9.2 ohms across each loop
• Part #236PECEM8 for 2 group unit should read
~11.5 ohms across each loop
• Part #236PECEM9 for 3 group unit should read
~ 7.3 ohms across each loop
• Element will only have power when SSR is on,
check status light on SSR
Fig. 38
NOTE: This is a good ঞ me to inspect for scale build up inside of boiler
 Loading...
