23
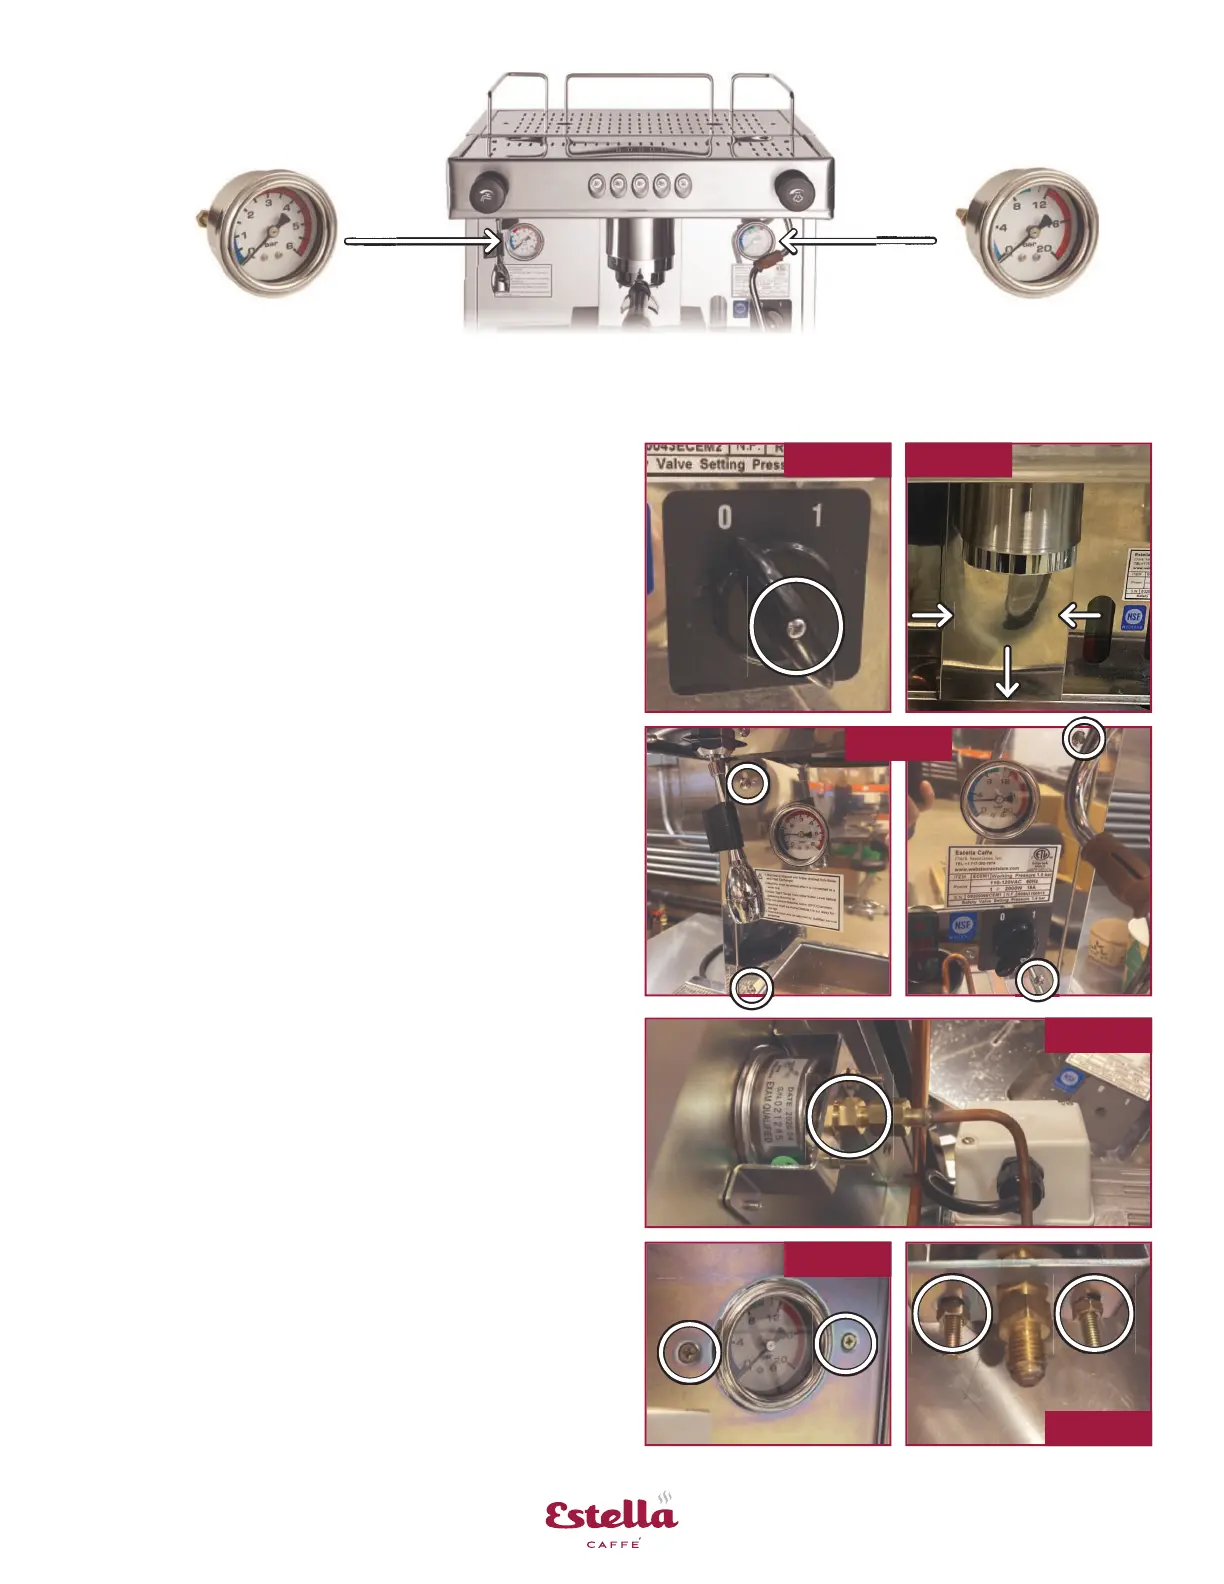
1. Follow pre-maintenance steps from page 10
2. Ensure cup drain pan has been removed
3. Remove screw from on/off switch knob
and remove knob (Fig. 68)
4. Remove center cover behind group
dispensing area (Fig. 69)
• Apply pressure to either side of cover
to remove from slots in front panel
• Slide down into drain pan cup area
5. Remove 4 screws from front panel (Fig. 70)
with 4mm hex key
6. Remove brass hex nut from back of gauge
(Fig. 71)
7. Remove 2 screws from front of gauge to
remove from unit (Fig. 72)
8. Remove 2 hex nuts from back of gauge
mount (Fig. 73)
9. Reassemble by reversing steps
Fig. 69
Fig. 70
Fig. 71
Fig. 72
Fig. 73
Fig. 68
Gauges, Steam Pressure, and Water Pressure
Time Estimate: Approximately 25 min.
Steam Pressure Gauge
#236PECEM34
Water Pressure Gauge
#236PECEM33
 Loading...
