12
8.2. Feedback status
For testing purposes it is often helpful to indicate the actual occu-
pancy status by a visual display. This is possible in the configuration
menu. The status “occupied” is indicated for each feedback input
by “filled square” on the touch panel of the command station.
8.3. Finding an ECoSDetector
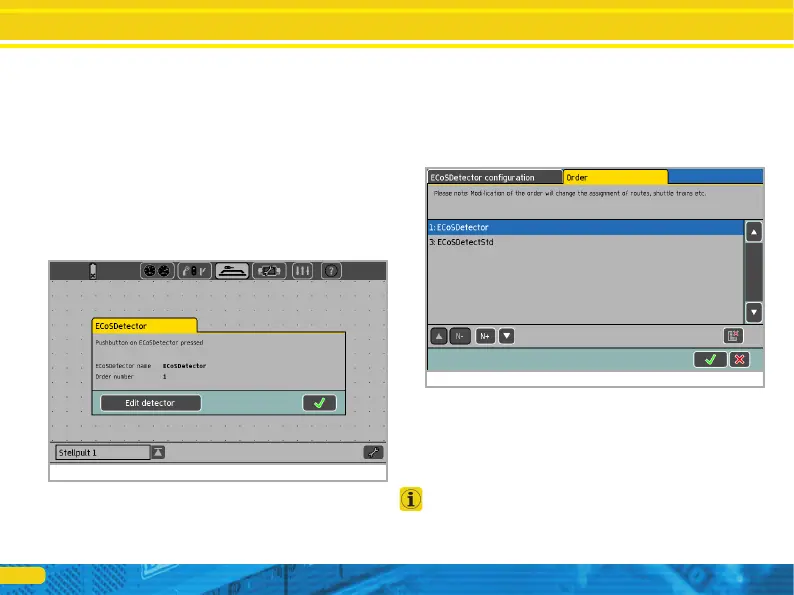
After pressing the screen button “Blinking” in the configuration
dialogue (also refer to figure 12) the LED of the ECoSDetector
starts blinking rhythmically. This makes it far easier for you to find
the module.
Alternately you can press the button on the ECoSDetector at any
time. A dialogue window will open on the ECoS screen that dis-
play both name and indenture number of the module.
8.4. Administration of several ECoSDetectors
When your layout grows and you wish to use several ECoSDetec-
tor modules it may become necessary to change the indenture
numbers at a later stage. We have developed a comfortable me-
thod for this.
• Press the tab “Administration” of any ECoSDetector in the confi-
guration menu. A window similar to that in figure 14 will open.
The list displays all detected ECoSDetector modules with their
names and indenture numbers. The list is sorted by indenture
number.
If you now wish to assign a new indenture number to an ECoS-
Detector simply mark the module concerned and press the button
«N+» in order to increase the number or press «N-» in order to
decrease the number.
Please make sure that all modules have different numbers.
Figure 13: Find the ECoSDetector
Figure 14: Administration of several ECoSDetector modules
Configuration on the command station