27971-01A
Installation - Remote Connections
24
NOTE: A T-Max® 1A with a
“master” chip can be substituted
for a 3A.
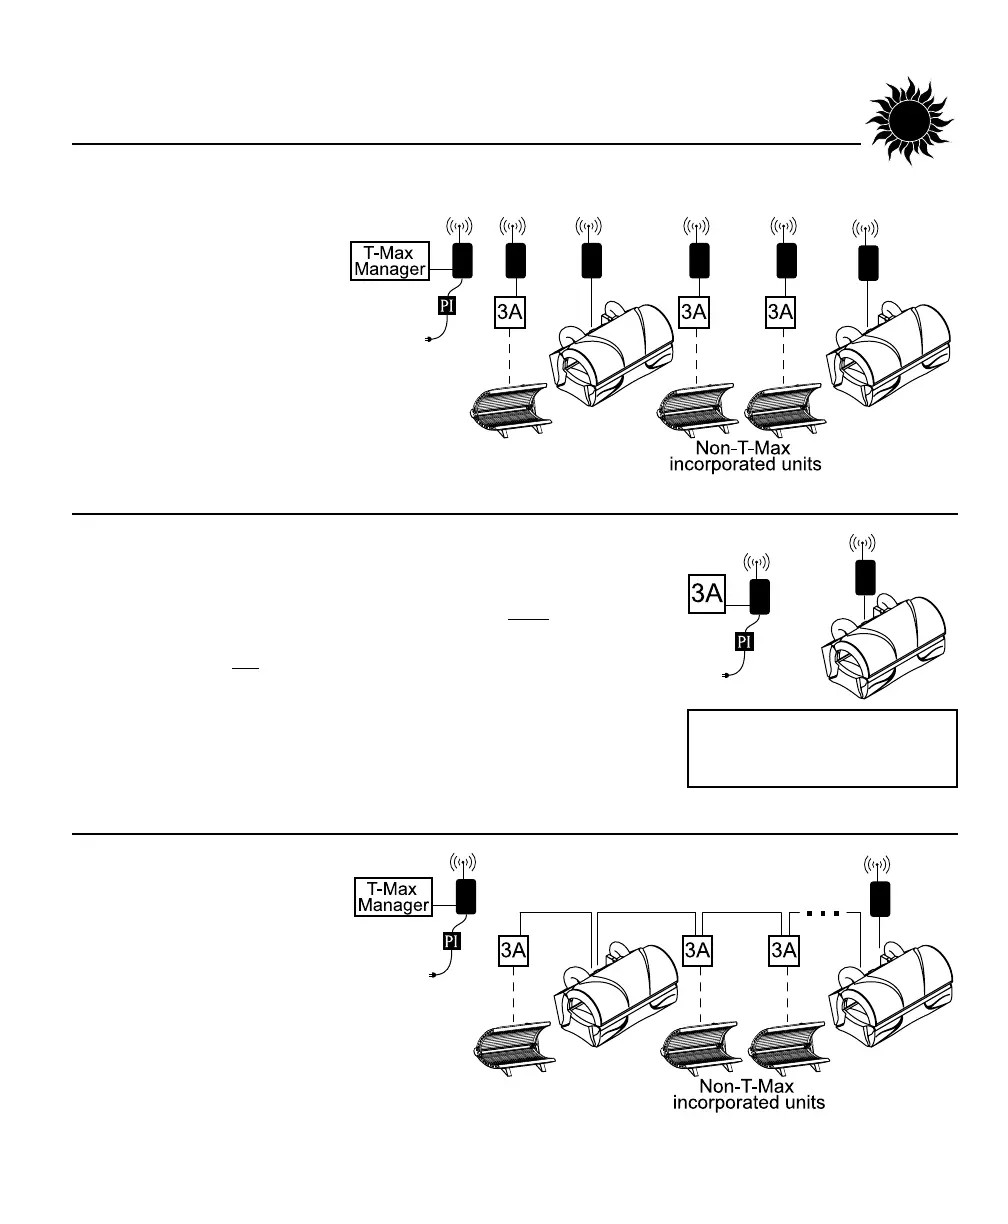
Scenario 1 - T-Max® Manager Series with Complete Wireless
Connect one AP-900 (with Power Injector)
to the Manager and one AP-900
to each of the tanning beds.
Install as many beds as you like
with this configuration. Units that do not
communicate with T-Max will need an
AP-900 with Power Injector and an additional 3A
to operate. If you have an older T-Max®
Manager that doesn’t support auto address-
ing, set the address of each sunbed manually
as described in Setting the address manually. You can place your
sunbed at any location in the series.
Scenario 2 - T-Max 3A with Wireless
In single sunbed installations, the T-Max® 1A and 3A can offer the
same control as the T-Max® Manager, eliminating the need for a
Manager. If you’re using a 1A in this manner, it must
have a chip
labelled “master” installed on its circuit board. The remote control
bypass plug must not
be used in this configuration. The 3A may be
used as a “master” with no modification.
After you have set the T-Max® 1A’s, or 3A’s, address to “0” (refer to
your T-Max® user’s guide) and the sunbed’s address to “1”, simply
connect one AP-900 (with Power Injector) to the T-Max® 3A and one
AP-900 to the tanning bed.
Scenario 3 - T-Max® Manager
Series with Wireless combo
Connect one AP-900 (with
Power Injector) to the Manager
and one AP-900 to a wireless ready
tanning bed. The rest of the salon may
be “daisy-chained” together and connected to
the wireless equipped tanning bed, eliminat-
ing the need to wire the Manager to the tan-
ning beds.