21
2119167-07-09/23 (translation of the original operating instructions)
Operating Instructions Safety Systems
MGB-L1…-AR.-… / MGB-L2…-AR.-… and MGB-L1…-AP.-… / MGB-L2…-AP.-…
EN
10. Changing actuating direction (here: from right to left)
Important!
It is possible to make this change only when the bolt tongue is not extended and an escape release
is not yet mounted.
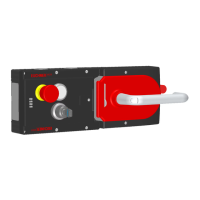
In the delivery state, the handle module is set either for doors hinged on the right or for doors hinged on the left.
Based on the example of a handle module for doors hinged on the right this means:
Ì The guard opens by pressing down the door handle.
Ì The system is mounted the other way around for doors hinged on the left. In other words, the guard opens by pressing up the
door handle (see Fig. 9). For this reason the actuating direction of the door handle must be changed (see Fig. 9 to Fig. 14).
(Similarly on handle modules for doors hinged on the left)
CLOSED
OPEN
1
3
2
Push door handle up.
Unscrew locking screws
Push cover aside.
Fig. 9: Changing actuating direction, step
Fig. 10: Changing actuating direction, steps
and
5
4
Lift the locking pin on the door handle using a screwdriver and hold
it in this position.
Turn door handle to the right.
7
8
6
b
a
T10
Only on the use of an escape release: using the T10 screw, turn
the joint counterclockwise from position (a) to position (b).
Close cover.
Screw in locking screws and tighten to 0.8 Nm.
Fig. 11: Changing actuating direction, steps
and
Fig. 12: Changing actuating direction, steps
to

 Loading...