PROTEUS user manual
Issue C
20
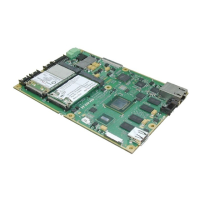
Getting started with your PROTEUS
What do need?
There are three basic configurations that can be used to access to your PROTEUS
board:
• PROTEUS board, TFT LCD display kit, keyboard/mouse, USB hub, and power.
• PROTEUS board, LVDS to VGA adapter, monitor, keyboard/mouse, USB hub, and
power.
• PROTEUS board with preinstalled remote access, Ethernet, and power.
Connecting your PROTEUS
PROTEUS stand alone configuration
1 Connect display/adapter cable to LVDS A connector (J4).
2 Connect USB hub to USB connector.
3 Connect keyboard and mouse to the USB hub.
4 Connect green power connector plug to a cable coming from a DC power supply. The
power supply output voltage should be between +8.5 to +24V (+12V nominal). Check
polarity.
5 Switch on display/monitor power.
6 Connect power cable to the PROTEUS board.
7 Switch on power supply.
The board starts with the Eurotech logo splash screen. If a device with booting
capability is connected (or on board FLASH is preloaded with OS) then the board
boots from this, if not the BIOS screen is shown.