TH
I
S
S
I
D
E UP
Arrow
m
us
t be leve
l
w
ith ground
whe
n use
d
rear
-fac
ing.
Used
for
Rear-
faci
ng
ONLY
.
1
Used for
Fo
rward-faci
ng O
NLY
.
3
2
&
Recline
Posit
io
ns
23
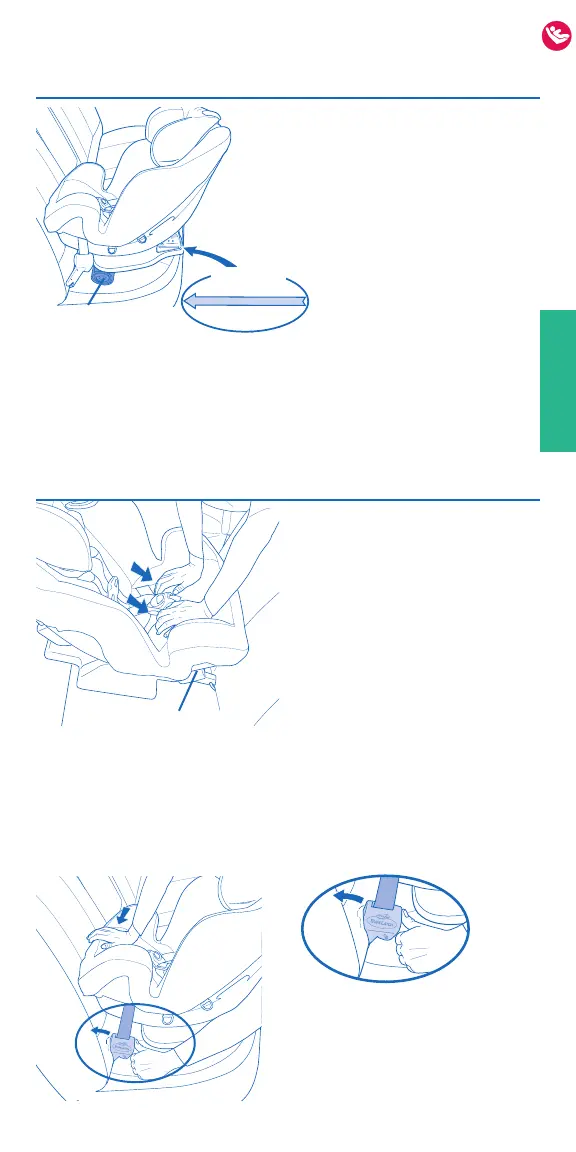
4. Secure the child
restraint.
Using your full weight,
push the child restraint
firmly into the vehicle seat
,
as shown, to lock in place
.
Rear-facing Belt Path
IMPORTANT: To properly secure this child restraint, it
MUST NOT move more than 25 mm (1 inch) from side-to-
side or from front-to-back at the rear-facing belt path.
If you cannot tightly secure the child restraint, try again or
move it to another location.
3. Increase recline
angle, if necessary.
If level line is not parallel
to the ground, disconnect
SureLatch connectors
and place a tightly rolled
towel/small blanket
beneath the front edge
of the child restraint.
Repeat Step 2.
Tightly rolled towel
or small blanket
Note: In some vehicles, you may
need to prop up the connector
while
pushing downward on the
seat to secure it tightly. Repeat
for the other connector.
IMPORTANT: Infants may have difficulty breathing when
in a sitting position. Make sure they recline enough for their
head to lie back comfortably and safely. Failure to properly
recline the child restraint could increase the child’s risk
of serious injury or death.
Rear-facing Installation with SureLatch
Connectors
Level Line
Rear-facing