12 For Professional Technical Support call 1-844-241-5521
Deep Well Installation (continued)
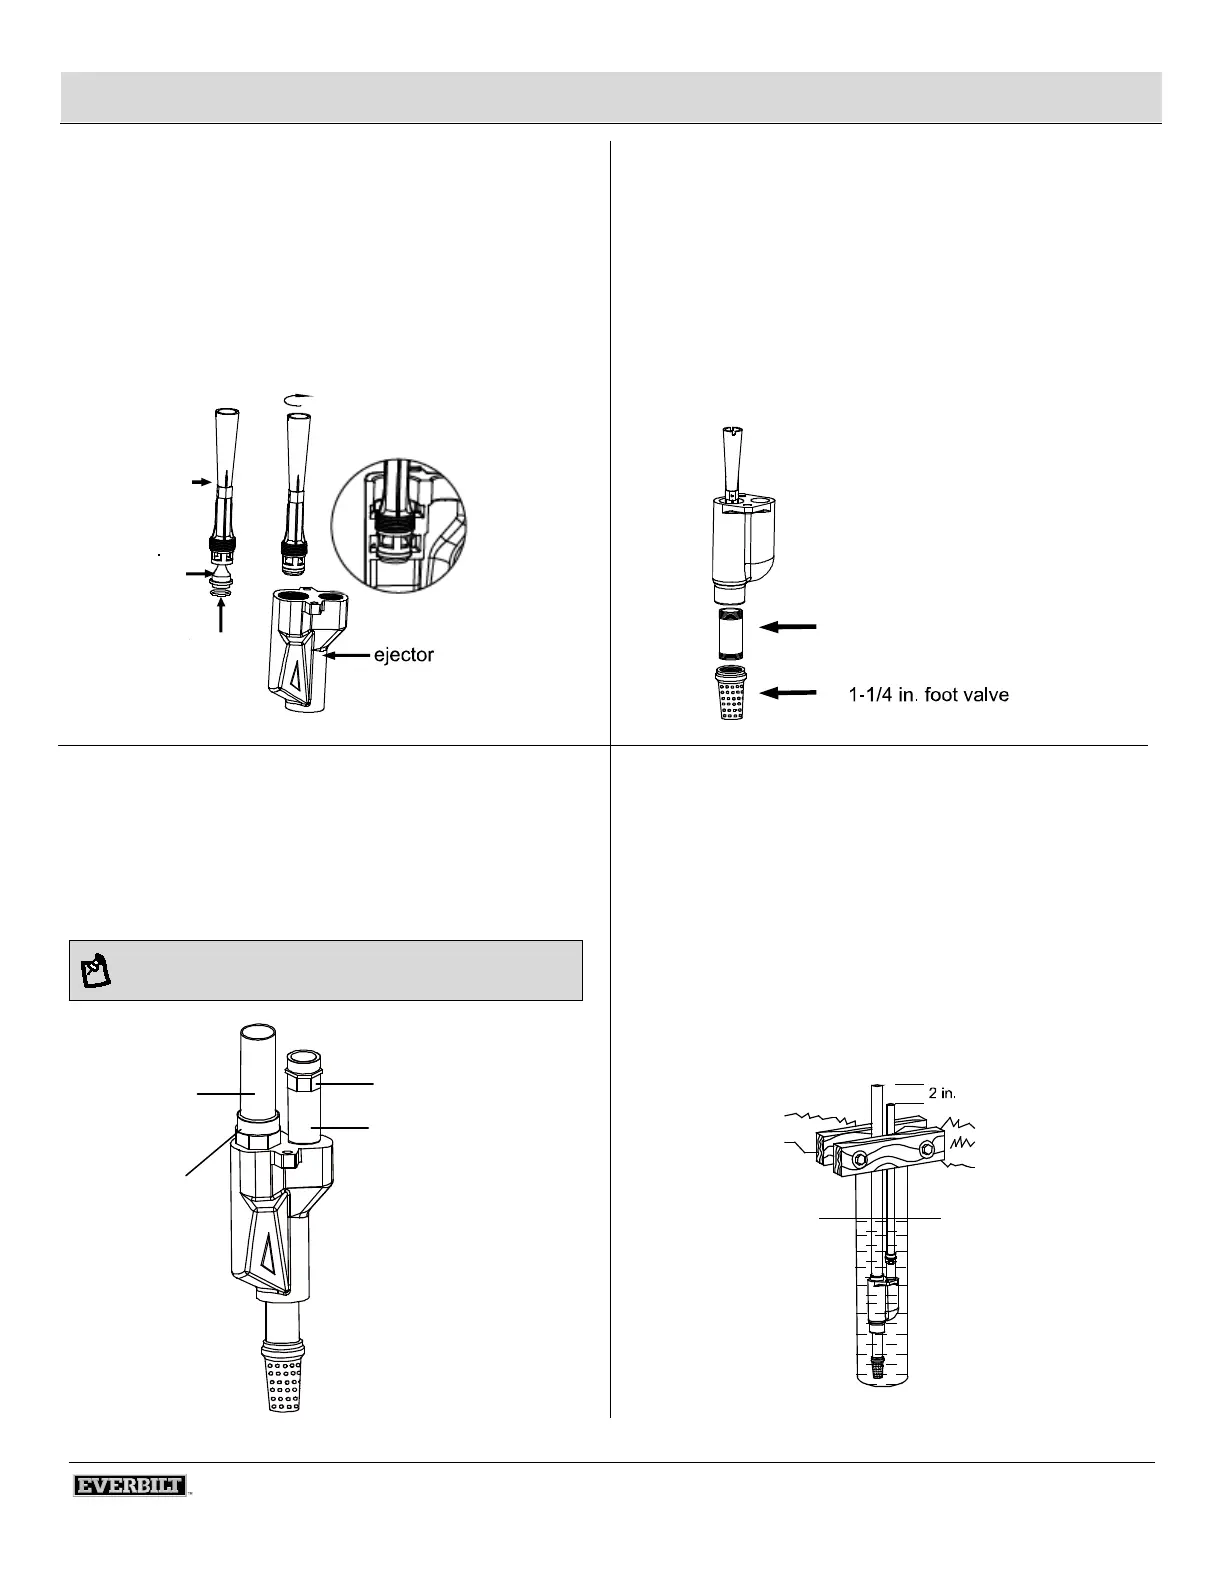
2
Attaching the nozzle and venturi to the
ejector
3
Connecting the (A) foot valve to the
ejector
Wrap the threads of the venturi tube (2) (J32P-18/#11) with
thread tape.
Attach the O-ring (4) on the nozzle (3) (#02) and screw the nozzle
(3) (#02) into the venturi tube (2) (J32P-18/#11).
Attach the venturi tube (2) (J32P-18/#11) with the nozzle (3) and
O-ring (4) to the Ejector.
Wrap both ends of a (U) 1-1/4 in. x 4 in. nipple (sold
separately), with tread tape.
Thread the npple into the (A) 1-1/4 in. foot valve (sold
separately).
Thread the other end of the nipple into the bottom of the
ejector.
Hand tighten, and then tighten 1-1/2 turn with a pipe wrench.
4
Connecting the Ejector to the (T) 1 in.
nipple or Flexible pipe, and (E) 1-1/4
in. Schedule 80 PVC or Flexible pipe to
the ejector
5
Sliding the pipe assembly into the
well
Connect two pipes (1 in. drive, 1-1/4 in suction) to the ejector.
NOTE: If use PVC pipe to connect, a 1 in. x 3 in. nipple is
required.
Before sliding the pipe assembly into the well, firmly clamp the
assembly with a pipe clamp (not included) to prevent the
assembly from sliding down into the well.
Keep the 1 in. pipe 2 in. shorter than the 1-1/4 in. pipe.
The amount of PVC pipe or flexible pipe is based on well depth
to water
2
3
4
(U) 1-1/4 in. x 4 in. nipple
(A)
(C) 1 in. Female Adaptor
(T) 1 in. nipple
(E) 1-1/4 in.
Pipe
(P) 1-1/4 in.
Male Adaptor