Maintenance
Alwaysmowwithasharpblade.Asharpbladecuts
cleanlyandwithouttearingorshreddingthegrass
blade.
1.Stoptheengineandwaitforallmovingpartsto
stop.
2.Disconnectthewirefromthesparkplug.
3.Drainthegasolinefromthefueltank.Referto
EmptyingtheFuelTankandCleaningthe
FuelFiltersection.
4.Tipthelawnmowerontoitsrightside.
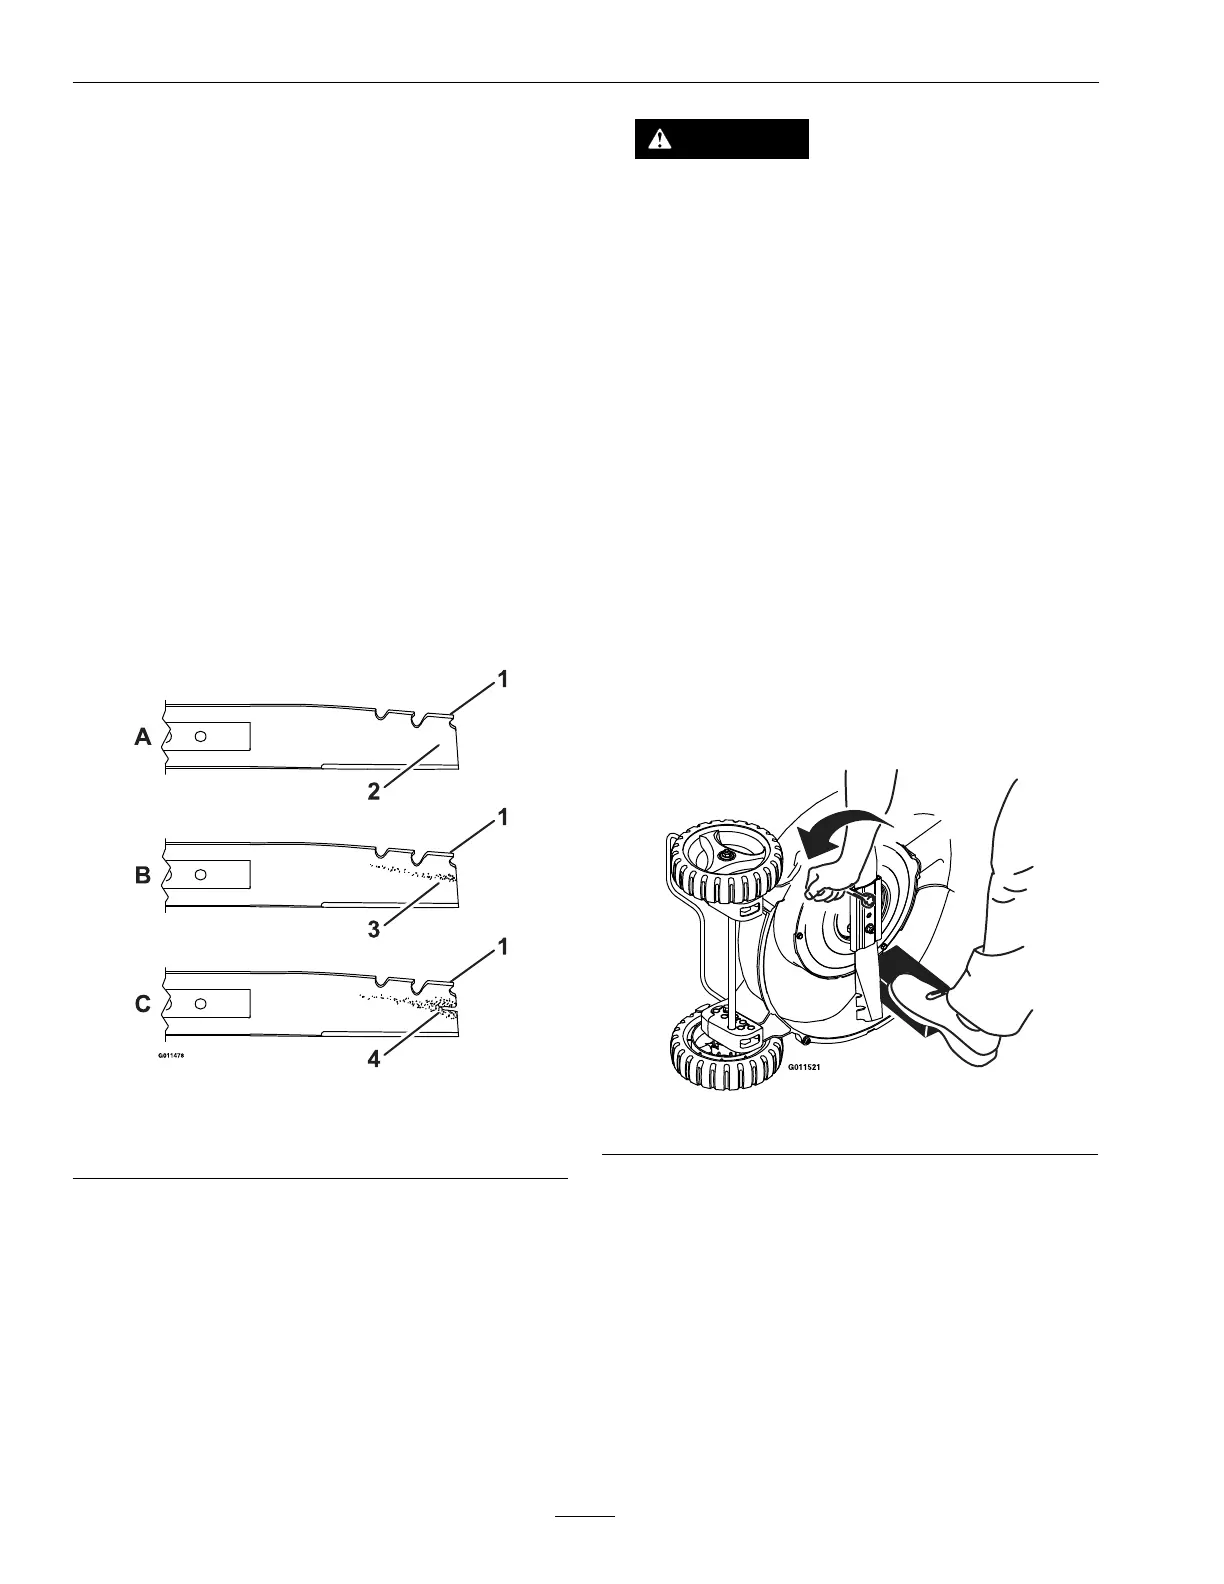
5.Inspectthebladeforsharpnessandwear,
especiallywheretheatandthecurvedparts
meet(seeFigure18).Becausesandandabrasive
materialcanwearawaythemetalthatconnects
theatandcurvedpartsoftheblade,check
thebladebeforeusingthelawnmower.Ifyou
noticeaslotorwear(Figure18BandFigure18C),
replacetheblade.
Figure18
1.Sail
3.Wear
2.Flat
4.Slot
Note:Forthebestperformance,installanew
bladebeforethecuttingseasonbegins.During
theyear,ledownanysmallnickstomaintainthe
cuttingedge.
DANGER
Awornordamagedbladecanbreak.A
pieceofthebladecouldbethrownintothe
operator’sorbystander’sarea,resultingin
seriouspersonalinjuryordeath.
•Inspectthebladeperiodicallyforwearor
damage.
•Replaceawornordamagedblade.
Ifitisnecessarytoremovethebladefor
replacementorsharpening,completethe
followingsteps:
A.Toremovetheblade,useablockofwoodto
holdthebladesteady(seeFigure19).Make
suretograsptheendofthebladeusingarag
orathicklypaddedglove.
•ForBladeBrakeClutchUnits:Remove
thebladenuts,bladesupport,andblade.
•ForUnitswithoutaBladeBrake
Clutch:Removethebladebolt,blade
support,andblade.
Figure19
B.ForSharpening:Filethetopsideofthe
bladetomaintainitsoriginalcuttingangle
(Figure20AandB)andinnercuttingedge
radius(Figure20A).Thebladewillremain
balancedifyouremovethesameamountof
materialfrombothcuttingedges.
24