Maintenance
Note:Checkandadjusttheside-to-sideblade
levelifyouhavenotcheckedthesetting;referto
Side-to-SideLeveling.
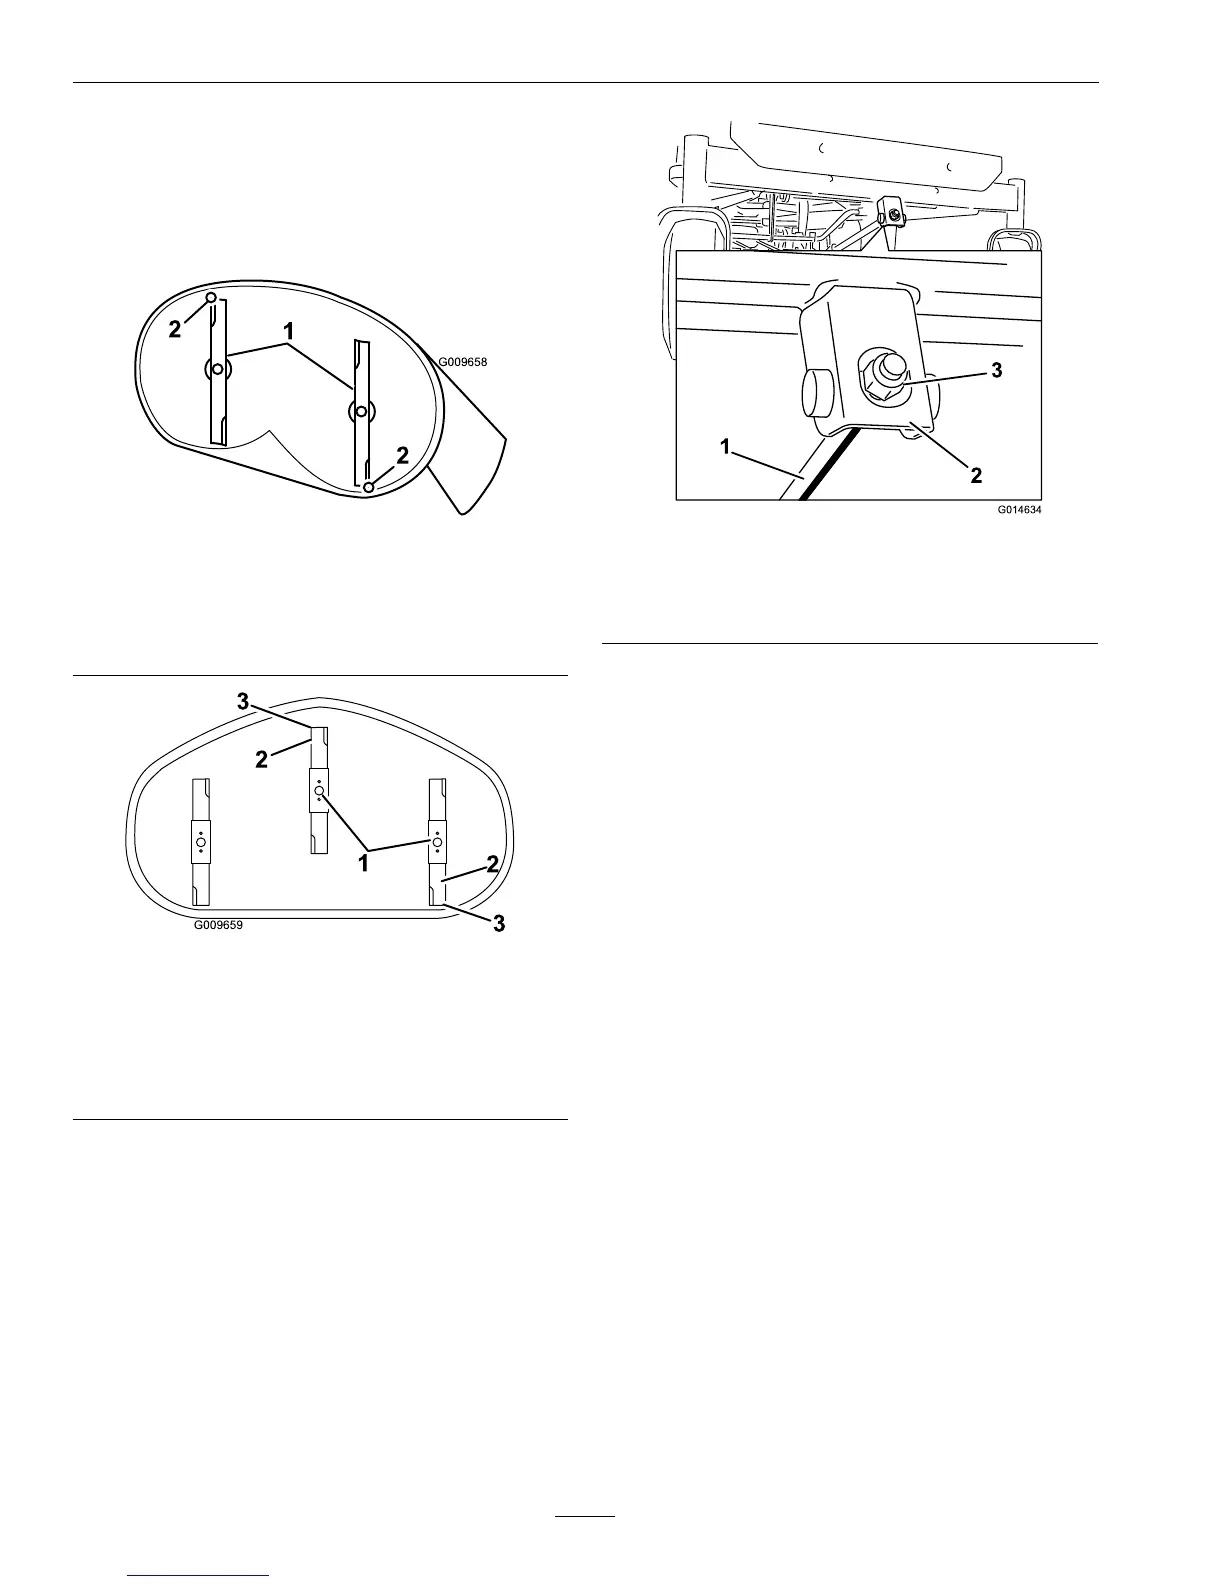
4.Carefullyrotatethebladessotheyarefacingfront
torear(Figure72andFigure73).
g009658
Figure72
MowerDeckwith2Blades
1.Bladesfronttorear
2.Measurefromthetipofthebladetotheatsurfacehere
g009659
Figure73
MowerDeckwith3Blades
1.Bladesfronttorear
2.Outsidecuttingedges
3.Measurefromthetipofthebladetotheatsurfacehere
5.Measurefromthetipofthefrontbladetotheat
surfaceandthetipoftherearbladetotheat
surface(Figure72andFigure73).Ifthefront
bladetipisnot1/16-5/16inch(1.6-7.9mm)lower
thantherearbladetip,adjustthefrontlocknut.
6.Toadjustthefront-to-rearbladeslope,rotate
theadjustmentnutinthefrontofthemower
(Figure74).
g014634
Figure74
1.Adjustingrod3.Locknut
2.Adjustingblock
7.Toraisethefrontofthemower,tightenthe
adjustmentnut.Tolowerthefrontofthemower,
loosentheadjustmentnut.
8.Afteradjustment,checkthefront-to-rearslope
again.Continueadjustingthenutuntilthefront
bladetipis1/16-5/16inch(1.6-7.9mm)lower
thantherearbladetip(Figure72andFigure73).
9.Whenthefront-to-rearbladeslopeiscorrect
checktheside-to-sidelevelofthemoweragain;
refertoSide-to-SideLeveling.
RemovingtheMowerDeck
ServiceInterval:Asrequired
1.Parkthemachineonalevelsurfaceanddisengage
thebladecontrolswitch.
2.Movethemotioncontrolleversouttotheneutral
lockposition,engagetheparkingbrake,stopthe
engine,removethekey,andwaitforallmoving
partstostopbeforeleavingtheoperatingposition.
3.Lowertheheight-of-cutlevertothelowest
position.
4.Removethehairpincotterfromthefrontsupport
rodandremovetherodfromthedeckbracket
(Figure75).Carefullylowerthefrontofthe
mowerdecktotheground.
60
 Loading...