PERIODIC MAINTENANCE AND MINOR REPAIR
6-4
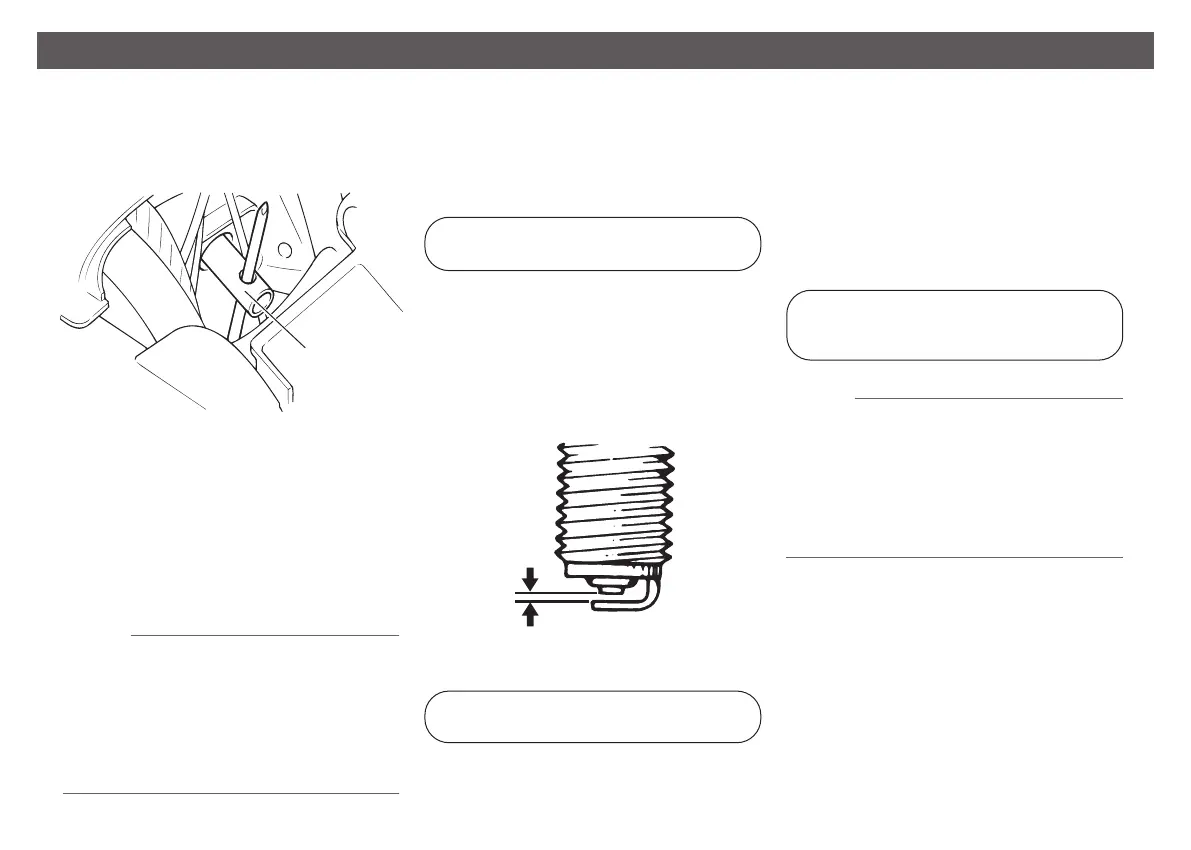
3. Remove the spark plug as shown,
with the spark plug wrench in-
cluded in the owner’s tool kit.
1. Spark plug wrench
To check the spark plug
1. Check that the porcelain insulator
around the center electrode of the
spark plug is a medium-to-light tan
(the ideal color when the vehicle is
ridden normally).
NOTE:
If the spark plug shows a distinctly dif-
ferent color, the engine could be oper-
ating improperly. Do not attempt to di-
agnose such problems yourself. In-
stead, have a Explorer dealer check the
vehicle.
2. Check the spark plug for electrode
erosion and excessive carbon or
other deposits, and replace it if
necessary.
Specied spark plug:
BR8HSA (NGK)
To install the spark plug
1. Measure the spark plug gap with a
wire thickness gauge and, if nec-
essary, adjust the gap to speci-
cation.
1
1. Spark plug gap
Spark plug gap:
0.6 ~ 0.7 mm
2. Clean the surface of the spark plug
gasket and its mating surface, and
then wipe o any grime from the
spark plug threads.
3. Install the spark plug with the spark
plug wrench, and then tighten it to
the specied torque.
Tightening torque:
Spark plug:
12 Nm
NOTE:
If a torque wrench is not available when
installing a spark plug, a good estimate
of the correct torque is 1/4 ~ 1/2 turn
past nger tight. However, the spark
plug should be tightened to the speci-
ed torque as soon as possible.
4. Install the spark plug cap.
5. Install the panel.
1