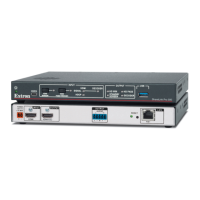
ShareLink 200 N • Installation 6
Setting Up the Standby Screen
Once the ShareLink 200 N is connected and powered on, the default standby screen
(see figure 4) appears on the display.
Figure 4. Standby Screen
1
Instructional screen — Provides instructions for starting a presentation. The
background image of the instructional screen can be customized (see OSD Setup on
page 29).
2
Calibration tool icon ( )— Double-click to open the Calibration tool (for
touchscreens only). This feature allows you to calibrate a touchscreen for accuracy, if
needed (see Using the Calibration Tool on the next page).
3
Screen Resize tool icon ( )— Double-click to use the screen resize tool. This
feature allows you to change the size of the screen presented on the display (see Using
the Screen Resize Tool on page 8).
4
Whiteboard icon ( )— Click to use the display as a whiteboard. This feature allows
the presenter to draw on a blank screen using a mouse or touchscreen (see Using the
Whiteboard Feature on page 9).
5
USB Player icon ( )— Click to access the USB Player. This feature allows the
presenter to access photos, videos, audio files, and documents directly from the
connected USB flash drive (see Using the USB Player on page 10).
6
IP Address — Use this IP address to identify and access the ShareLink 200 N during
connection (see Setting up the ShareLink Software on page 12).
7
Hostname — Use this Hostname to identify and access the ShareLink 200 N during
connection through the ShareLink software. This hostname can be customized in the
configuration pages (see Network Setup,
1
on page 27).
8
Code — Use this code to access the ShareLink 200 N device through the software (see
Connecting a Computer to the ShareLink 200 N on page 11). The code can be
customized or disabled (see Device Setup on page 26).