Page 37 of 72
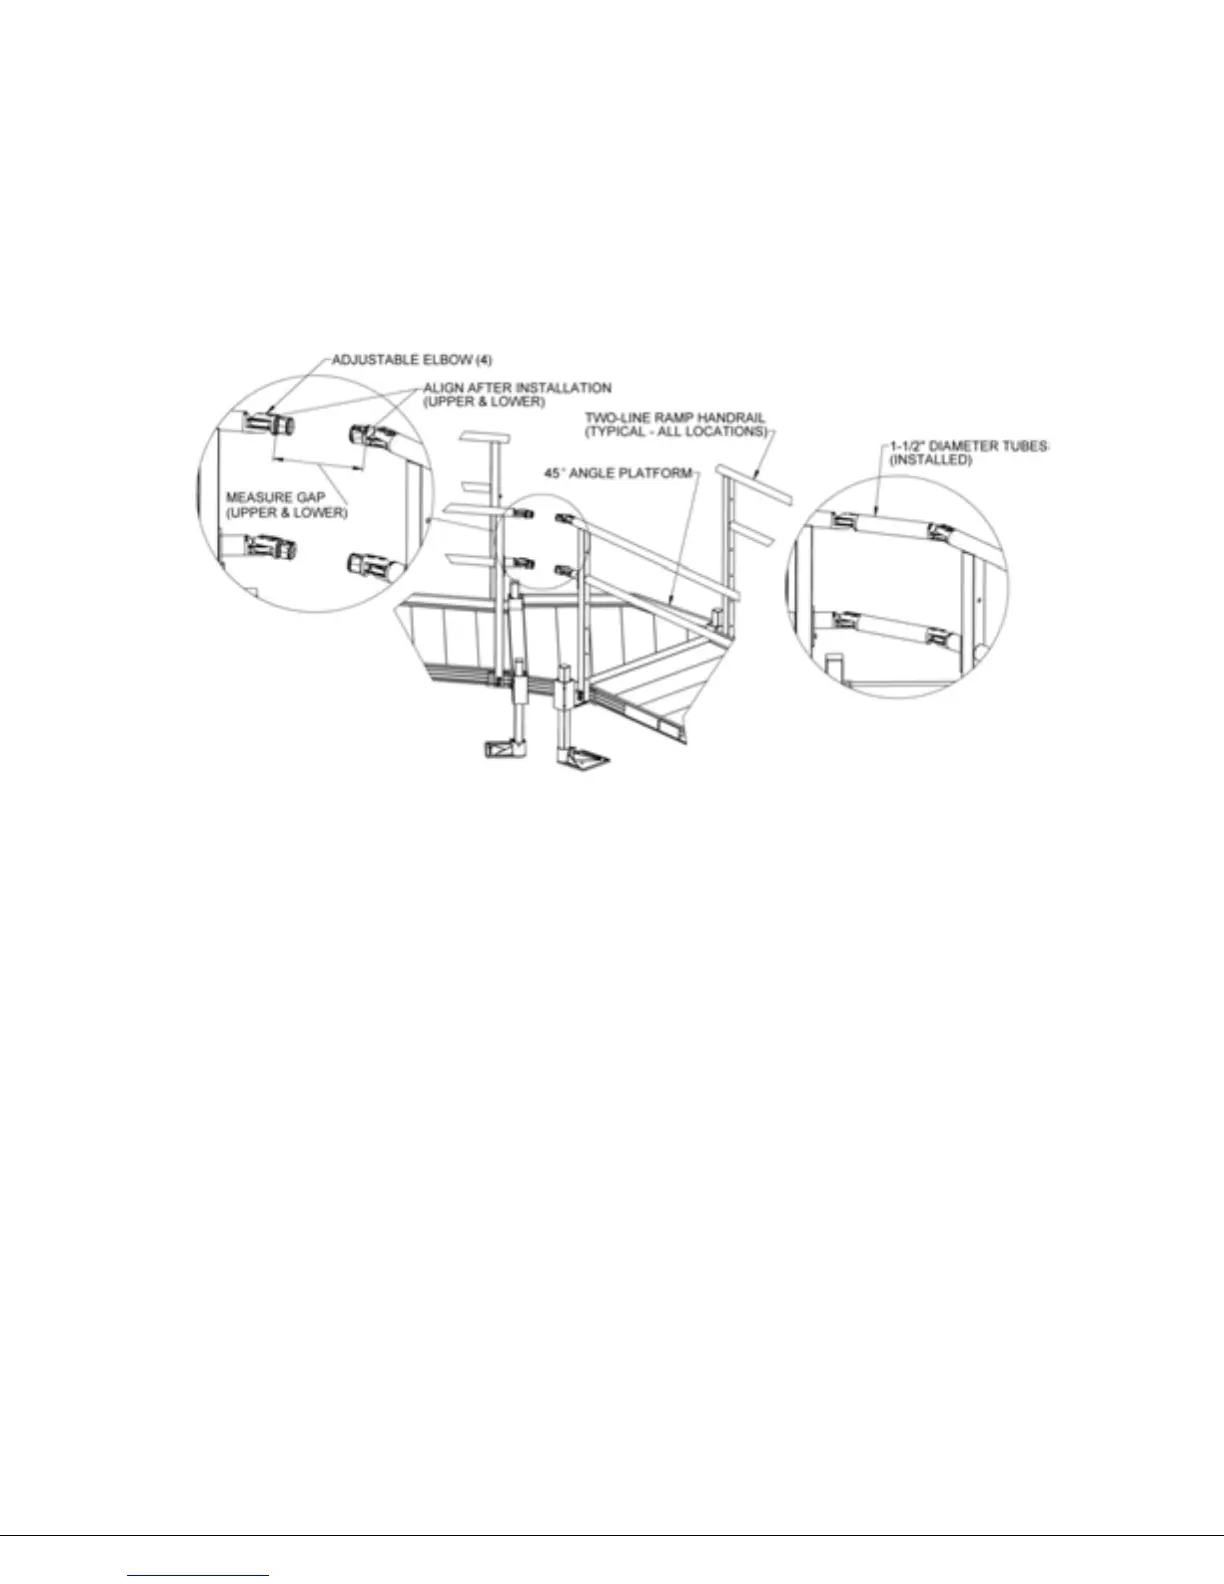
4.8.4. Insert adjustable elbows into both the ramp handrails and the Bolt-On Stub Rails (FIG.
4.16).
4.8.5. Loosen the elbow assembly screws and position the adjustable elbows so they are
aligned with the adjustable elbows on the opposite side (but do not tighten), then
measure the distance between the two larger round faces. Measure both upper and
lower gaps because they could be different and cut tubes accordingly (FIG 4.16).
4.8.6. The procedure for installing the 1-1/2” diameter handrail tubes and adjustable elbows is
the same as the installing the closure top rail, refer to ‘CLOSURES’.
4.8.7. To connect the handrails on the “long” side of the 45° angled platform, the welded
handrail extension (shaped like an “H” with unequal legs) must first be connected to the
ramp handrail whose uppermost point ends at the angled platform (not the ramp whose
lowermost point starts at the angled platform). First, locate and disassemble an
adjustable elbow.