Page 38 of 72
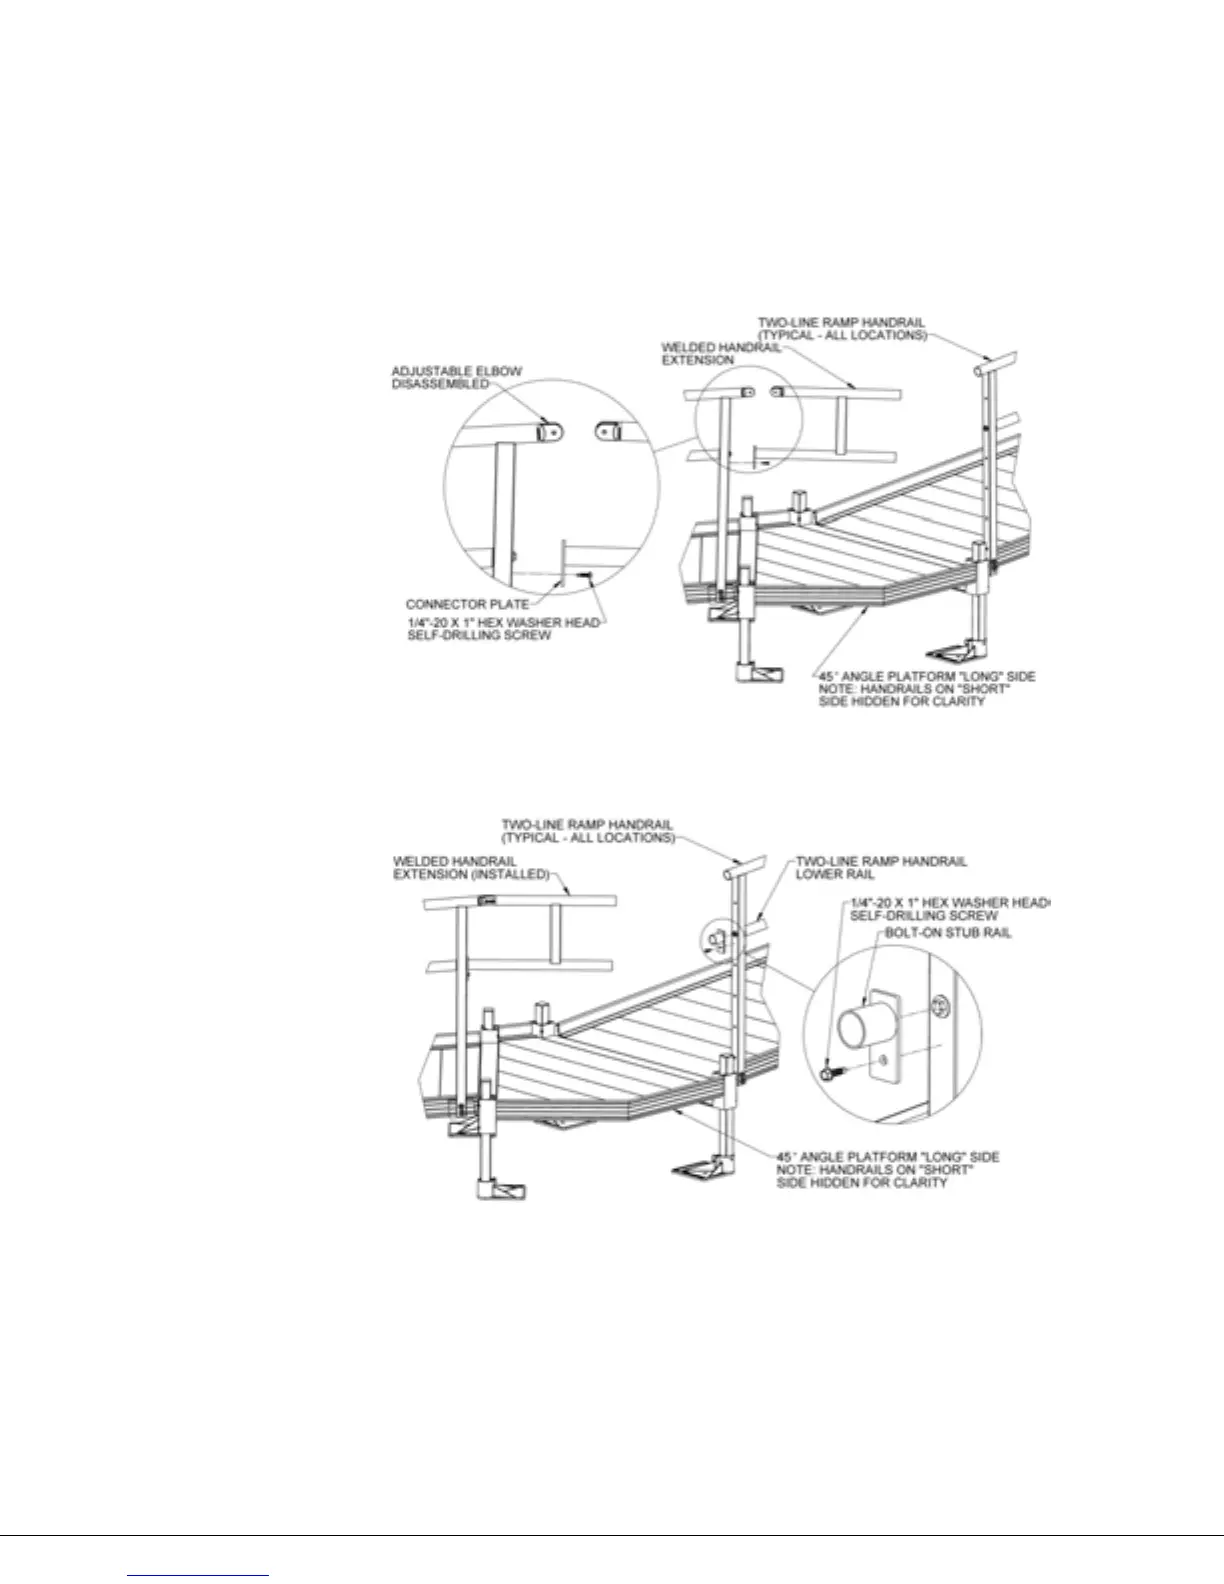
4.8.8. Insert one half of the elbow into the ramp handrail and the other half into the leg of the
handrail extension above the connector plate (FIG. 4.17).
4.8.9. Center the large hole in the connector plate over the bolt and washer attaching the lower
ramp handrail (or over the second hole from the top if no rail is present) and reassemble
the adjustable elbow.
4.8.10. Secure the connector plate to the ramp handrail post using a 1/4”-20 x 1” hex washer
head self-drilling screw (FIG. 4.17).
FIG. 4.17
FIG. 4.18
4.8.11. Attach a BOLT-ON STUB RAIL to the ramp handrail post on the opposite side of the
welded “H”. Center the large hole in the BOLT-ON STUB RAIL over the bolt and washer
attaching the lower ramp handrail (or over the second hole from the top if no rail is
present) and secure using a 1/4”-20 x 1” hex washer head self-drilling screw (FIG. 4.18).