8
ENGLISH
ENGLISH
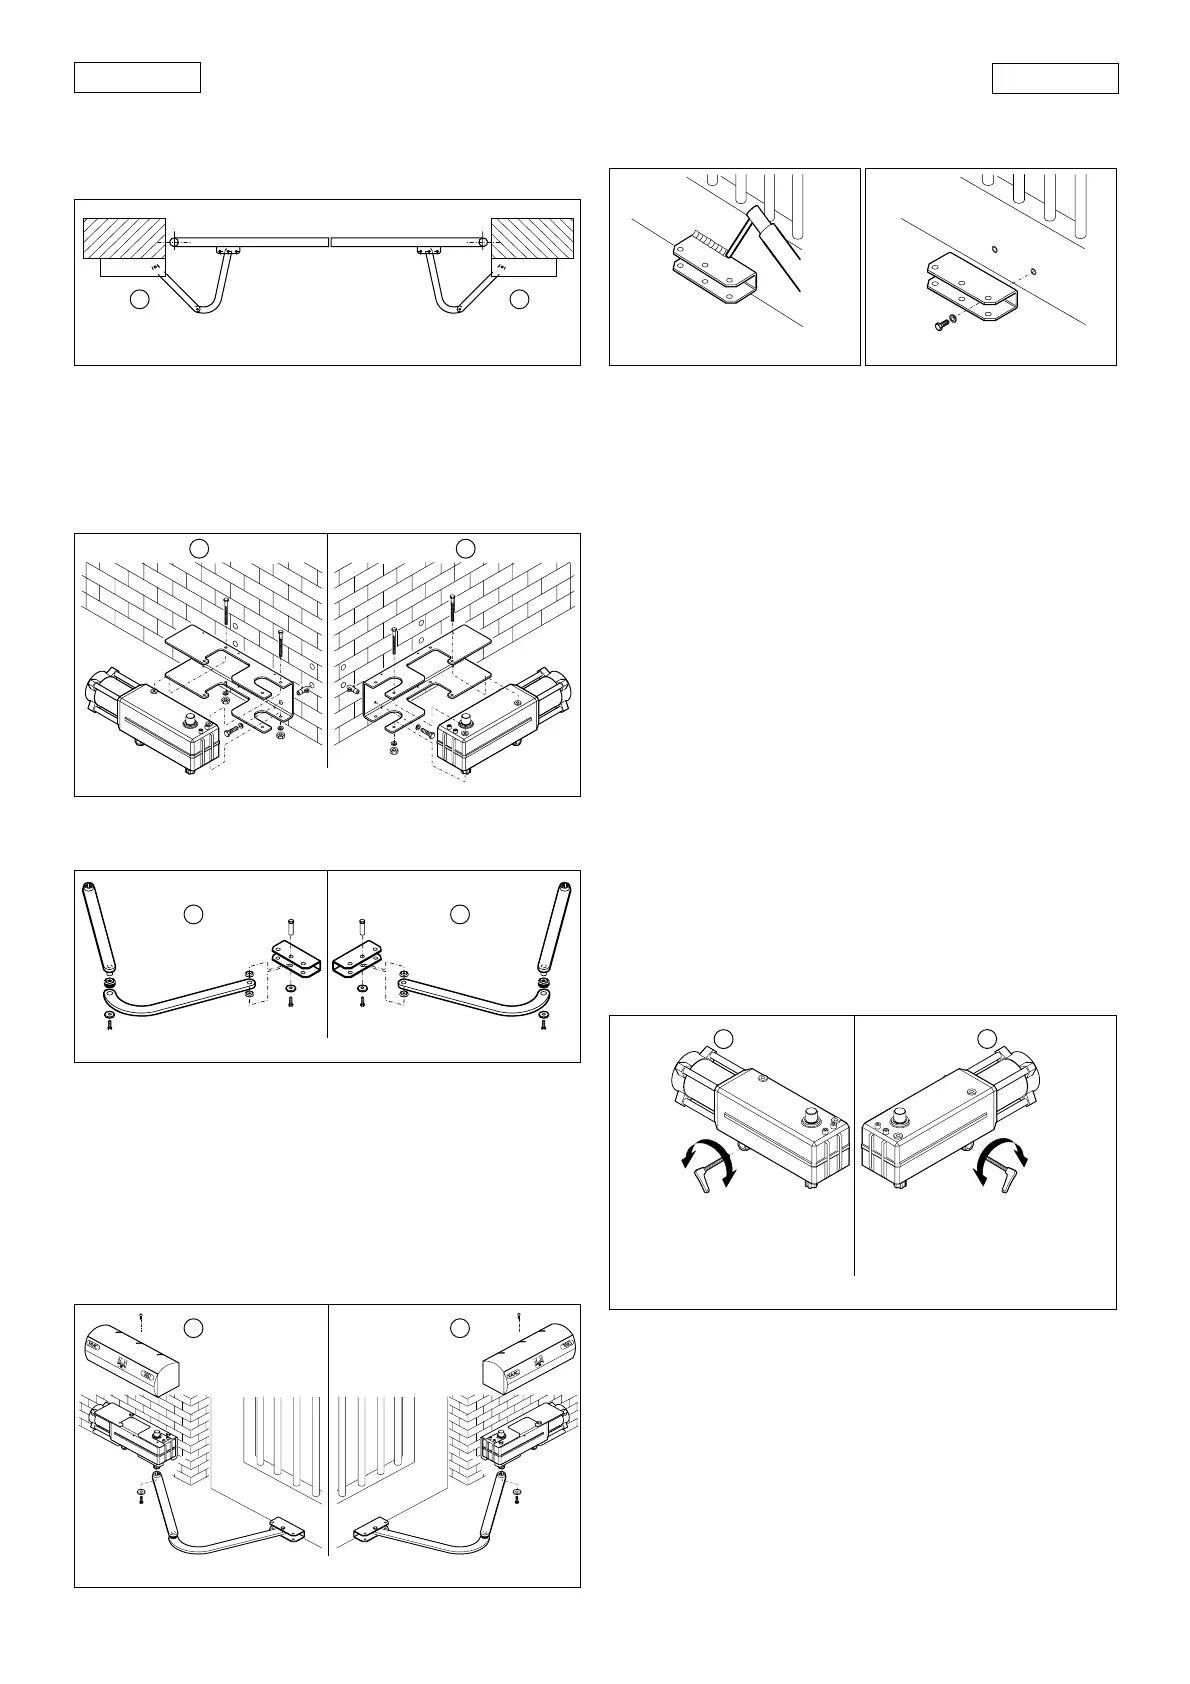
4.3. INSTALLATION STEPS
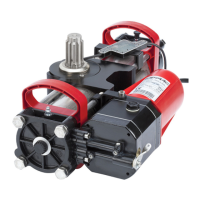
The 390 operator, base-plate and articulated arm are designed
either for right-hand (Fig. 7-Rh) or left-hand (Fig. 7-Lh) installation.
Rh
Fig. 7
Lh
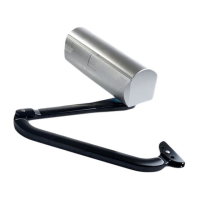
•Secure the base-plate to the pilaster, using Ø10 screws and
suitable expansion plugs (Fig. 8), and check it is perfectly
horizontal.
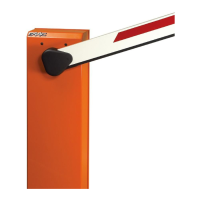
•Fit the gearmotor unit on the base-plate and secure it with the
two screws, nuts and flexible washers (Fig.8).
Ü The transmission shaft must always face downward.
RhLh
Fig. 8
•Assemble the articulated arm and front coupling as shown in
Fig. 9.
RhLh
Fig. 9
•Fit the straight lever of the articulated arm on the gearmotor
shaft and tighten it with the supplied screw and washer (Fig.
10).
•Release the operator (chapter 5.)
•Establish the securing position of the front coupling on the
leaf, observing dimension “C” defined previously (chapter
4.2). Check that arm and coupling are perfectly horizontal.
•The coupling may be welded directly onto the leaf (Fig. 11)
or screwed by using the threaded inserts (Fig. 12).
Fig. 10
RhLh
In both cases, provisionally remove the coupling from the
arm in order to secure it.
7. MAINTENANCE
Do the following jobs at least every six months:
•Check if motor torque is correctly set.
•Check efficiency of the release system.
•Check efficiency of safety devices.
8. REPAIRS
For any repairs, contact our authorised Repair Centres.
Fig. 11 Fig. 12
•Fit the guards on the operator (Fig. 10).
•Re-lock the operator (chapter 6.)
Make the electrical connections of the selected electronic
appliance, observing the annexed instructions.
4.4. TEST OF THE AUTOMATION
When you have finished installation, carefully check the operating
efficiency of the automation and of all accessories connected to
it, safety devices in particular.
Hand the “User’s Guide” page to the Client, and describe how the
operator should function and be used correctly, stressing the
potentially dangerous areas of the automation.
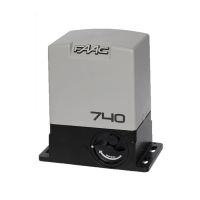
5. MANUAL OPERATING MODE
If the gate has to be operated manually in the event of a
power-cut or fault to the automation, use the release device
as follows:
•Fit the supplied Allen wrench and turn it by about a half turn
until it stops, in the direction shown in Fig. 13, depending on
type of installation.
6. RESTORING NORMAL OPERATING MODE
To avoid an involuntary pulse from activating the gate during
the manoeuvre, before re-locking the operator , switch off
power to the system.
•Fit the supplied Allen wrench and turn it by about a half turn
until it stops, in the direction shown in Fig. 13, depending on
type of installation.
BLOCCA/LOCK
BLOQUE/VERRIEGELT
BLOQUEAR
BLOCCA/LOCK
BLOQUE/VERRIEGELT
BLOQUEAR
SBLOCCA/UNLOCK
DEBLOQUE/ENTRIEGELT
DESBLOQUEAR
SBLOCCA/UNLOCK
DEBLOQUE/ENTRIEGELT
DESBLOQUEAR
Fig. 13
Rh
Lh