Installing the Drives
The TerraBlock SATA drives ship boxed separately from the enclosure.
If the SATA drives have been left at or below 45F (7C) for several hours
(on a delivery truck or loading dock), allow the drives to return to room
temperature before inserting and powering on the unit. Drive failure may
occur if cold drives are powered up before warming.
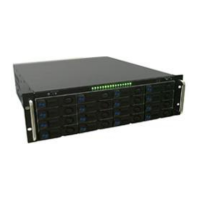
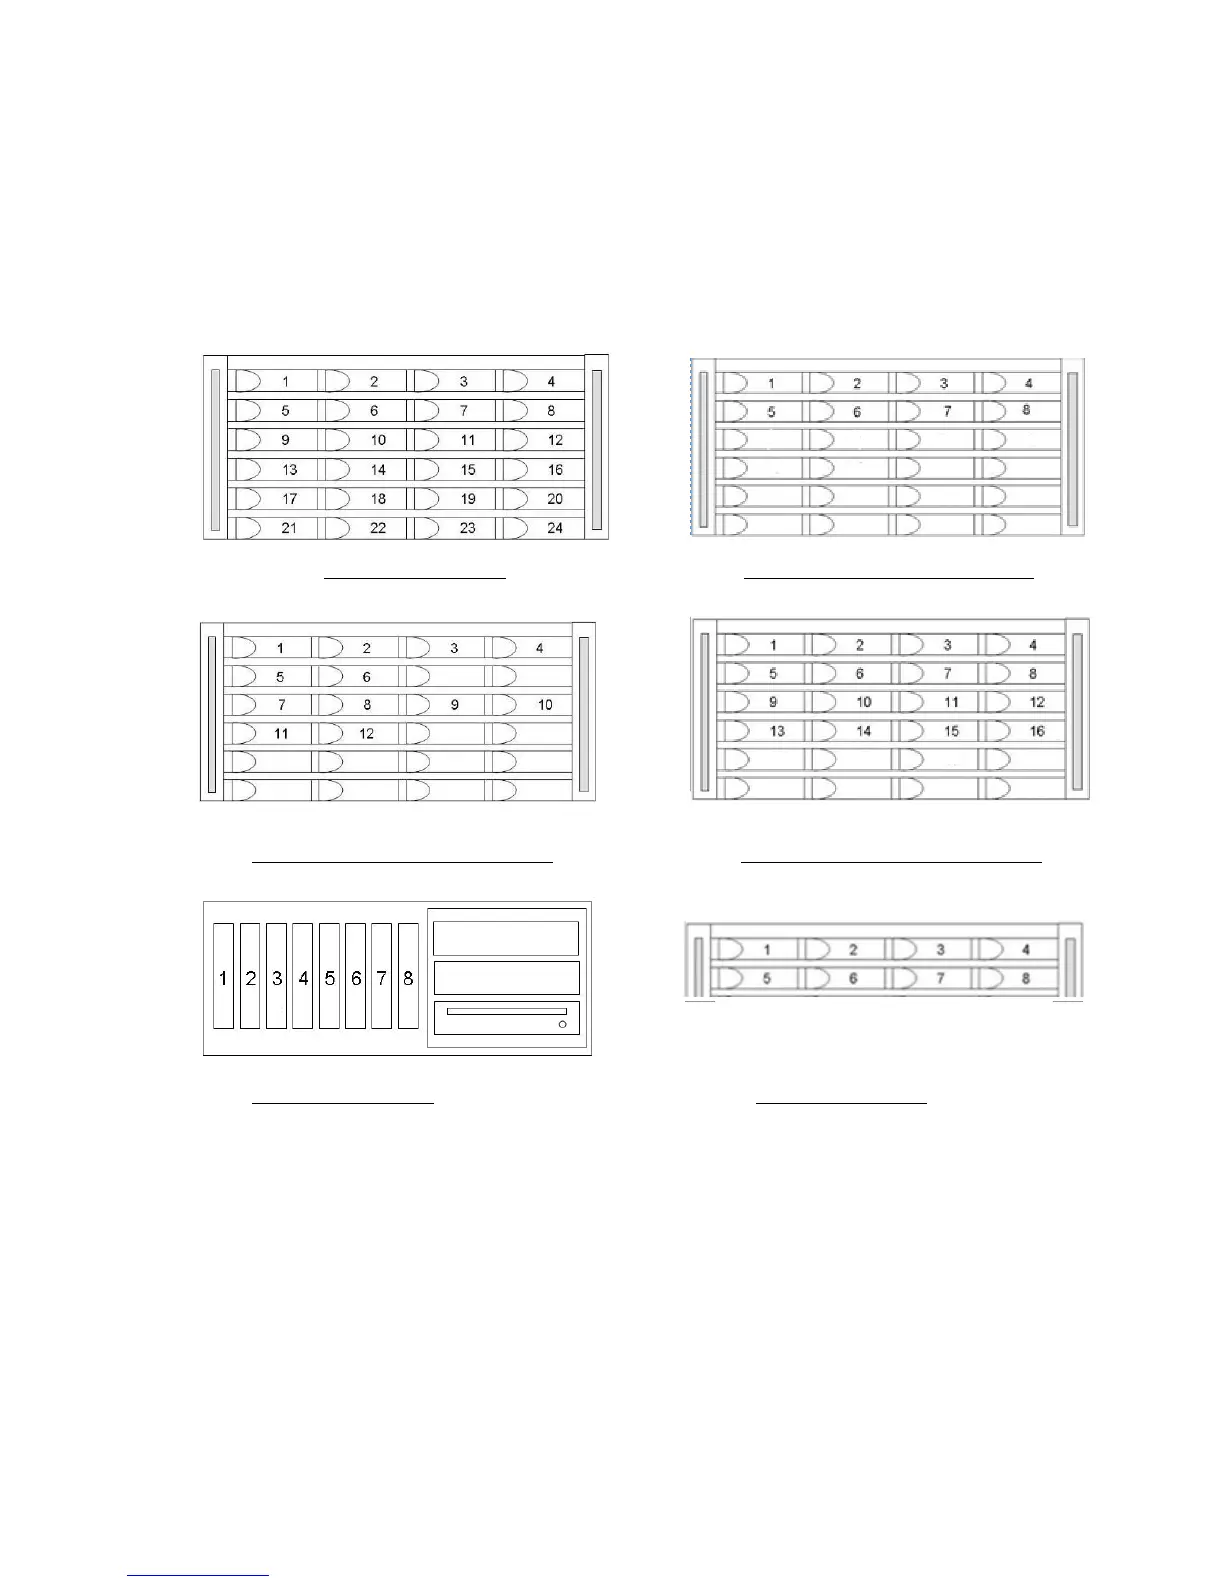
24D Drive Locations 24EX Drive Locations (8 Drives)
24EX Drive Locations (12 Drives) 24EX Drive Locations (16 Drives)
8XS Drive Locations 8D Drive Locations
1. Slide the drive carrier assembly into the appropriate slot until the latch makes
contact with the enclosure.
2. Push the latch toward the enclosure to finish sliding the drive and carrier into the
enclosure. You will hear the latch click when the drive and carrier are seated in
the slot. If you encounter resistance do not force the latch closed.
Remove the drive and check the connector and slot for foreign objects.
3. Repeat steps 1 through 5 for all remaining drives.
The front bezel of the 24D chassis will need to be removed to insert the
bottom row of drives. Disengage the latch spring on the left side of the
cover back to free the left pin, and move the bezel left. To replace, hold
the latch spring back and line up the two pins and slide into position.