EasyManua.ls Logo

FARFISA INTERCOMS ECHOS - Page 111

FARFISA INTERCOMS ECHOS
236 pages
Print Icon
To Next Page IconTo Next Page
To Previous Page IconTo Previous Page
Loading...
109
(MT11 - Gb2012)
INTERNAL STATIONS
4+1
INTERCOMS *
7+1
VIDEOINTERCOMS
S
T
U
D
I
O
3) Connect the monitor cable to the
bracket.
4) Hook the monitor to the bracket.
JP1
J2
JP4
H
1
2
3
9V
9R
9M
5
F
4
Y
XPP 8
1
C
C
V
M
R9
JP5
J1
JP2
1
2
3
1
14
U1
1
10
3
2
1
U
P
U
P
Table version
1) Apply the 4 anti-slip rubber pads in their housing under the table
adapter base.
5) Mark the colour/termi-
nal combination on the
junction box.
JP1
J2
JP4
H
1
2
3
9V
9R
9M
5
F
4
Y
XPP 8
1
C
C
V
M
R9
JP5
J1
JP2
1
2
3
1
14
U1
1
10
3
2
1
U
P
U
P
3) Fix the bracket WB7100 with the 2
screws supplied.
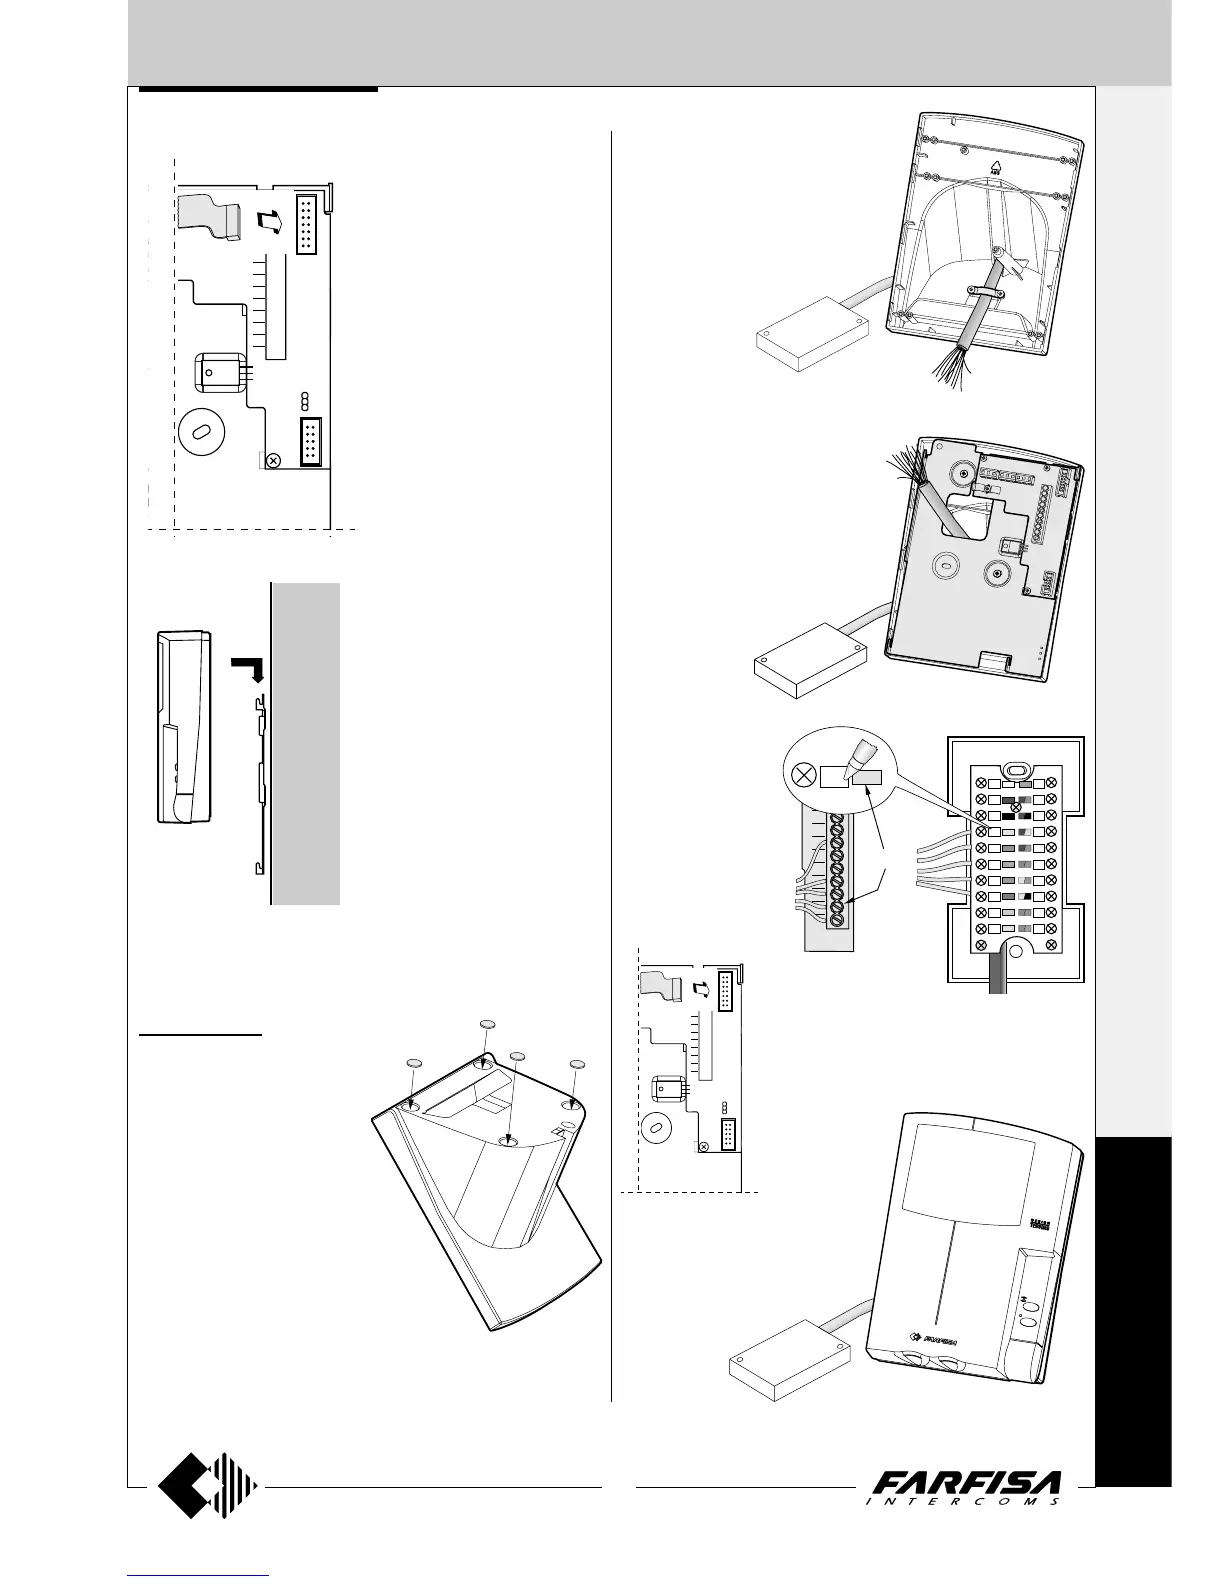
4) Make the connection to the bracket
terminal board according to the in-
stallation diagram.
2) Pass the connection cable through the
hole on the back of the table adapter
and block it with the cable clamp.
6) Connect the monitor cable to the bracket.
7) Hook the monitor to the bracket.
H
1
2
3
9V
9R
9M
5
F
4
WB7100
Yellow
Junction box
1
1

Table of Contents

Related product manuals