64
Figure 5.16 – Printer Calibration Sheet method
Select your printer from the list.
Insert the Printer Calibration Sheet into the printer.
Click Print.
After the test page prints, do the following:
Locate where the Vertical Line (up and down) crosses the “A” line. Enter this
number as the A value.
Locate where the Horizontal Line (left to right) crosses the “B” line. Enter this
number for the B value.
Click Done. You have now calibrated your printer.
Click Print to print your label.
Click Close to return to the New Project Wizard.
For instructions on applying the label to the CD, please refer to Chapter 9.
Plain Paper
The plain paper method for calibration should be used with a blank sheet of paper.
Please do not use a label sheet, as you will need to fold the paper during calibration.
Select the Plain Paper option and Click Next. The next screen will look like the
one below:
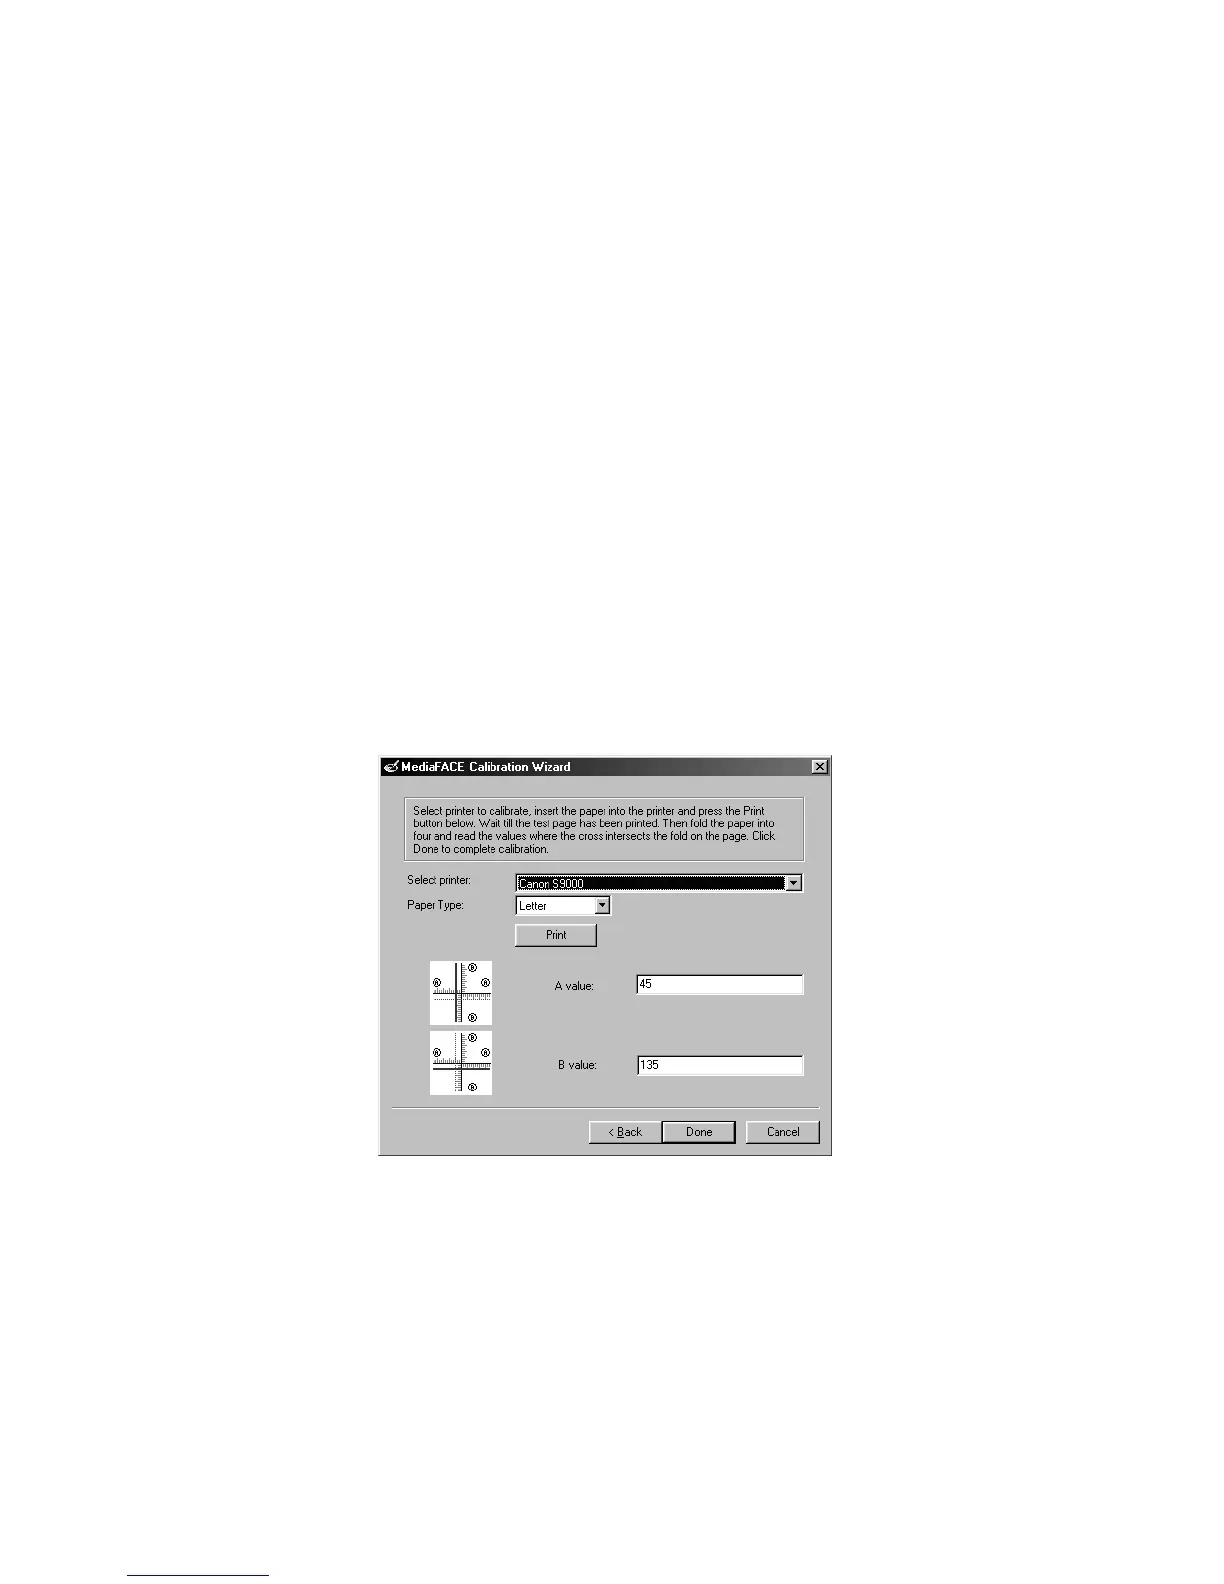
Figure 5.17 – Plain Paper Calibration method
Select your printer from the list.
Select the paper type: Letter or A4
Click Print.
After the page prints, do the following: (these instructions also appear on the
printed page itself)
Fold the paper so that the two letter A’s meet, being sure to keep the edges of the
paper as even as possible.
 Loading...