13
Congure Proles in the ProtoNode’s Web Congurator
• Open PC web browser; enter the default IP address of the ProtoNode 192.168.1.24.
• When the S bank of DIP switches are set for BACnet you will see all the Raypak Profiles supporting BACnet listed
in the Configurator.
• When the S bank is set for BACnet MS/TP, all Raypak profiles supporting BACnet MS/TP will appear.
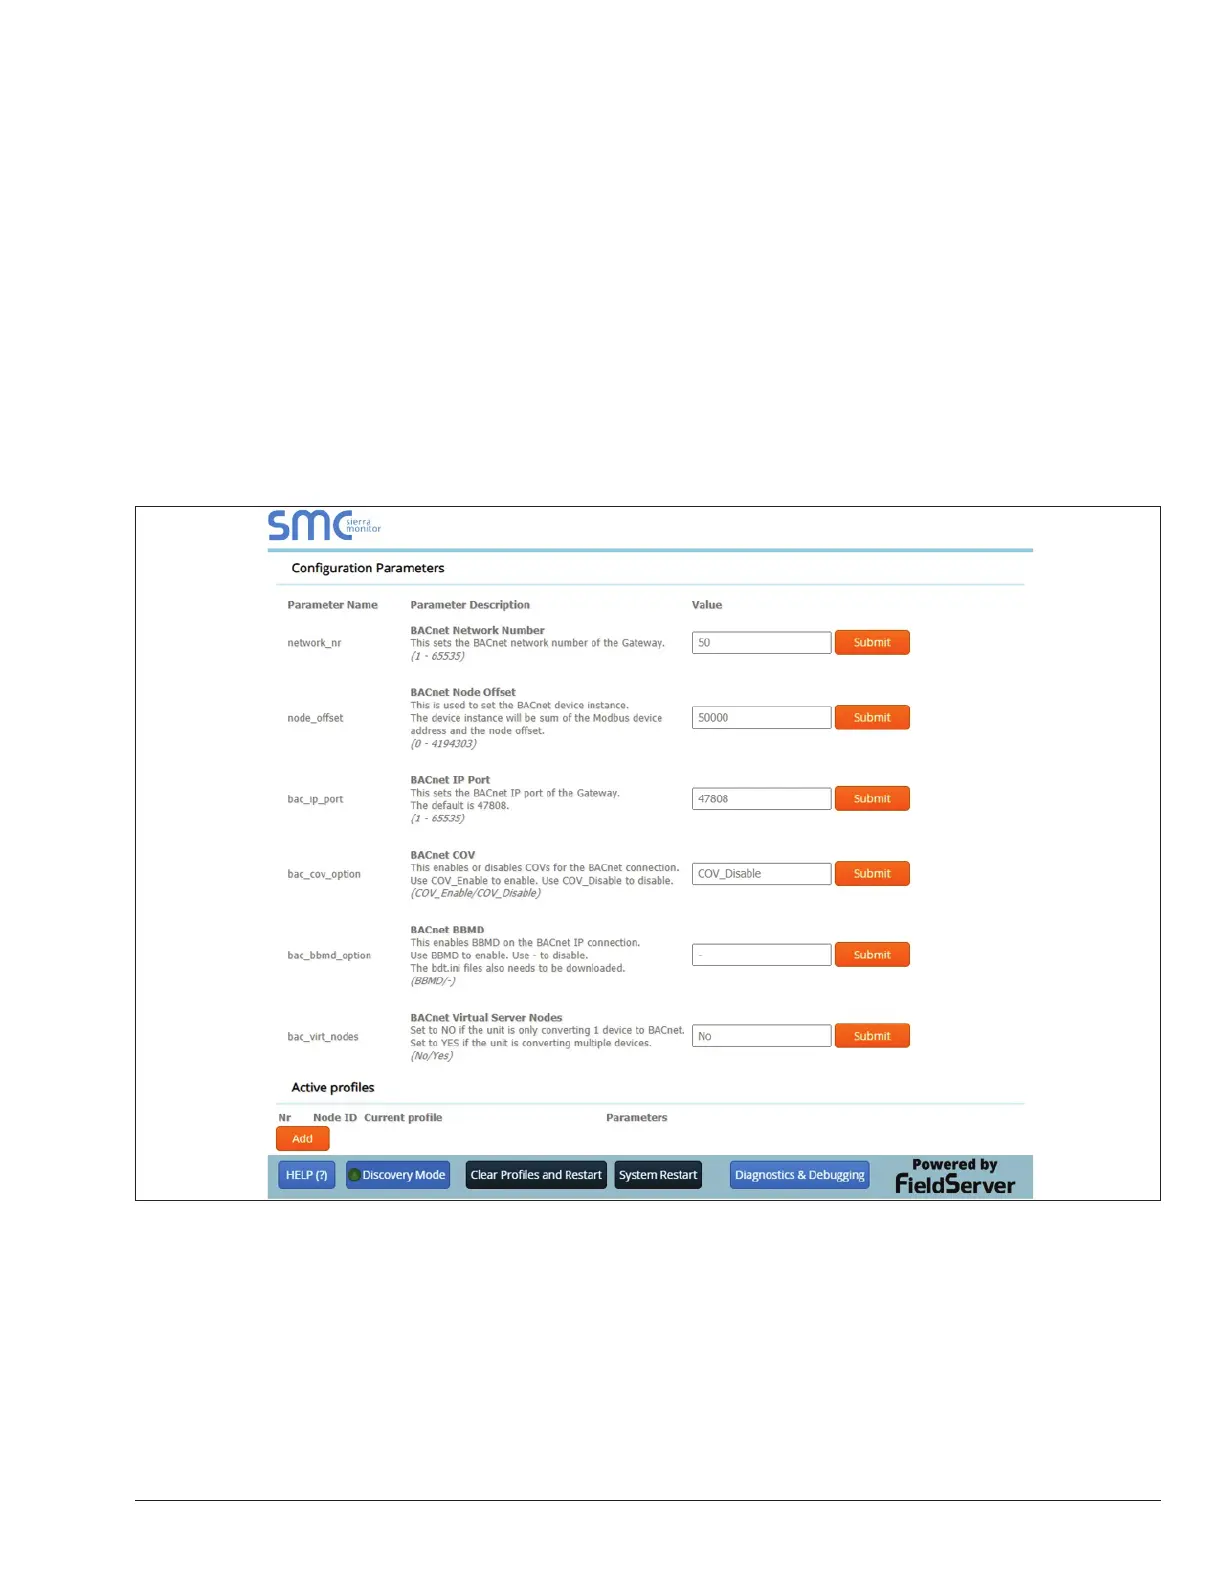
Selecting the Raypak proles that will be connected the ProtoNode
• When you open the Web Configurator, you will see Active Profiles on the left side of the screen. There is a pull
down box under Current Profiles that will list all the profiles available to select from.
• To add an active profile to the ProtoNode, select Add under Active Profiles. For every Raypak VERSA IC Master
Unit that will be added to the ProtoNode, you will need to add the Active Profile (on the left of the screen) and the
Modbus Node Address that the device is assigned to. Each Versa IC Master unit must have a unique Modbus
Node Address selected in the Versa adjust menu. Note: Modbus Node Address must match the Node ID
selected when commissioning the Protonode from the Web Configurator shown below.
Figure 14. Web Congurator showing the active proles to select from
• Once the Profile and Modbus Node Address have been selected, press the Add button to add the Profile to be
configured.
APPROVED
UNCONTROLLED DOCUMENT IF PRINTED