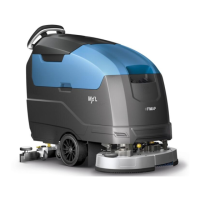
HOW TO MOVE THE MACHINE
To transport the machine safely, proceed as follows:
DANGER: before starting any task, make sure the current regulations concerning the safe transport of dangerous substances are
scrupulously observed.
1. Check that the solution tank and the recovery tank are empty; if this is not the case, empty them (see paragraphs “DRAINING THE
RECOVERY TANK” on page 21and “EMPTYING THE SOLUTION TANK” on page 22).
2. Stand at the back of the machine.
3. Lift the squeegee body, press the “SQUEEGEE CONTROL” pedal (1) at the rear right of the machine (Fig.1).
4. Use a ramp to move the machine up onto the transport vehicle.
ATTENTION: during this operation, check there are no people or objects near the machine.
N.B.: the ramp gradient must not be such as to cause damage to the machine as it goes up.
5. Place the machine on the transport device, put the machine in stand-by by pressing the button (2) located on the control panel (Fig.2).
6. Press the uncoupling lever (3) (Fig.3) and turn the control column to the vertical position (Fig.4).
7. Press the uncoupling lever (4) (Fig.5) and open the battery compartment closing carter, using the handle (5) (Fig.6).
8. Disconnect the electrical connector from the machine's general system.
9. Reclose the battery compartment closure carter, make sure that the retainer system is correctly engaged.
WARNING: secure the device according to the directives in force in the country of use, so that it cannot slide or tip over.
MACHINE SAFETY
To ensure that work is carried out in the best safety conditions, proceed as follows:
1. Check that the solution tank and the recovery tank are empty; if this is not the case, empty them (see paragraphs “DRAINING THE
RECOVERY TANK” on page 21and “EMPTYING THE SOLUTION TANK” on page 22).
2. Stand at the back of the machine.
3. Lift the squeegee body, press the “SQUEEGEE CONTROL” pedal (1) at the rear right of the machine (Fig.1).
4. Put the machine in stand-by by pressing the button (2) located on the control panel (Fig.2).
5. Press the uncoupling lever (4) (Fig.5) and open the battery compartment closing carter, using the handle (5) (Fig.6).
6. Disconnect the electrical connector from the machine's general system.
7. Reclose the battery compartment closure carter, make sure that the retainer system is correctly engaged.
TYPE OF BATTERY TO BE USED (GL versions)
CODE DESCRIPTION
229862 BATTERY KIT 12V 33Ah AGM
229891 BATTERY KIT 12V 26Ah Pb
229863 BATTERY KIT 12V 36Ah Pb
Used batteries must meet the requirements set out in DIN EN 50272-3 "Traction batteries for
industrial trucks".
To ensure proper performance, the machine must be powered with 24V.
The machine can be powered with the battery kits listed in the table to the side.
N.B.: it is recommended to use battery kit 12V 33Ah AGM.
TYPE OF BATTERY TO BE USED (GXL versions)
CODE DESCRIPTION
229890 BATTERY KIT 12V 55Ah AGM
229863 BATTERY KIT 12V 36Ah Pb
229950 BATTERY KIT 12V 61Ah Pb
Used batteries must meet the requirements set out in DIN EN 50272-3 "Traction batteries for
industrial trucks".
To ensure proper performance, the machine must be powered with 24V.
The machine can be powered with the battery kits listed in the table to the side.
N.B.: it is recommended to use battery kit 12V 55Ah AGM.
BATTERY MAINTENANCE AND DISPOSAL
For battery maintenance and recharging, respect the instructions provided by the battery manufacturer. When the batteries reach the end of
their service life, they must be disconnected by a specialised and properly trained operator, and must be subsequently removed from the battery
compartment using suitable lifting devices.
N.B.: dead batteries are classied as dangerous waste and as such must be delivered to an authorised body for disposal.
11