STARTING WORK
The machine can be used in the following work modes:
• ECO-MODE, read the section “ECO-MODE”;
• MANUAL MODE, read the section “MANUAL MODE”,
• PROGRAM ZONE, read the section “PROGRAM ZONE MODE”.
As an example, we will look at the program mode. To begin working in this mode, proceed as follows:
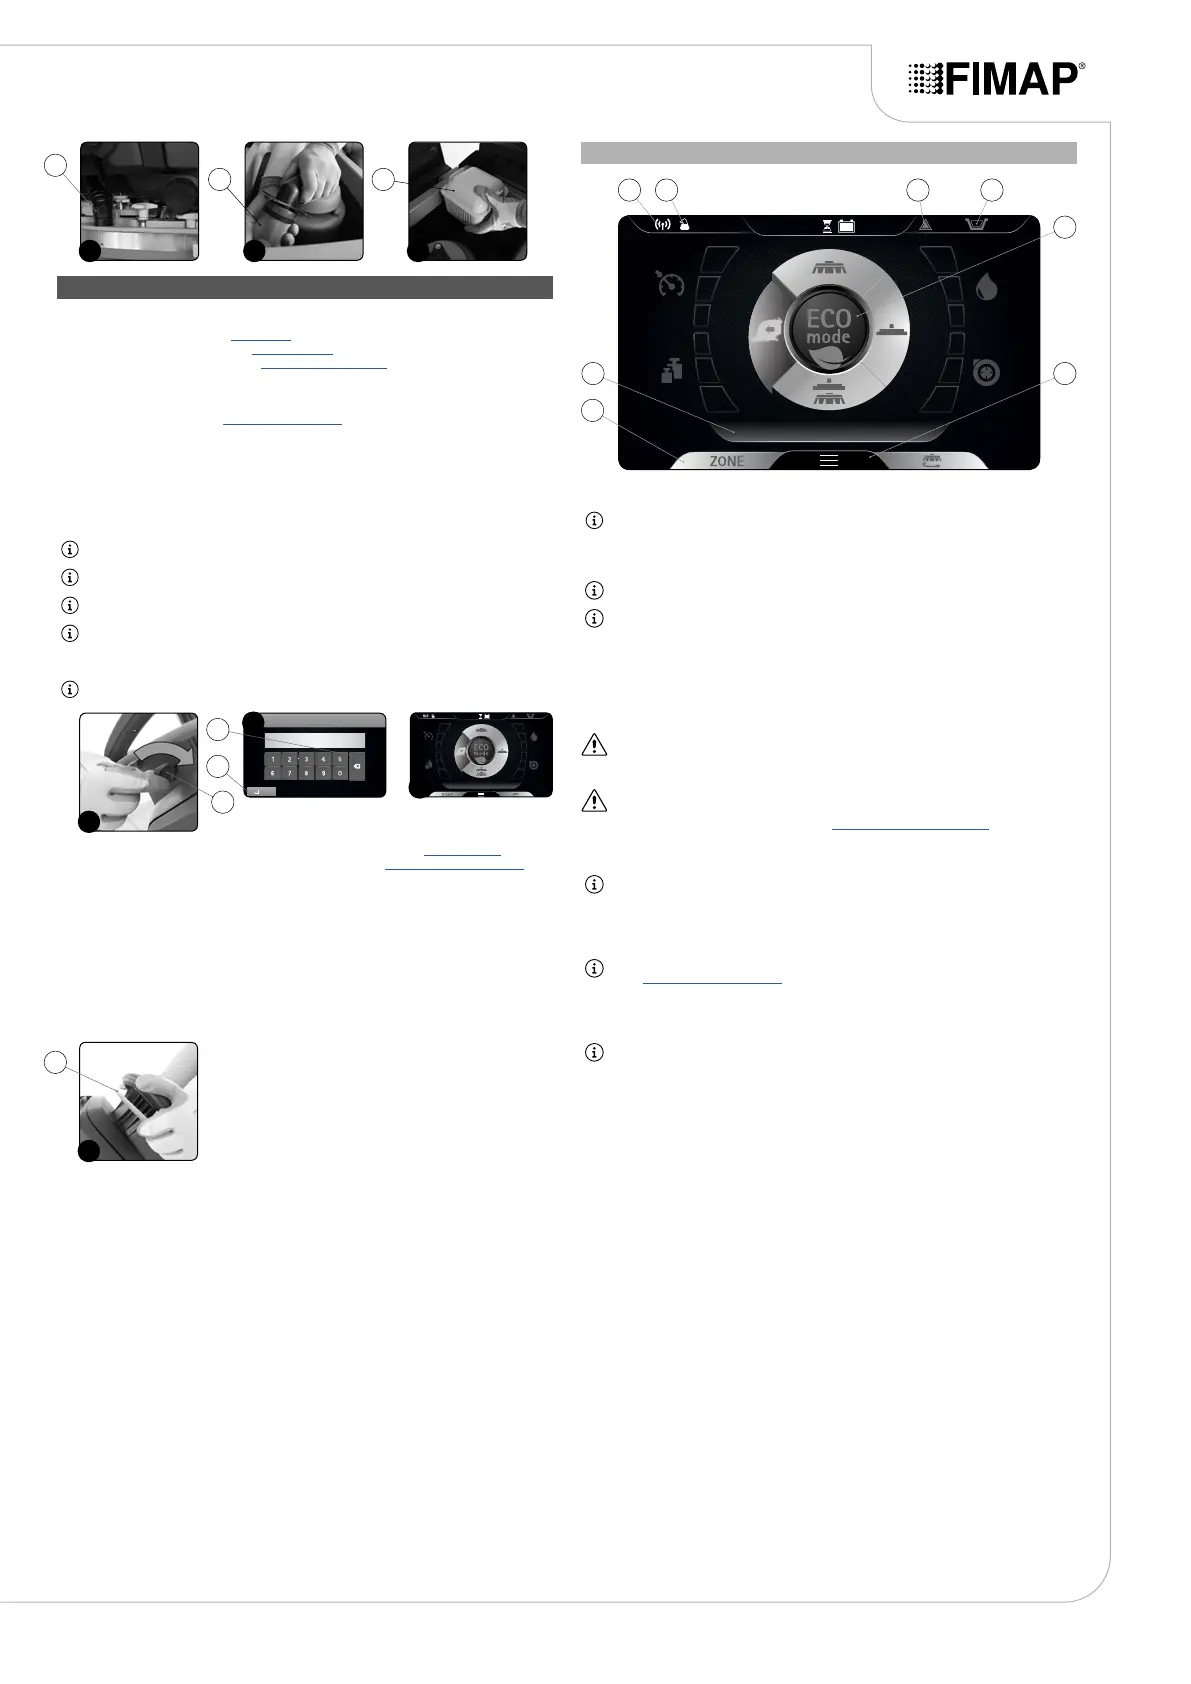
1. Make all the checks listed in “PREPARING TO WORK”.
2. Sit on the driver’s seat.
3. Insert the key (1) in the main switch on the control panel. Set the main switch to “I” by making a
quarter turn of the key to the right ( Fig. 1)).
4. The rst and second screen displayed allow you to check the software versions of the functions
board and display board.
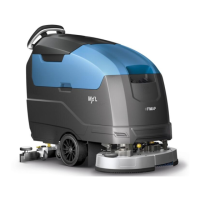
5. A few seconds after ignition, the password screen is displayed (Fig. 2).
6. Enter the password and press Enter (2) (Fig. 2).
NB: if you make a mistake, press Delete (3) (Fig. 2).
N.B.: the password entered by the manufacturer is 1000.
N.B.: it is possible to disable the password entry, contact the nearest FIMAP assistance centre.
N.B.: the password to be entered (selected by the manufacturer) is 1000.
7. If the password is correct, the “MAIN” screen will be displayed (Fig. 3).
NB: by default the machine is set to the transfer program (Fig. 3).
8. Select the required working program with the DS selector device (see “DS SELECTOR”).
9. Select the required work area and press the “ZONE” key (see “ZONE PROGRAM BUTTON”).
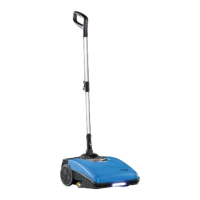
10. When you push the dead man's lever (4) (Fig. 4), the machine will begin to move.
If the program selected is “SCRUBBING WITH DRYING”, the squeegee and brush head will lower
until they touch the oor.
As soon as the drive pedal is pressed, the traction motor, brush head motor and vacuum motor will
start working. As a result, the solenoid valve will also be activated and detergent solution will be
dispensed onto the brushes.
During the rst few metres, check that there is sucient solution and that the squeegee is drying
correctly.
The appliance will now begin to work with full eciency until the battery is at or until the detergent
solution has nished.
TRANSFER
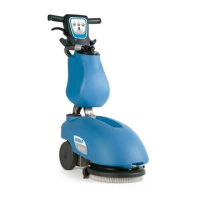
Selecting the program “TRANSFER”, the control display screen will appear as shown in the gure.
NB: with this working program, both the brush head and squeegee support are in the idle
position (raised o the oor) and the motors switch o with the respective switch-o delays
(even if the drive pedal is not pressed). When the dead man's lever is pressed, only the
traction motor is powered.
NB: on the DS selector, the symbol of the transport program (A) is green.
NB: the grey symbols show working programs that are not active. the green symbols show
working programs that are active.
The icons that may be visible are:
1. FFM symbol, if visible it shows that the “FIMAP FLEET MANAGEMENT” system operating.
2. FSS symbol, if visible it shows that the “FIMAP SOLUTION SAVER” system is operating.
3. General alarm symbol.
ATTENTION: if visible, stop the machine. To continue working, see “ALARM SCREEN”.
4. Solution tank empty oat symbol.
ATTENTION: if visible, it indicates that the detergent solution in the tank has a reached a level
beyond which the solenoid valve cannot deliver solution onto the brushes, so the tank needs to
be lled up before continuing the work (see “FILLING THE SOLUTION TANK”).
5. ECO-MODE button.
NB: if the Eco-Mode button (5) is pressed in transfer mode, the “scrubbing with drying”
program is activated in economic mode.
6. Menu button.
7. Zone button.
NB: if the Zone button (8) is pressed in transfer mode, the window for selecting the zone opens
(see “ZONE PROGRAM BUTTON”). Once you have selected an area, “scrubbing with drying”
is activated for the area selected.
8. Text indicator.
NB: the text indicator (8) shows which zone program has been selected, or whether the
machine is in transport mode if the word “DRIVE” is visible.
17
1110 12
11
12 13
4
1
1
2
3
2
4
3
68
5
7
1 32 4