EN
109
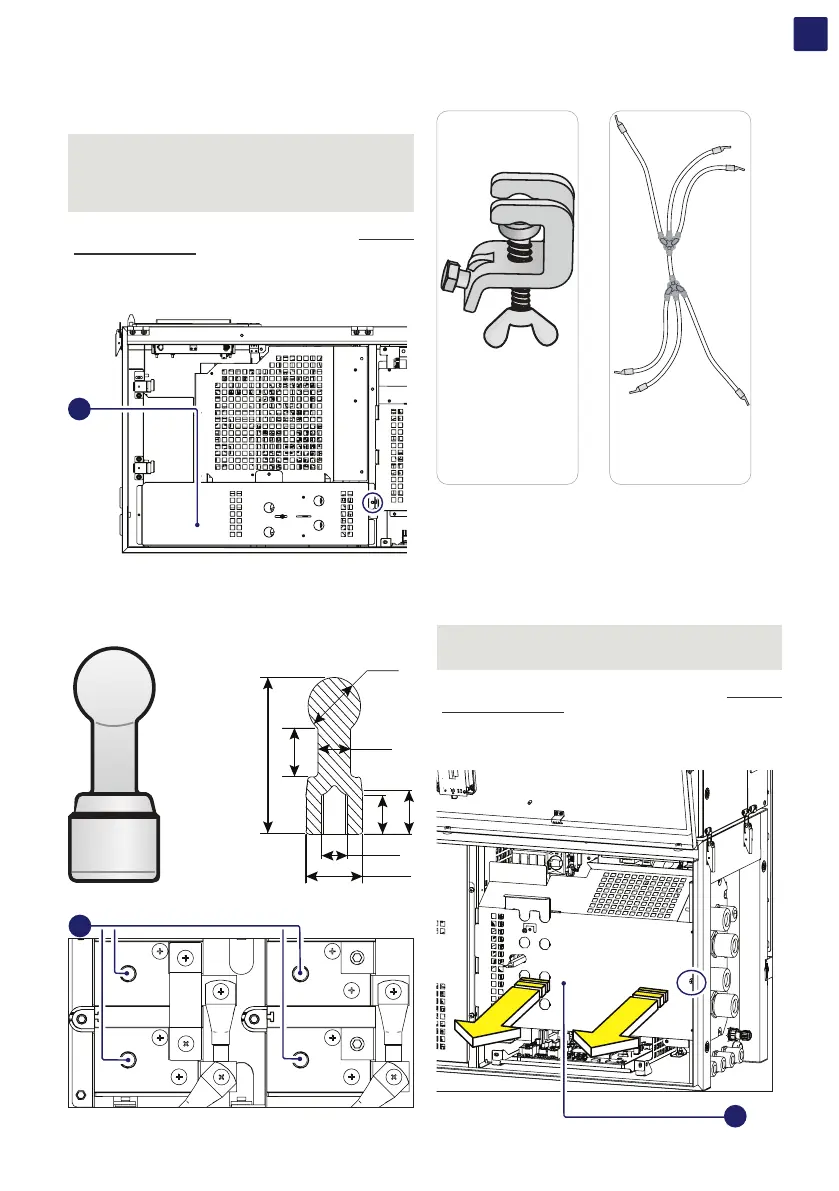
8.2.4.13 Grounding kit installation on DC side (only for
Standard and -S2 models)
WARNING – B Before to approach the below operations
all the steps from 1 to 12 included must be successfully
completed.
NOTE – D This step is applicable only on Standard and -S2
models, single or double MPPTs.
• Open the wiring box front cover (07) (refer to paragraph “Opening
the wiring box cover”).
• Remove the internal DC Protective shield (60) by removing the
M5 screw.
60
• Install 4 Fixed Ball Points in both positive and negative input
channels on the DC input connection busbar (17).
59
15
18
20
Ø11
M10
SW24
Ø20
MPPT 1
–
MPPT 1
+
MPPT 2
+
MPPT 2
–
17
• Install the earth connecting elements to the earthing and short-
circuiting cable.
Earth connecting
elements
Earthing and
short-circuiting cable
• Connect the earthing cable to the ground.
• Connect the earth connecting elements on the fixed ball points, to
put in short circuit and to ground the DC input channels.
8.2.4.14 Grounding kit installation on AC side
WARNING – B Before to approach the below operations
all the steps from 1 to 12 included must be successfully
completed.
• Open the wiring box front cover (07) (refer to paragraph “Opening
the wiring box cover”).
• Remove the internal DC Protective shield (27) by removing the
M5 screw.
27