EN
79
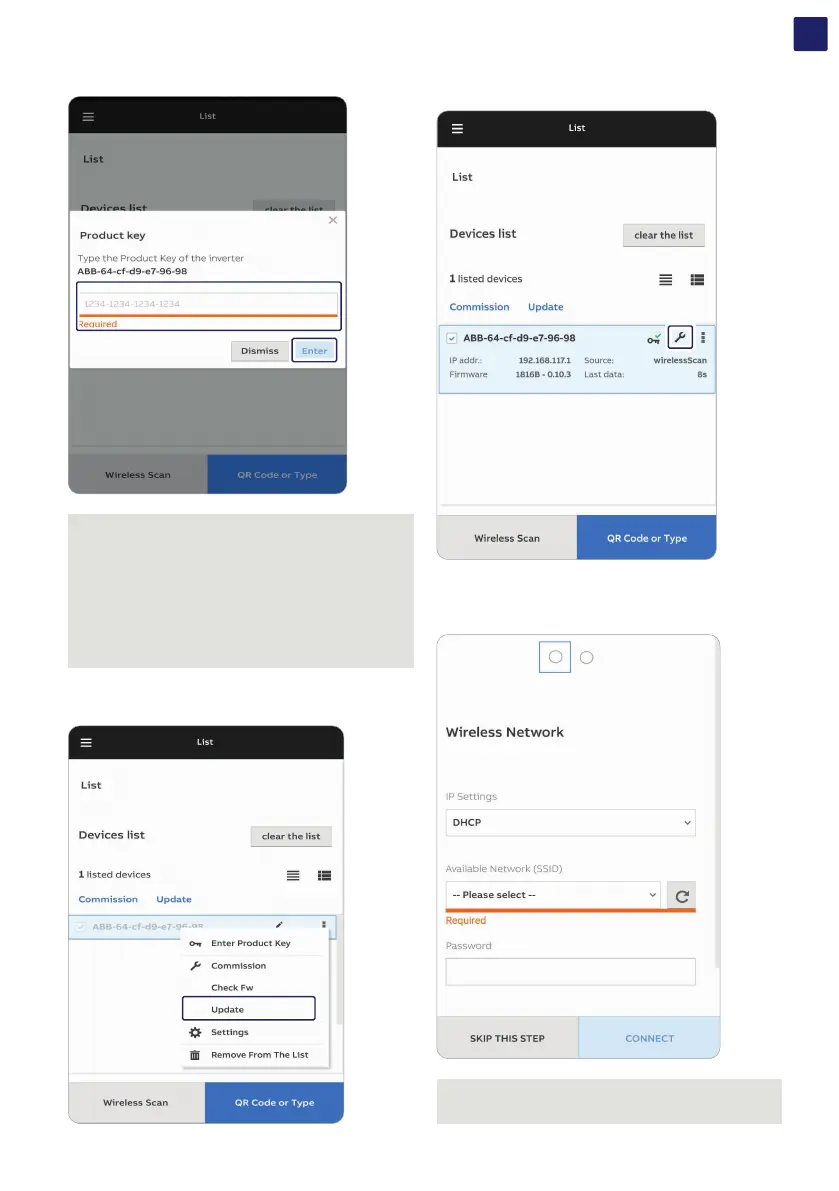
• Enter the “Product Key” and tap “Enter” to confirm.
NOTE – D Both QR code and Product key are provided on
the Communication identification label applied onto each
inverter or applied on the plant documentation (if this has
been done during installation).
NOTE – D It’s required to digit also the dash “-” characters of
the Product Key in the password field.
NOTE – D It’s recommend to create a plant map and apply
the Communication Identification label (the Communication
Identification label is divided in two separate parts by a
dashed line) of each inverters in the right position of that map.
• Update firmware (if necessary). Tap on “Firmware update” for
aligning the firmware of all the inverters in the list to the last
version (internet connection is needed).
• Tap the “Commissioning” button.
• Enter the IP Settings (DHCP or Static), Network SSID
and password.
Tap on “Connect” button to connect the inverter to the local
wireless network.
NOTE – D If the inverter should not be connected to a Local
wireless network tap on “Skip this step” button (the inverter
connection remains point-to-point).