MIG-MAG WELDING
19
5
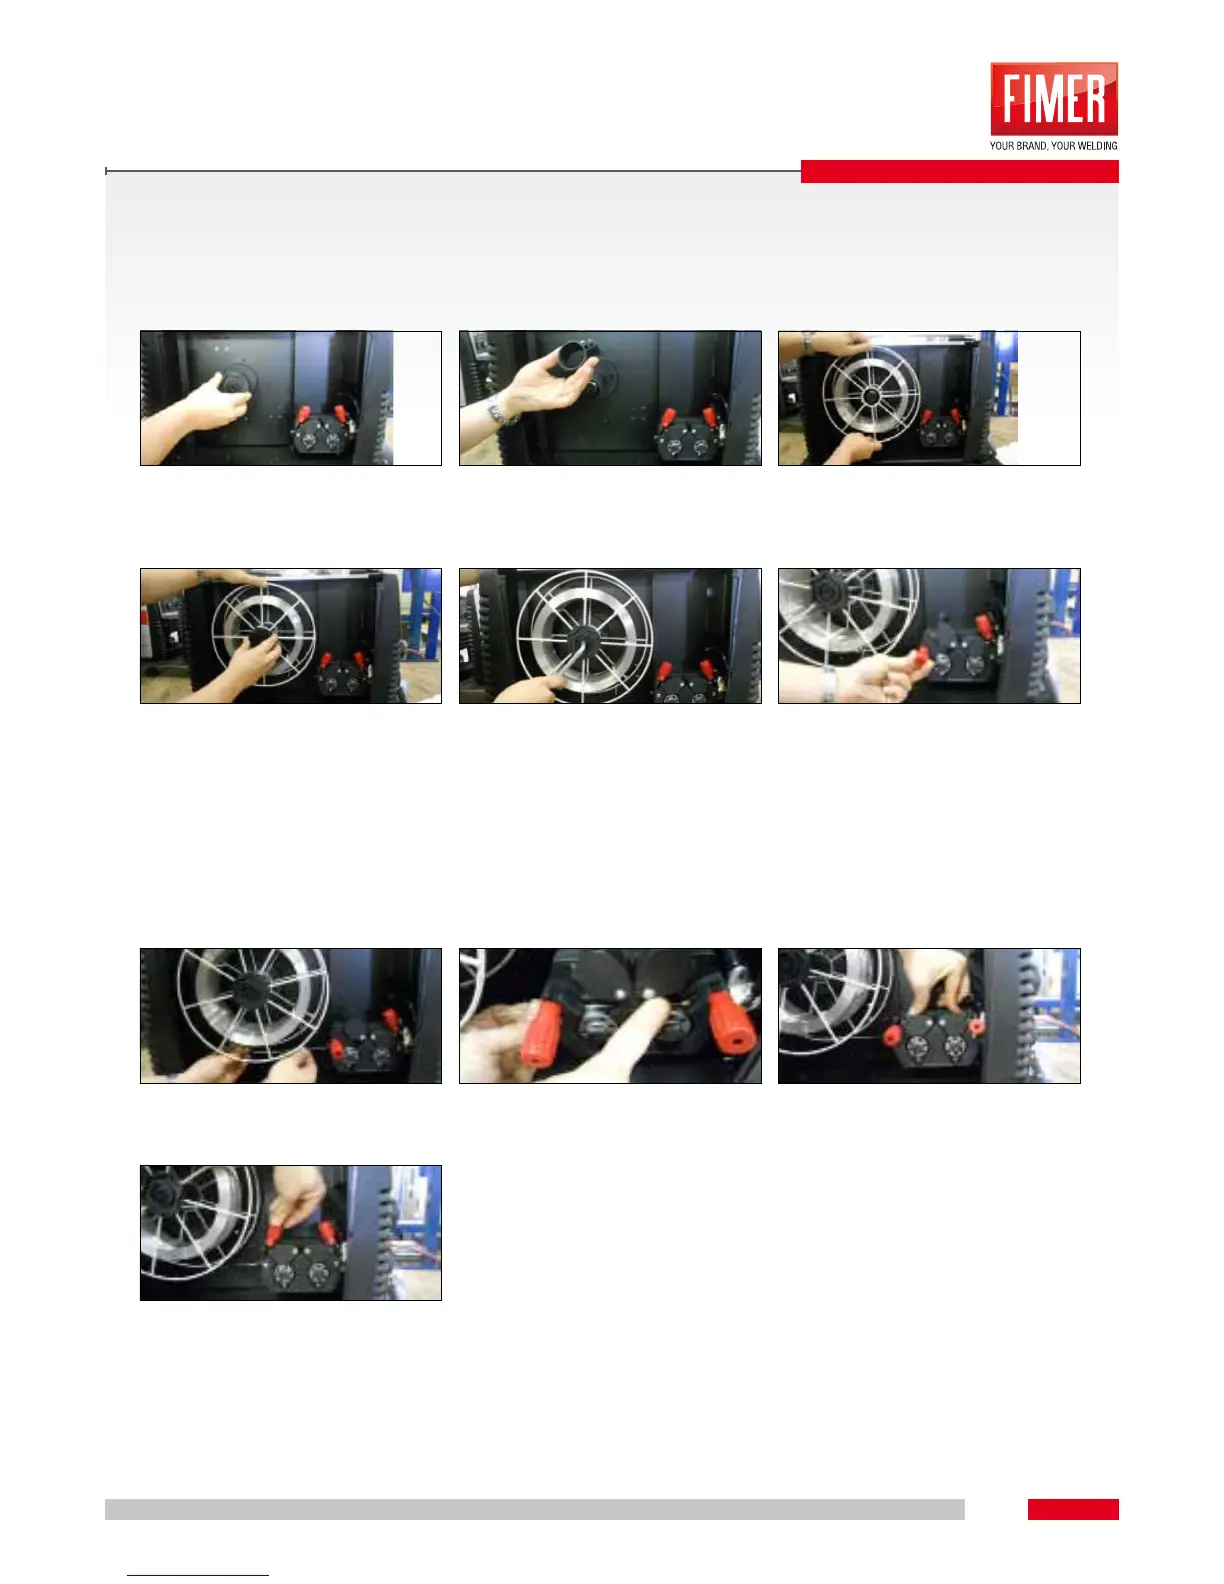
Attention: Before starting the wire installation steps, always remove the gas nozzle/diffuser and the wire
guide tip from welding torch. Disconnect the electrical supply cable.
A B C
Unscrew the knob placed at the center of
the welding wire roll.
Eventually remove the spacer depending
on the roll’s dimensions.
Remove the plastic protection of new roll
and place it on the dened support.
D E F
Re-assemble the knob. Pay attention to the hex (M8) placed in
the center of roll support which is the fric-
tion system of wire.
Screw in the hex to obtain a good friction:
If You x hard the friction is excessive
and arrests the normal unrolling of the
roll. Otherwise a low braking makes the
wire unrolls itself accidently at the end of
welding.
Unscrew the knobs of the wire feeder
group and let them turn. In this way they
will lift the upper wire feeders.
G H I
Insert the wire into the wire feeder engi-
ne capillary tube .
Let the wire ows under wire feeder rolls
until the entrance of euro connector.
Reduce the upper rolls and close the
wire pressure regulation plastic knob.
L
Tight carefully the knob. If it is too narrow the wire will block; otherwise if it is too
slack it won’t be able to drag the wire.
Repeat the operation also for the second milled knob.