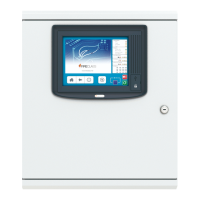
FireClass Panels and Repeaters Connecting the CUI repeater RBus wires
Installation Guide Doc. version 2.0 18
resistance or no links equates to no additional
termination resistance.
5 At the CUI repeater, feed the RBus wires through
the appropriate knockout, using glands as
necessary.
6 Connect the RBus wires to the appropriate terminal
block connector, dependent upon if it's a left or right
RBUS connection, TB2 or TB4. Connect the RS485
A and B signals for the RBUS.
7 Connect the RBus cable screen to the housing earth
connector. (Do not earth the screen at the repeater
end, it must only be earthed at one end.)
8 Check whether an isolator IC needs to be fitted to
the CUI repeater.
Note: The need for an isolator must be established at
the system design stage, so check whether an isolator
IC has been included in the equipment consignment. In
general, an isolator IC is fitted to all AC powered repeat-
ers. The isolator provides protection when there may be
different mains supply or ground reference voltages at
the control panel, compared to these voltages at the
CUI repeater. This may occur if there is a large distance
between the panel and CUI repeater.
9 If you need to fit an isolator IC, fit a DC-DC Converter
to socket SK1 on the CUI Repeater, 125.013.520.
10 When you fit the DC-DC converter, make sure that
the LK3 & LK4 links on the CUI repeater are not
linked.
11 Set the address and baud rate using the DIP switch
S1 on the CUI Repeater. Make the baud rate setting
according to Table 4. Make the address setting
according to Table 3. For the address, set the switch
to OFF for binary 0, or ON for binary 1. The DIP
switch S1 location is on the top left-hand side, see
items 1 to 4 in Fig. 13. You may use a small screw-
driver to move the switch sliders.
12 S1-8: Processor Fault Sensing option.The Default
position is OFF (disabled) for normal operation. Only
set ON if required to generate a “local” processor-
fault for any fault condition on the panel. Legacy-
function for old hardware.
Binary Switch Position
Address 1 2 3 4
1 ON OFF OFF OFF
2 OFF ON OFF OFF
3ONONOFFOFF
4 OFF OFF ON OFF
5 ON OFF ON OFF
6 OFF ON ON OFF
7 ONONONOFF
8 OFF OFF OFF ON
9ONOFFOFFON
10 OFF ON OFF ON
11 ON ON OFF ON
12 OFF OFF ON ON
13 ON OFF ON ON
14 OFF ON ON ON
15 ON ON ON ON
Table 3: Repeater address setting
Baud Rate DIP Switch
position 5
DIP Switch
position 6
4800 ON OFF
9600 OFF ON
19200* ON ON
Table 4: Repeater baud rate setting
*Default