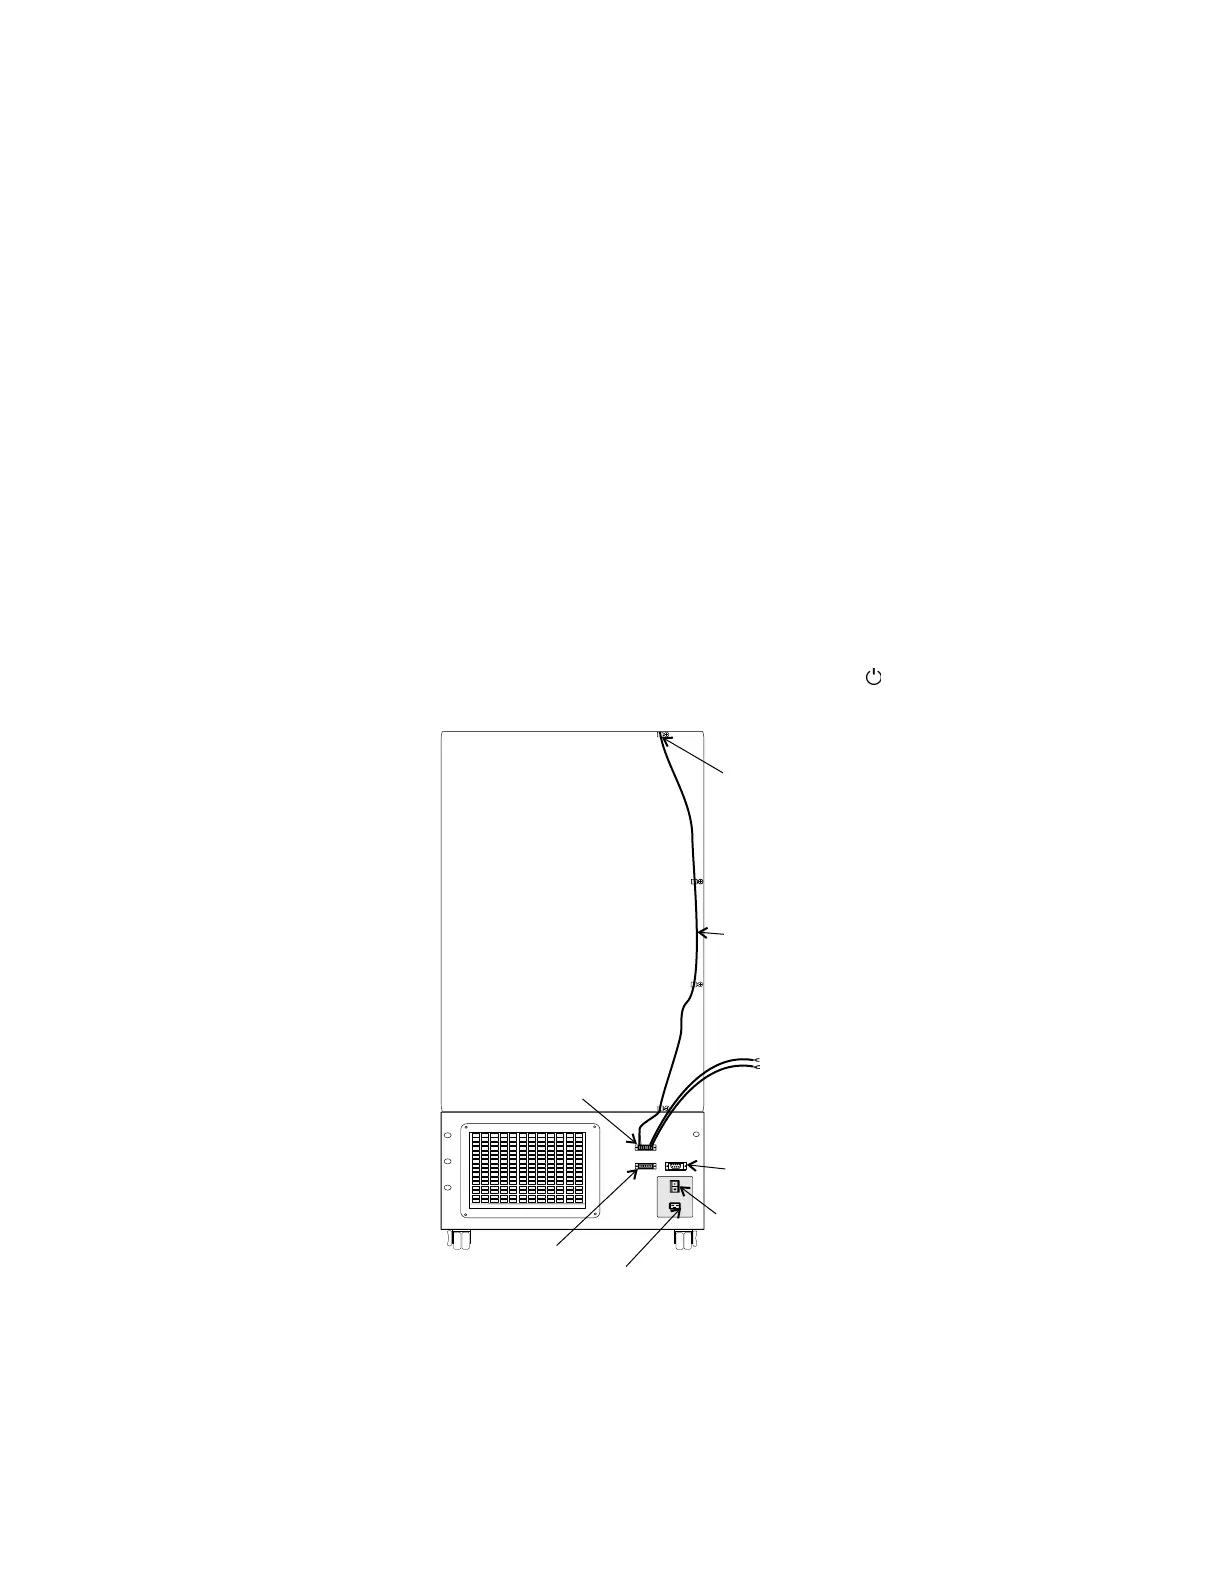
1. Remove the four screws on the freezer back panel and use them to
mount the tie wrap anchors as shown in Figure 5-5. Secure the probe
wire with tie wraps.
2. Plug the solenoid/probe connector into the BUS connection and secure
with a screw on the right and left side. The connector is keyed.
3. Loosen the terminal screws on the solenoid. Slide the spade lug
connectors under the screws and tighten to secure.
4. Connect power to the freezer. Turn the freezer On, with battery switch
Off (O).
a. The Solenoid Engaged light on the BUS control panel will
illuminate (no injection occurs). This light stays on until the unit is
below BUS setpoint.
b. The Low Battery indicator may also illuminate.
5. Turn the battery switch to Standby mode ( ) to charge both batteries.
5-4 Isotemp Basic Fisher Scientific
Section 5
Factory Options
Connect the
Probe/Solenoid Harness