Lit. No. 94430/94431, Rev. 07 12 January 15, 2014
MOUNTING THE SPREADER
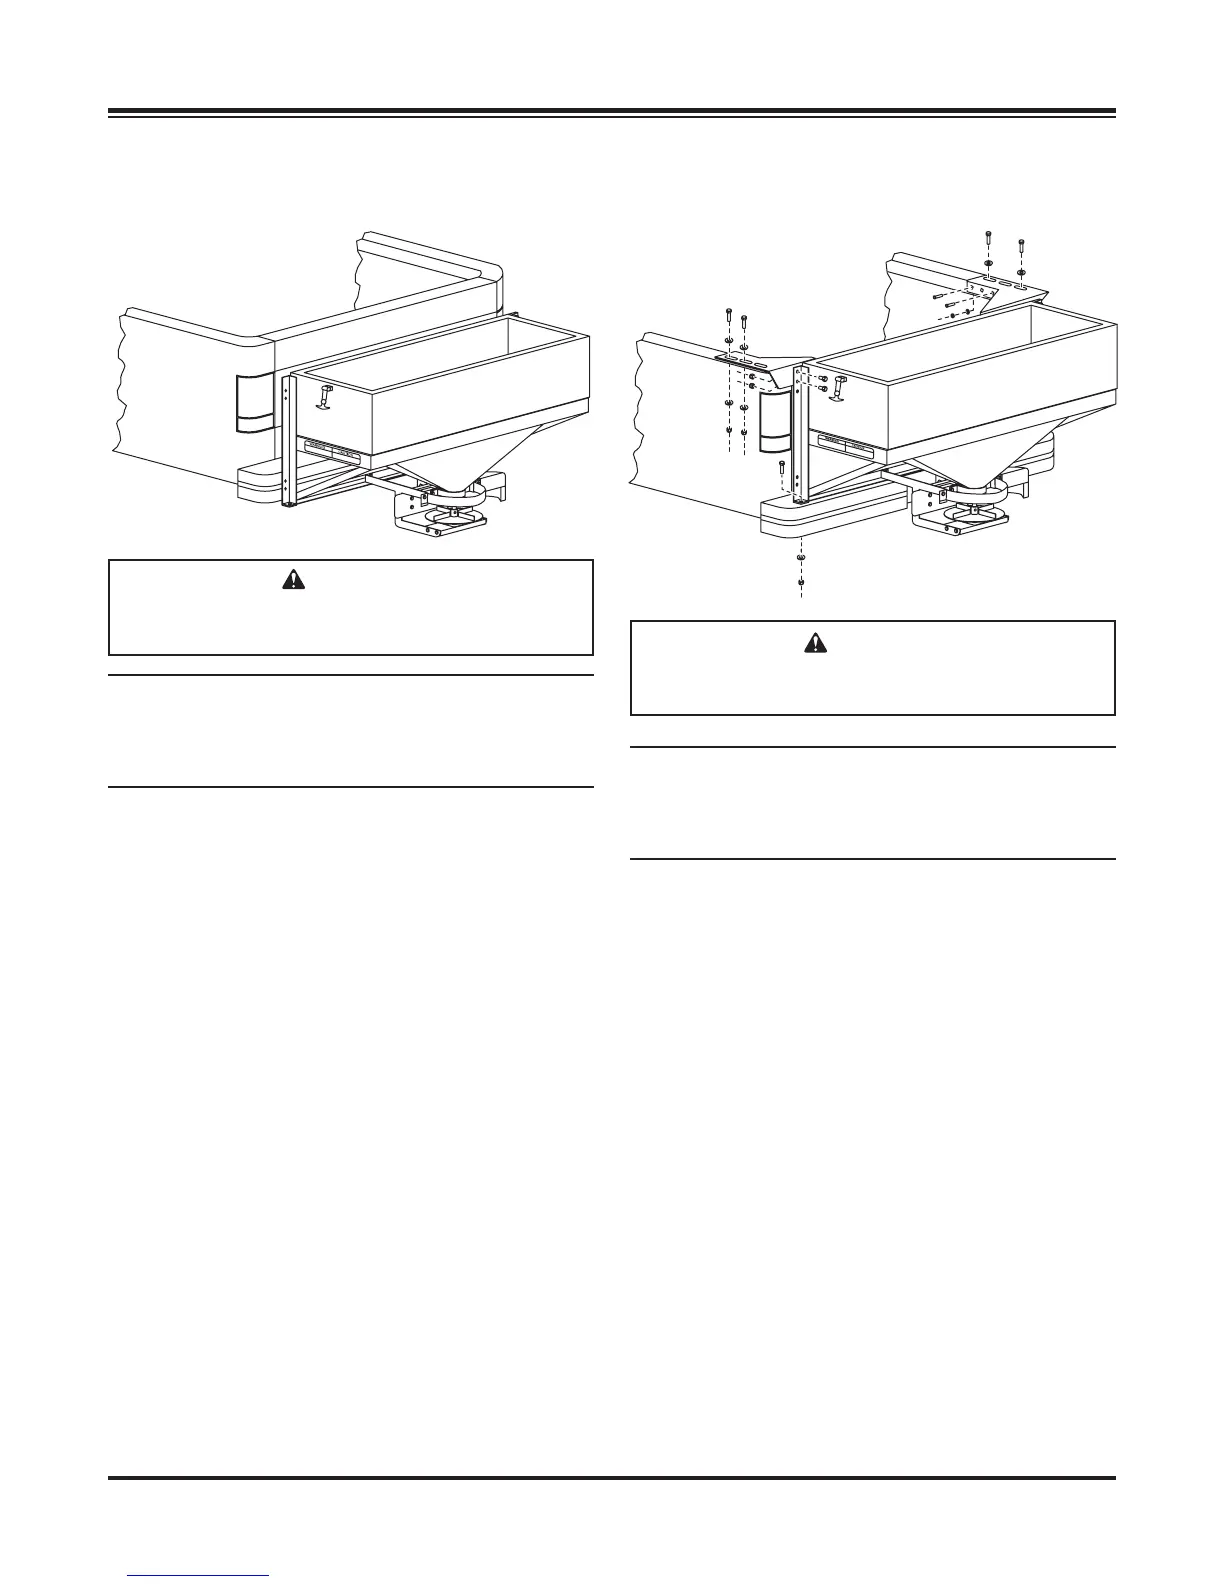
FIXED MOUNT SPREADER
NOTE: The spreader shall be installed according
to instructions supplied. Your local outlet is
trained to provide this service and service your
spreader with factory original parts.
1. Install the left and right top brackets to the truck
bed rail with two 1/2" cap screws, four at washers
and one locknut per side. Secure the small
mounting ange of each top bracket to the bed rail
using two 5/16" cap screws, two at washers and
two locknuts per side.
2. Place the spreader on the bumper and line up
the holes in the bottom feet with the holes in the
bumper.
3. Attach the spreader to the top brackets using two
3/8" cap screws and two 3/8" locknuts per side.
4. Attach the spreader to the bumper of the truck
using one 3/8" cap screw, one 3/8" at washer
and one 3/8" locknut per side.
5. Plug the spreader harness into the vehicle
harness.
CAUTION
During removal or mounting, securely grip
spreader to avoid dropping.
RECEIVER MOUNT SPREADER
NOTE: The spreader shall be installed according
to instructions supplied. Your local outlet is
trained to provide this service and service your
spreader with factory original parts.
1. Attach the spreader to the receiver mount with six
3/8" x 1" cap screws.
2. Insert the assembled unit into the receiver hitch
and secure with pin (not included).
3. Plug the spreader harness into the vehicle
harness.
4. Use the supplied ratchet straps to secure the
assembly to the vehicle frame.
Attaching the straps to the vehicle bumper or
tailgate may result in vehicle or spreader damage.
CAUTION
During removal or mounting, securely grip
spreader to avoid dropping.
 Loading...