2.2
Controllers cannot be installed vertically in the
same cutout. Cutouts should not be closer than
shown above.
Make the cutouts in the panel according to the dimensions and
spacing shown. For multiple installations, make the cutout wider
according to the following formula:
Cutout width (W) = N x B - 0.19 inch (4.5 mm)
where:
N = number of controllers to be mounted
B = unit width = 2.84 inches (72 mm)
Tolerance = + 0.04 inch (1 mm) per unit
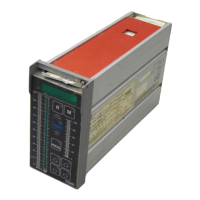
Wiring the Mounting Cassette
The DPRSOO Integral Controller fits into a standard panel-mount
cassette. The mounting cassette has terminal blocks on the rear for
all electrical connections.
Connect all wiring to the terminal blocks before inserting the cassette
into the panel cutout unless the rear of the cassette will be accessible
after installation.
2.3
Power and Ground Wiring
The power source for the DPRSOO Controller should be free of
electrical noise. Do not use sources that supply power to relays,
contacts, or thyristor-controlled equipment. If no other source is
available, use an isolation transformer or magnetic voltage stabilizer.
Do not connect electrically noisy equipment and the DPRSOO to the
same secondary of such a transformer. Closely follow the
manufacturer’s recommendations concerning the grounding 01 the
isolation transformer.
When operating the controller from an alternating current source,
always use a 3-wire power cord. Connect the neutral wire to terminal
41 and the ground wire to terminal 42 on the terminal block. Connect
the supply line wire to the appropriate terminal for the power being
The controller operates on either 50 or
lJM6.1:DPR900:9102
May 1991