Retaining Spring
(1 Top and 1 Bottom)
2.13
in installations utilizing thicker panels, the retaining
springs may not fit properly and can prevent
insertion of the cassette Contact your Fisher
Representative for assistance.
When it is necessary to remove the mounting cassette, reverse the
procedure. by first removing the upper retaining spring, then the lower
one. Press the front edge of each spring back to remove it. In the
case of a thick front panel, it may be necessary to use a screwdriver
or other tool to apply enough pressure to remove the spring.
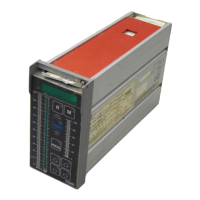
Installing the Controller
When the mounting cassette is firmly secured in the panel, install the
controller by sliding it into the mounting cassette and pressing the
unit firmly into place. When the mounting cassette is connected to its
power source, and the DPRSOO is fully seated in the mounting
cassette, the front panel illuminates, The digital display will show the
year and week (YYWW) of the controller firmware version. This
display lasts 3 seconds before the controller begins operating to
allow any transmitters connected to the controller to stabilize. The
controller is now ready for use with the default configuration settings.
This manual supports software version numbers 8836 thru 9147.
The functionality is limited to the software version currently loaded
on the user’s DPRSOO Integral Controller.
UM6.1:DPR900:9147 Change 2 -July 1992